 Data Structure
 Networking
 RDBMS
RDBMS Operating System
 Java
Java MS Excel
 iOS
iOS HTML
HTML CSS
CSS Android
 Python
 C Programming
 C++
C++ C#
C# MongoDB
 MySQL
MySQL Javascript
 PHP
PHP
- Selected Reading
- UPSC IAS Exams Notes
- Developer's Best Practices
- Questions and Answers
- Effective Resume Writing
- HR Interview Questions
- Computer Glossary
- Who is Who
How to convert a colored image to HLS in OpenCV using Python?
A color (RGB) image has three channels, Red, Blue and Green. A colored image in OpenCV has a shape in [H, W, C] format, where H, W, and C are image height, width and number of channels. All three channels have a value range between 0 and 255.
An HLS image also has three channels, the Hue, Lightness and Saturation channels. In OpenCV, the values of the Hue channel range from 0 to 179 whereas the Lightness and Saturation channels range from 0 to 255.
In OpenCV, the color image loaded using cv2.imread() function is always in BGR format. To convert a BGR image to HLS image, we use the cv2.cvtColor() function. This function is used to convert an image from one color space to another. This function takes two arguments? first, the input image and second, the color conversion method.
Syntax
The syntax of cv2.cvtColor() is ?
cv2.cvtColor(bgr_img, cv2.COLOR_BGR2HLS)
To convert an RGB image to HLS image, follow the steps given below.
Steps
Import the required library. In all the following Python examples, the required Python library is OpenCV. Make sure you have already installed it.
import cv2
Read the input RGB image using cv2.imread(). The RGB image read using this method is in BGR format. Optionally, assign the read BGR image to bgr_img.
bgr_img = cv2.imread('water.jpg')
Now, convert this BGR image to HLS image using cv2.cvtColor() function. Optionally, assign the converted HSV image to hls_img.
hls_img = cv2.cvtColor(bgr_img, cv2.COLOR_BGR2HLS)
Finally, display the converted HLS image.
cv2.imshow('HLS image', hls_img)
cv2.waitKey(0)
cv2.destroyAllWindows()
Let's have a look at some examples for a better understanding of how it is done.
Example 1
In this program, we will see how perform Affine Transformation on the input image.
# import required libraries
import cv2

# read RGB image, the input image is in BGR format
img_bgr = cv2.imread('bike.jpg')

# convert the BGR image to HLS
img_hls = cv2.cvtColor(img_bgr, cv2.COLOR_BGR2HLS)

# Display the converted HLS image
cv2.imshow('HLS Image', img_hls)
cv2.waitKey(0)
cv2.destroyAllWindows()
We will use this image (bike.jpg) as the input file in this program ?

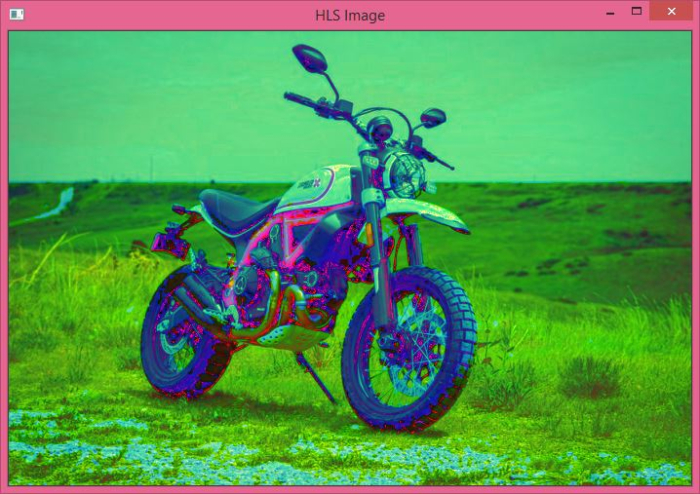
When you run the above Python program, it will produce the following output window ?

Notice the color difference between the input image and the converted HLS image.
Example 2
Let's take another example ?
import cv2

# read RGB image, the image is in BGR format
img = cv2.imread('tutpoint.png')

# convert the BGR image to HLS
img_hls = cv2.cvtColor(img, cv2.COLOR_BGR2HLS)

# Display the converted HLS image
cv2.imshow('HLS Image', img_hls)
cv2.waitKey(0)
cv2.destroyAllWindows()
Consider the following image (tutpoint.png) as the input file for this program ?

When you run the above Python program, it will produce the following output window ?

Notice the color difference between the input image and the converted HLS image.

