
Article Categories
- All Categories
-
 Data Structure
-
 Networking
-
 RDBMS
RDBMS
-
 Operating System
-
 Java
Java
-
 MS Excel
-
 iOS
iOS
-
 HTML
HTML
-
 CSS
CSS
-
 Android
-
 Python
-
 C Programming
-
 C++
C++
-
 C#
C#
-
 MongoDB
-
 MySQL
MySQL
-
 Javascript
-
 PHP
PHP
-
 Economics & Finance
How To Check If A Row Is Hidden In Excel?
Often there comes a spreadsheet where you would need to make a preliminary check to see if any row is hidden.
Fear not; it is very easy to check.
Hiding rows is an interesting feature of MS Excel where not relevant information can be concealed in a spreadsheet without deleting them forever. While working on the file, your teammates may have concealed rows to optimize their visual perspective of the data by removing unnecessary rows, computations, or anything else that might reduce the file's readability.
In this tutorial, we explain how to identify hidden rows in your excel sheet and reveal them with a few easy steps.
Check the Rows Headings
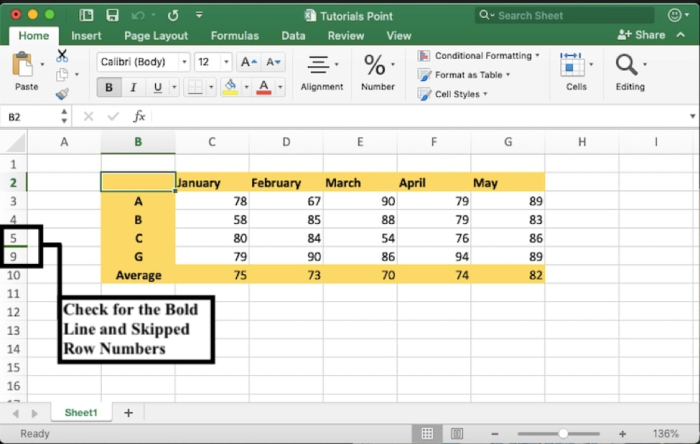
Generally, it is quite easy to spot the hidden rows in a spreadsheet. Visual cues such as the numbering or bold lines help us know if a set of rows are hidden. Consider a table containing employee information to understand this better.
Step 1 ? Check for a double line among the row heading. Rows that are hidden are marked by thicker borders and skipped numbers. As you can see, after row 5 is row 9, indicating rows 6- 8 are hidden.
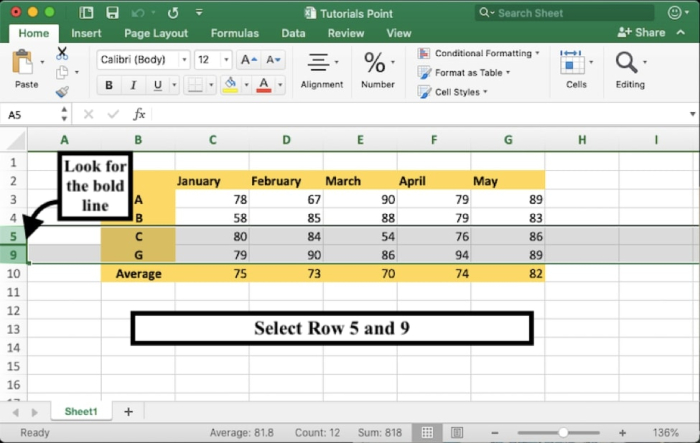
Step 2 ? To unhide rows, select the row above and below the one/s you want to reveal. In this case, select and hold row 5, press shift, and then select row 9.
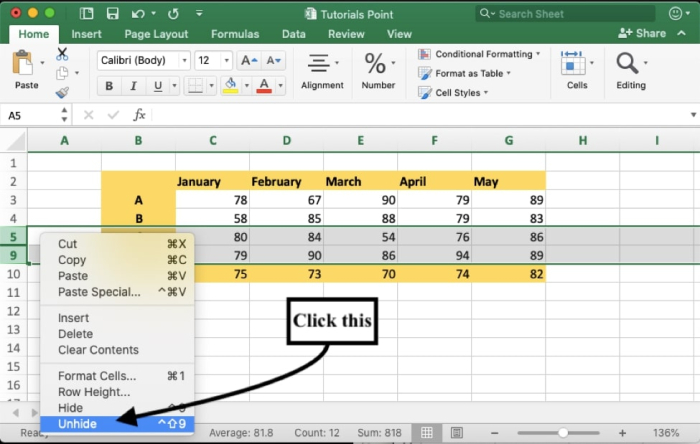
Step 3 ? Press right-click anywhere within these selected rows, and click on the "Unhide" option.
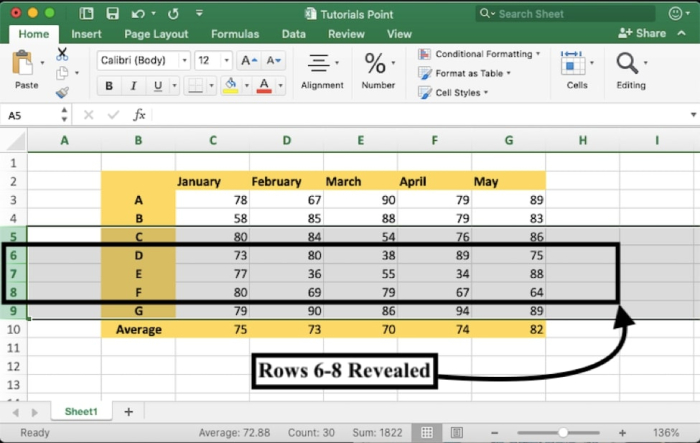
After this, rows 6 to 8 will be revealed, and you can see the information of candidate D, E, and F which was not visible earlier.
Cell Format Method Option
You can also unhide rows using an alternative approach. With this technique, you can reveal multiple hidden rows at once. This method helps you keep track of your data and be able to access it whenever you want by knowing how to unhide any rows.
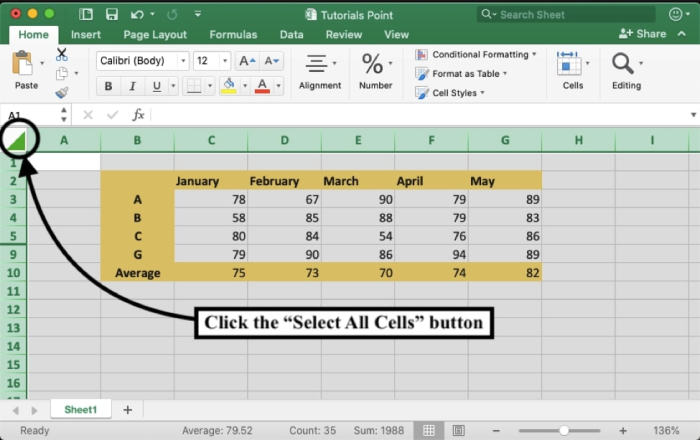
Step 1? Select all the cells by using the keyboard shortcut Ctrl+A or by clicking the "Select All Cells" button between the row and column headers of the spreadsheet.
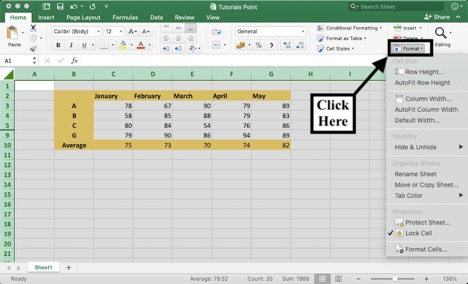
Step 2 ? In the Home tab, navigate to "Format," which is located on the right hand side of the toolbar.
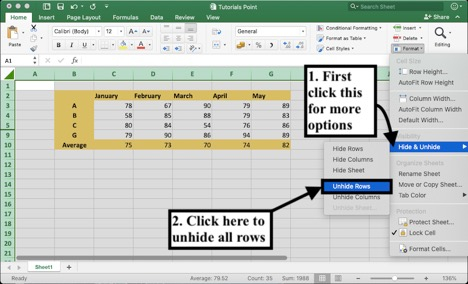
Step 3? Select the "Hide & Unhide" option from the drop-down menu. It will show you another list. From there, click on the "Unhide Rows" to reveal all the hidden rows in the sheet at once.
After you complete this step, your results will appear.
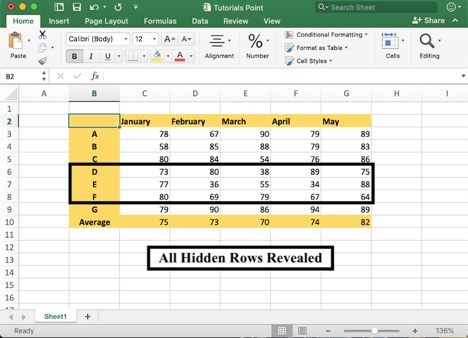
You can also reveal all hidden rows using a few keyboard shortcuts. After clicking all the cells in the spreadsheet using the shortcut Ctrl + A, press Ctrl + Shift + 9 to reveal all the rows in your spreadsheet.
Conclusion
Now that you know how to locate and unhide rows in MS Excel, you can view all the data on the sheet. We help you with more such nifty tutorials on how to master Excel in a few simple steps. Excel always becomes easy if you learn a bit more about it every day, and here are some useful Excel tutorials to help you make the most of it.

1K+ Views
