 Data Structure
 Networking
 RDBMS
RDBMS Operating System
 Java
Java MS Excel
 iOS
iOS HTML
HTML CSS
CSS Android
 Python
 C Programming
 C++
C++ C#
C# MongoDB
 MySQL
MySQL Javascript
 PHP
PHP
- Selected Reading
- UPSC IAS Exams Notes
- Developer's Best Practices
- Questions and Answers
- Effective Resume Writing
- HR Interview Questions
- Computer Glossary
- Who is Who
How to change Tkinter Window Icon
The Tkinter is a popular GUI(Graphical User Interface) library in Python that provides a simple and easy way to create a GUI application. In Python, we have some built?in functions such as Tk(), PhotoImage(), mainloop(), title(), and, wm_title() will be used to change the Tkinter Window Icon.
Syntax
The following syntax is used in the examples-
Tk()
This built?in method in Python creates the main window of the tkinter application.
PhotoImage(file='image_address_link')
The PhotoImage is a class in the tkinter module that allows displaying the image with the help of a parameter named file that sets the image location.
iconphoto()
The iconphoto() is connected to PhotoImage() that accepts two parameters? False/True, var_name( to set the values as PhotoImage()). If set to True, the image will be used as the application's icon for all windows. If set to False, the picture will only be used as the main window's icon.
mainloop()
The mainloop() is a Tk class built?in method that initiates the main event loop of a tkinter application. It's an infinite loop that watches for events and processes them until the window closes.
title()
This built?in method in Python has set the name of the icon window.
wm_title()
This is another way to set the main title for the window icon().
Algorithm
The following steps are-
Step 1: Start importing the module named tkinter that supports the GUI interface in Python. import* means it imports all the built?in functions and modules related to the tkinter library.
Step 2: Then set the built?in method Tk() in the variable root that will create the main window.
Step 3: Then store the built?in method PhotoImage in the variable img that will set the file location path.
Step 4: Next use the title of the main window by giving the following methods:
title()
wm_title()
These methods are assigned with the variable root that was already created the main window application.
Step 5: Finally, we are using the method named mainloop() with the variable root that prints the final result.
Example
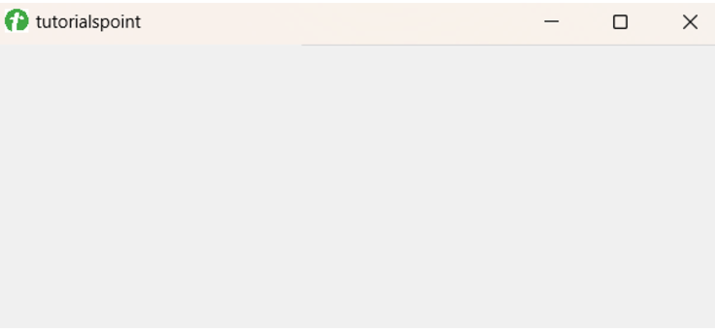
In the following example, we will start the program with a GUI library named tkinter. To build the main window of GUI it will use the built?in function Tk() and store it in the variable root. Next, it will use the function PhotoImage() which will set the icon address and store it in the variable img. Then use the built?in function iconphoto() that add the icon image to the title bar and set the title of the window using title(). Finally, we are using mainloop() to execute the program output.
from tkinter import*
root = Tk()
img = PhotoImage(file='C:\Users\Lenovo\Pictures\tutorialspoint.png')
root.iconphoto(False, img)
root.title("tutorialspoint")
root.mainloop()
Output

Example
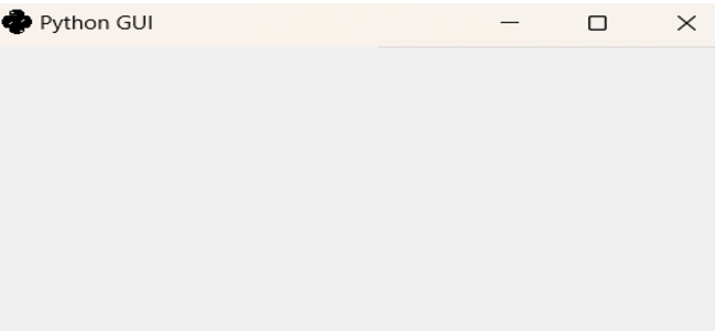
In the following example, we will use the almost same thing as compared to Example 1 but the only change is the image address and way to set the title using a new built?in function i.e. wm_title().
from tkinter import*
root = Tk()
img = PhotoImage(file='C:\Users\Lenovo\Pictures\python.png')
root.iconphoto(False, img)
root.wm_title("Python GUI")
root.mainloop()
Output

Example
In the following example, we will show the default icon of the Tkinter Window. The program simply imports the tkinter library that will be used to build the GUI. Using the built?in function Tk() create the main window of the program and store it in the variable root. Next, use the built?in function? title() to set the name of the terminal window and display the output by using mainloop().
import tkinter as tk
root = tk.Tk()
root.title("tk")
root.mainloop()
Output

Conclusion
Changing of Tkinter Window Icon represents the new set of icons to the window title bar. It means it customizes the small icon that shows in the taskbar of the window application. In every example, the built?in function mainloop() processes every event of the tkinter window operation to generate the final output of the program. This type of program helps to set the branding and visual identity of any specific software based on Python.

