- Flutter - Home
- Flutter - Introduction
- Flutter - Installation
- Creating Simple Application in Android Studio
- Flutter - Architecture Application
- Introduction to Dart Programming
- Flutter - Introduction to Widgets
- Flutter - Introduction to Layouts
- Flutter - Introduction to Gestures
- Flutter - State Management
- Flutter - Animation
- Flutter - Writing Android Specific Code
- Flutter - Writing IOS Specific Code
- Flutter - Introduction to Package
- Flutter - Accessing REST API
- Flutter - Database Concepts
- Flutter - Internationalization
- Flutter - Testing
- Flutter - Deployment
- Flutter - Development Tools
- Flutter - Writting Advanced Applications
- Flutter - Conclusion
- Flutter Useful Resources
- Flutter - Quick Guide
- Flutter - Useful Resources
- Flutter - Discussion
Flutter - Testing
Testing is very important phase in the development life cycle of an application. It ensures that the application is of high quality. Testing requires careful planning and execution. It is also the most time consuming phase of the development.
Dart language and Flutter framework provides extensive support for the automated testing of an application.
Types of Testing
Generally, three types of testing processes are available to completely test an application. They are as follows −
Unit Testing
Unit testing is the easiest method to test an application. It is based on ensuring the correctness of a piece of code (a function, in general) o a method of a class. But, it does not reflect the real environment and subsequently, is the least option to find the bugs.
Widget Testing
Widget testing is based on ensuring the correctness of the widget creation, rendering and interaction with other widgets as expected. It goes one step further and provides near real-time environment to find more bugs.
Integration Testing
Integration testing involves both unit testing and widget testing along with external component of the application like database, web service, etc., It simulates or mocks the real environment to find nearly all bugs, but it is the most complicated process.
Flutter provides support for all types of testing. It provides extensive and exclusive support for Widget testing. In this chapter, we will discuss widget testing in detail.
Widget Testing
Flutter testing framework provides testWidgets method to test widgets. It accepts two arguments −
- Test description
- Test code
testWidgets('test description: find a widget', '<test code>');
Steps Involved
Widget Testing involves three distinct steps −
Render the widget in the testing environment.
WidgetTester is the class provided by Flutter testing framework to build and renders the widget. pumpWidget method of the WidgetTester class accepts any widget and renders it in the testing environment.
testWidgets('finds a specific instance', (WidgetTester tester) async {
   await tester.pumpWidget(MaterialApp(
      home: Scaffold(
         body: Text('Hello'),
      ),
   ));
});
Finding the widget, which we need to test.
Flutter framework provides many options to find the widgets rendered in the testing environment and they are generally called Finders. The most frequently used finders are find.text, find.byKey and find.byWidget.
find.text finds the widget that contains the specified text.
find.text('Hello')
find.byKey find the widget by its specific key.
find.byKey('home')
find.byWidget find the widget by its instance variable.
find.byWidget(homeWidget)
Ensuring the widget works as expected.
Flutter framework provides many options to match the widget with the expected widget and they are normally called Matchers. We can use the expect method provided by the testing framework to match the widget, which we found in the second step with our our expected widget by choosing any of the matchers. Some of the important matchers are as follows.
findsOneWidget − verifies a single widget is found.
expect(find.text('Hello'), findsOneWidget);
findsNothing − verifies no widgets are found
expect(find.text('Hello World'), findsNothing);
findsWidgets − verifies more than a single widget is found.
expect(find.text('Save'), findsWidgets);
findsNWidgets − verifies N number of widgets are found.
expect(find.text('Save'), findsNWidgets(2));
The complete test code is as follows −
testWidgets('finds hello widget', (WidgetTester tester) async {
   await tester.pumpWidget(MaterialApp(
      home: Scaffold(
         body: Text('Hello'),
      ),
   ));
   expect(find.text('Hello'), findsOneWidget);
});
Here, we rendered a MaterialApp widget with text Hello using Text widget in its body. Then, we used find.text to find the widget and then matched it using findsOneWidget.
Working Example
Let us create a simple flutter application and write a widget test to understand better the steps involved and the concept.
Create a new flutter application, flutter_test_app in Android studio.
Open widget_test.dart in test folder. It has a sample testing code as given below −
testWidgets('Counter increments smoke test', (WidgetTester tester) async {
   // Build our app and trigger a frame.
   await tester.pumpWidget(MyApp());

   // Verify that our counter starts at 0.
   expect(find.text('0'), findsOneWidget);
   expect(find.text('1'), findsNothing);

   // Tap the '+' icon and trigger a frame.
   await tester.tap(find.byIcon(Icons.add));
   await tester.pump();

   // Verify that our counter has incremented.
   expect(find.text('0'), findsNothing);
   expect(find.text('1'), findsOneWidget);
});
Here, the test code does the following functionalities −
Renders MyApp widget using tester.pumpWidget.
Ensures that the counter is initially zero using findsOneWidget and findsNothing matchers.
Finds the counter increment button using find.byIcon method.
Taps the counter increment button using tester.tap method.
Ensures that the counter is increased using findsOneWidget and findsNothing matchers.
Let us again tap the counter increment button and then check whether the counter is increased to two.
await tester.tap(find.byIcon(Icons.add));
await tester.pump();

expect(find.text('2'), findsOneWidget);
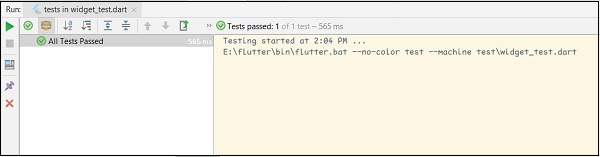
Click Run menu.
Click tests in widget_test.dart option. This will run the test and report the result in the result window.