- Flutter - Home
- Flutter - Introduction
- Flutter - Installation
- Creating Simple Application in Android Studio
- Flutter - Architecture Application
- Introduction to Dart Programming
- Flutter - Introduction to Widgets
- Flutter - Introduction to Layouts
- Flutter - Introduction to Gestures
- Flutter - State Management
- Flutter - Animation
- Flutter - Writing Android Specific Code
- Flutter - Writing IOS Specific Code
- Flutter - Introduction to Package
- Flutter - Accessing REST API
- Flutter - Database Concepts
- Flutter - Internationalization
- Flutter - Testing
- Flutter - Deployment
- Flutter - Development Tools
- Flutter - Writting Advanced Applications
- Flutter - Conclusion
- Flutter Useful Resources
- Flutter - Quick Guide
- Flutter - Useful Resources
- Flutter - Discussion
Flutter - Internationalization
Nowadays, mobile applications are used by customers from different countries and as a result, applications are required to display the content in different languages. Enabling an application to work in multiple languages is called Internationalizing the application.
For an application to work in different languages, it should first find the current locale of the system in which the application is running and then need to show its content in that particular locale, and this process is called Localization.
Flutter framework provides three base classes for localization and extensive utility classes derived from base classes to localize an application.
The base classes are as follows −
Locale − Locale is a class used to identify the users language. For example, en-us identifies the American English and it can be created as.
Locale en_locale = Locale('en', 'US')
Here, the first argument is language code and the second argument is country code. Another example of creating Argentina Spanish (es-ar) locale is as follows −
Locale es_locale = Locale('es', 'AR')
Localizations − Localizations is a generic widget used to set the Locale and the localized resources of its child.
class CustomLocalizations {
   CustomLocalizations(this.locale);
   final Locale locale;
   static CustomLocalizations of(BuildContext context) {
      return Localizations.of<CustomLocalizations>(context, CustomLocalizations);
   }
   static Map<String, Map<String, String>> _resources = {
      'en': {
         'title': 'Demo',
         'message': 'Hello World'
      },
      'es': {
         'title': 'Manifestacin',
         'message': 'Hola Mundo',
      },
   };
   String get title {
      return _resources[locale.languageCode]['title'];
   }
   String get message {
      return _resources[locale.languageCode]['message'];
   }
}
Here, CustomLocalizations is a new custom class created specifically to get certain localized content (title and message) for the widget. of method uses the Localizations class to return new CustomLocalizations class.
LocalizationsDelegate<T> − LocalizationsDelegate<T> is a factory class through which Localizations widget is loaded. It has three over-ridable methods −
isSupported − Accepts a locale and return whether the specified locale is supported or not.
@override
bool isSupported(Locale locale) => ['en', 'es'].contains(locale.languageCode);
load − Accepts a locale and start loading the resources for the specified locale.
Here, the delegate works for en and es locale only.
@override
Future<CustomLocalizations> load(Locale locale) {
   return SynchronousFuture<CustomLocalizations>(CustomLocalizations(locale));
}
shouldReload − Specifies whether reloading of CustomLocalizations is necessary when its Localizations widget is rebuild.
Here, load method returns CustomLocalizations. The returned CustomLocalizations can be used to get values of title and message in both English and Spanish
@override
bool shouldReload(CustomLocalizationsDelegate old) => false;
The complete code of CustomLocalizationDelegate is as follows −
class CustomLocalizationsDelegate extends
LocalizationsDelegate<CustomLocalizations> {
   const CustomLocalizationsDelegate();
   @override
   bool isSupported(Locale locale) => ['en', 'es'].contains(locale.languageCode);
   @override
   Future<CustomLocalizations> load(Locale locale) {
      return SynchronousFuture<CustomLocalizations>(CustomLocalizations(locale));
   }
   @override bool shouldReload(CustomLocalizationsDelegate old) => false;
}
In general, Flutter applications are based on two root level widgets, MaterialApp or WidgetsApp. Flutter provides ready made localization for both widgets and they are MaterialLocalizations and WidgetsLocaliations. Further, Flutter also provides delegates to load MaterialLocalizations and WidgetsLocaliations and they are GlobalMaterialLocalizations.delegate and GlobalWidgetsLocalizations.delegate respectively.
Let us create a simple internationalization enabled application to test and understand the concept.
Create a new flutter application, flutter_localization_app.
Flutter supports the internationalization using exclusive flutter package, flutter_localizations. The idea is to separate the localized content from the main SDK. Open the pubspec.yaml and add below code to enable the internationalization package −
dependencies:
   flutter:
      sdk: flutter
   flutter_localizations:
      sdk: flutter
Android studio will display the following alert that the pubspec.yaml is updated.

Click Get dependencies option. Android studio will get the package from Internet and properly configure it for the application.
Import flutter_localizations package in the main.dart as follows −
import 'package:flutter_localizations/flutter_localizations.dart';
import 'package:flutter/foundation.dart' show SynchronousFuture;
Here, the purpose of SynchronousFuture is to load the custom localizations synchronously.
Create a custom localizations and its corresponding delegate as specified below −
class CustomLocalizations {
   CustomLocalizations(this.locale);
   final Locale locale;
   static CustomLocalizations of(BuildContext context) {
      return Localizations.of<CustomLocalizations>(context, CustomLocalizations);
   }
   static Map<String, Map<String, String>> _resources = {
      'en': {
         'title': 'Demo',
         'message': 'Hello World'
      },
      'es': {
         'title': 'Manifestacin',
         'message': 'Hola Mundo',
      },
   };
   String get title {
      return _resources[locale.languageCode]['title'];
   }
   String get message {
      return _resources[locale.languageCode]['message'];
   }
}
class CustomLocalizationsDelegate extends
LocalizationsDelegate<CustomLocalizations> {
   const CustomLocalizationsDelegate();

   @override
   bool isSupported(Locale locale) => ['en', 'es'].contains(locale.languageCode);

   @override
   Future<CustomLocalizations> load(Locale locale) {
      return SynchronousFuture<CustomLocalizations>(CustomLocalizations(locale));
   }
   @override bool shouldReload(CustomLocalizationsDelegate old) => false;
}
Here, CustomLocalizations is created to support localization for title and message in the application and CustomLocalizationsDelegate is used to load CustomLocalizations.
Add delegates for MaterialApp, WidgetsApp and CustomLocalization using MaterialApp properties, localizationsDelegates and supportedLocales as specified below −
localizationsDelegates: [
   const CustomLocalizationsDelegate(),
   GlobalMaterialLocalizations.delegate,
   GlobalWidgetsLocalizations.delegate,
],
supportedLocales: [
   const Locale('en', ''),
   const Locale('es', ''),
],
Use CustomLocalizations method, of to get the localized value of title and message and use it in appropriate place as specified below −
class MyHomePage extends StatelessWidget {
   MyHomePage({Key key, this.title}) : super(key: key);
   final String title;
   @override
   Widget build(BuildContext context) {
      return Scaffold(
         appBar: AppBar(title: Text(CustomLocalizations .of(context) .title), ),
         body: Center(
            child: Column(
               mainAxisAlignment: MainAxisAlignment.center,
               children: <Widget>[
                  Text( CustomLocalizations .of(context) .message, ),
               ],
            ),
         ),
      );
   }
}
Here, we have modified the MyHomePage class from StatefulWidget to StatelessWidget for simplicity reason and used the CustomLocalizations to get title and message.
Compile and run the application. The application will show its content in English.
Close the application. Go to Settings → System → Languages and Input → Languages*.
Click Add a language option and select Spanish. This will install Spanish language and then list it as one of the option.
Select Spanish and move it above English. This will set as Spanish as first language and everything will be changed to Spanish text.
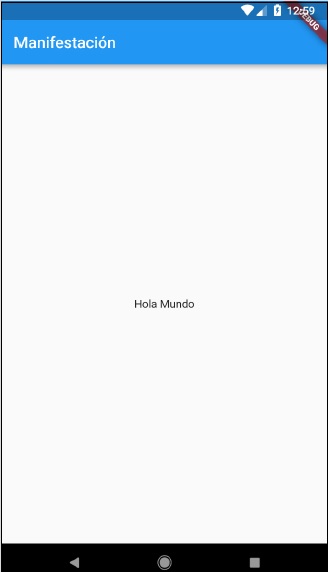
Now relaunch the internationalization application and you will see the title and message in Spanish language.
We can revert the language to English by move the English option above Spanish option in the setting.
The result of the application (in Spanish) is shown in the screenshot given below −
Using intl Package
Flutter provides intl package to further simplify the development of localized mobile application. intl package provides special methods and tools to semi-auto generate language specific messages.
Let us create a new localized application by using intl package and understand the concept.
Create a new flutter application, flutter_intl_app.
Open pubspec.yaml and add the package details.
dependencies:
   flutter:
      sdk: flutter
   flutter_localizations:
      sdk: flutter
   intl: ^0.15.7
   intl_translation: ^0.17.3
Android studio will display the alert as shown below informing that the pubspec.yaml is updated.

Click Get dependencies option. Android studio will get the package from Internet and properly configure it for the application.
Copy the main.dart from previous sample, flutter_internationalization_app.
Import the intl pacakge as shown below −
import 'package:intl/intl.dart';
Update the CustomLocalization class as shown in the code given below −
class CustomLocalizations {
   static Future<CustomLocalizations> load(Locale locale) {
      final String name = locale.countryCode.isEmpty ? locale.languageCode : locale.toString();
      final String localeName = Intl.canonicalizedLocale(name);

      return initializeMessages(localeName).then((_) {
         Intl.defaultLocale = localeName;
         return CustomLocalizations();
      });
   }
   static CustomLocalizations of(BuildContext context) {
      return Localizations.of<CustomLocalizations>(context, CustomLocalizations);
   }
   String get title {
      return Intl.message(
         'Demo',
         name: 'title',
         desc: 'Title for the Demo application',
      );
   }
   String get message{
      return Intl.message(
         'Hello World',
         name: 'message',
         desc: 'Message for the Demo application',
      );
   }
}
class CustomLocalizationsDelegate extends
LocalizationsDelegate<CustomLocalizations> {
   const CustomLocalizationsDelegate();

   @override
   bool isSupported(Locale locale) => ['en', 'es'].contains(locale.languageCode);
   @override
   Future<CustomLocalizations> load(Locale locale) {
      return CustomLocalizations.load(locale);
   }
   @override
   bool shouldReload(CustomLocalizationsDelegate old) => false;
}
Here, we have used three methods from the intl package instead of custom methods. Otherwise, the concepts are same.
Intl.canonicalizedLocale − Used to get correct locale name.
Intl.defaultLocale − Used to set current locale
Intl.message − Used to define new messages.
import l10n/messages_all.dart file. We will generate this file shortly
import 'l10n/messages_all.dart';
Now, create a folder, lib/l10n
Open a command prompt and go to application root directory (where pubspec.yaml is available) and run the following command −
flutter packages pub run intl_translation:extract_to_arb --output-
   dir=lib/l10n lib/main.dart
Here, the command will generate, intl_message.arb file, a template to create message in different locale. The content of the file is as follows −
{
   "@@last_modified": "2019-04-19T02:04:09.627551",
   "title": "Demo",
   "@title": {
      "description": "Title for the Demo application",
      "type": "text",
      "placeholders": {}
   },
   "message": "Hello World",
   "@message": {
      "description": "Message for the Demo
      application",
      "type": "text",
      "placeholders": {}
   }
}
Copy intl_message.arb and create new file, intl_en.arb.
Copy intl_message.arb and create new file, intl_es.arb and change the content to Spanish language as shown below −
{
   "@@last_modified": "2019-04-19T02:04:09.627551",
   "title": "Manifestacin",
   "@title": {
      "description": "Title for the Demo application",
      "type": "text",
      "placeholders": {}
   },
   "message": "Hola Mundo",
   "@message": {
      "description": "Message for the Demo application",
      "type": "text",
      "placeholders": {}
   }
}
Now, run the following command to create final message file, messages_all.dart.
flutter packages pub run intl_translation:generate_from_arb
--output-dir=lib\l10n --no-use-deferred-loading
lib\main.dart lib\l10n\intl_en.arb lib\l10n\intl_es.arb
Compile and run the application. It will work similar to above application, flutter_localization_app.
