 Data Structure
 Networking
 RDBMS
RDBMS Operating System
 Java
Java MS Excel
 iOS
iOS HTML
HTML CSS
CSS Android
 Python
 C Programming
 C++
C++ C#
C# MongoDB
 MySQL
MySQL Javascript
 PHP
PHP
- Selected Reading
- UPSC IAS Exams Notes
- Developer's Best Practices
- Questions and Answers
- Effective Resume Writing
- HR Interview Questions
- Computer Glossary
- Who is Who
Drawing a cross on an image with OpenCV
OpenCV is an Open Source Computer Vision Library in python. It provides numerous functions to perform various Image and video processing operations. The library uses the Numpy module to represent all the video frames and images as a ndarray type. It needs the numpy library, we need to make sure that the numpy module is also installed in our python interpreter.
In this article, we will see different ways to draw a cross on an image using OpenCV Python. Let's observe the input-output scenario to understand how to draw a cross on an image.
Input Output Scenarios
Assuming we have an input image and in the output, we will see a cross draw on the

Let's discuss what are the different ways draw cross on an image.
Using cv2.drawMarker() function
The function draws a marker on an image by a predefined position. And it supports several marker types. Following is the syntax of this function -
cv.drawMarker(img, position, color[, markerType[, markerSize[, thickness[, line_type]]]])
Parameters
img: The source image where to draw the marker.
position: The position where the crosshair is positioned.
color: It specifies the color of the marker.
thickness: It is an optional parameter. It specifies the line thickness of the marker.
markerType: The specifies the marker type. The available types are:
cv2.MARKER_CROSS: A crosshair marker shape.
cv2.MARKER_TILTED_CROSS: A 45-degree tilted crosshair marker shape.
cv2.MARKER_STAR: A star marker shape, which is combination of cross and tilted cross.
cv2.MARKER_DIAMOND: A diamond marker shape.
cv2.MARKER_SQUARE: A square marker shape.
cv2.MARKER_TRIANGLE_UP: An upwards-pointing triangle marker shape.
cv2.MARKER_TRIANGLE_DOWN: A downwards-pointing triangle marker shape.
thickness: it specifies the line thickness.
lineType (Optional): It specifies the type of line we want to use. The available 4 LineTypes are:
FILLED
LINE_4
LINE_8
LINE_AA
markerSize: it specifies the length of the marker by default it is set to 20 pixels
Example
In this example, we will draw a black cross on the input image.
import cv2
from random import randint

img = cv2.imread('Images/butterfly1.jpg')
cv2.imshow('Input image', img)

cv2.drawMarker(img, (250, 160), color=[0, 0, 0], thickness=10,
   markerType= cv2.MARKER_TILTED_CROSS, line_type=cv2.LINE_AA,
   markerSize=100)
cv2.imshow('Output image', img)
cv2.waitKey(0)
Input Image

Output Image

Using cv2.line() function
The function draws a line between two connecting points pt1 and pt2 in the image. Following is the syntax of the line() function -
cv.line(img, pt1, pt2, color[, thickness[, lineType[, shift]]])
Parameters
img: The source image where to draw the marker.
pt1: A tuple with the x and y coordinates of the image where the line should start.
pt2: A tuple with the x and y coordinates of the image where the line should end.
color: It specifies the color of the marker.
thickness: It is an optional parameter. It specifies the line thickness of the marker.
lineType (Optional): It specifies the type of line we want to use. The available 4 LineTypes are:
FILLED
LINE_4
LINE_8
LINE_AA
shift: it specifies the number of fractional bits in the point coordinates.
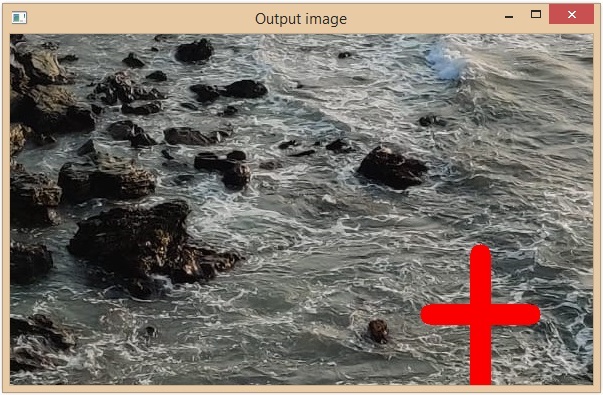
Example
Let's take an image and draw a cross using the cv2.line() method.
import cv2
from random import randint

img = cv2.imread('Images/flower-black-background.jpg')
cv2.imshow('Input image', img)

coordinates = [[(420, 280), (520,280)], [(470, 220), (470,350)]]

cv2.line(img, coordinates[0][0],coordinates[0][1], color=[0, 0, 250], thickness=20)
cv2.line(img, coordinates[1][0],coordinates[1][1], color=[0, 0, 250], thickness=20)

cv2.imshow('Output image', img)
cv2.waitKey(0)
Input Image

Output Image

Example
In this example, we will draw cross lines by covering the 4 corners of the image. Initially, we will get the dimensions of an image using the shape attribute of the numpy array(image array), and from those values, we can identify the image corners.
import cv2
from random import randint

img = cv2.imread('Images/Lenna.png')
cv2.imshow('Input image', img)

# image height = shape[0]
# image width = shape[1]
shape = img.shape

cv2.line(img, (0,0),shape[:2], color=[0, 0, 250], thickness=20)
cv2.line(img, (shape[1], 0), (0, shape[0]), color=[0, 0, 250], thickness=20)

cv2.imshow('Output image', img)
cv2.waitKey(0)
Input Image

Output Image

This is how the python OpenCV functions cv2.lines() and drawMarker() are drawn a cross on the specific image.

