 Data Structure
 Networking
 RDBMS
RDBMS Operating System
 Java
Java MS Excel
 iOS
iOS HTML
HTML CSS
CSS Android
 Python
 C Programming
 C++
C++ C#
C# MongoDB
 MySQL
MySQL Javascript
 PHP
PHP
- Selected Reading
- UPSC IAS Exams Notes
- Developer's Best Practices
- Questions and Answers
- Effective Resume Writing
- HR Interview Questions
- Computer Glossary
- Who is Who
Django – Making a contact form and storing its data without model, query and html
In Django, you can create a contact form very easily but it takes managing a lot of things like making forms, views, models, and then register the model in Admin, etc. In this article, we will see how to use a predefined package for our contact form which will save the data in a predefined model.
We will make a contact form which will store data in model without writing any code in models.py or views.py or writing any html. So, let's get started.
Example
First, create a Django project and an App.
Install the django-contactforms package −
pip install django-contactforms
Then, in settings.py, add the following line −
INSTALLED_APPS+=["contactforms"]
Add this module and your app name in INSTALLED_APPS.
In urls.py of project −
from django.contrib import admin
from django.urls import path,include

urlpatterns = [
   path('admin/', admin.site.urls),
   path('', include('contactforms.urls')),
   path("aftercontact", include('MyForm.urls'))
]
Create two URL endpoints, one for contact form and the other for redirecting after submitting.
In urls.py of app −
from django.urls import path,include
from . import views
urlpatterns = [
   path('',views.home,name="home"),
]
Here, we rendered the html which we will show after filling the contact form.
In views.py −
from django.shortcuts import render
# Create your views here.
def home(request):
   return render(request,"home.html")
Here we rendered our html.
Now, create a folder in the App directory and name it "templates". Add a folder inside it and call it "contact" and add a html file inside it and name it contact.html. Add the following lines in contact.html.
<!DOCTYPE html>
<html>
   <body>
      <div class="row">
      <form action="{% url 'contact' %}" method="post">
      <h3>Send a Message</h3>
      {% csrf_token %}
      <div class="form-group">
         {% if messages %}
         {% for message in messages %}
         <span{% if message.tags %} class="{{ message.tags } }"{% endif %} style="color: green">
            {{ message }}
         </span>
         {% endfor %}
            {% endif %}
      </div>
      <div class="form-group">
         {{ forms.name }}
      </div>
      <div class="form-group">
         {{ forms.email }}
      </div>
      <div class="form-group">
         {{ forms.subject }}
      </div>
      <div class="form-group">
         {{ forms.message }}
      </div>
      <button class="btn btnprimary" type="submit">Submit</button>
   </form>
   </div>
   </body>
</html>
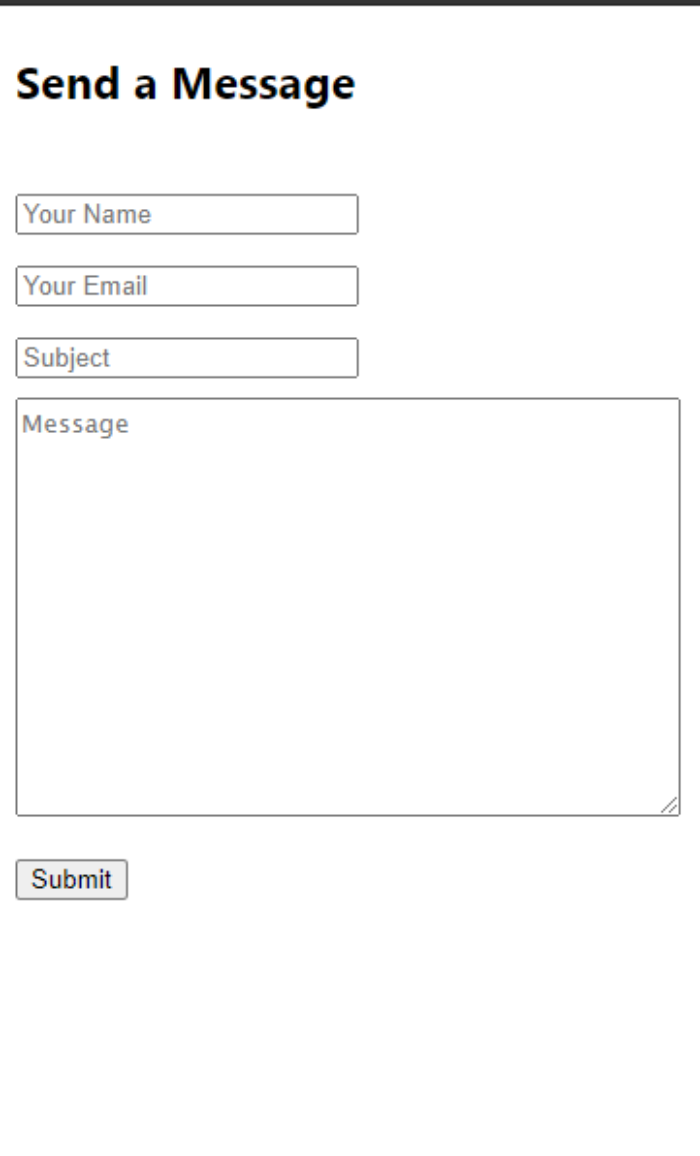
This is the form that will be shown on "/" endpoint. We simply loaded the form from our package.
Now come back to templates folder and add home.html (not inside contact folder) and add the following lines −
<!DOCTYPE html>
<html>
   <head><title>tut</title></head>
   <body>
      <h3>Successfull</h3>
   </body>
</html>
Output
This is the html which is rendered after submitting the contact form.


