- Consul - Home
- Consul - Introduction
- Consul - Architecture
- Consul - Installation
- Consul - Working with Microservices
- Consul - Bootstrapping & DNS
- Consul - Querying Nodes
- Consul - Failover Events
- Consul - Using UI
- Consul - Using Consul on AWS
Consul - Using UI
In this chapter, we will learn how to use the Consul UI (User Interface) and understand its important components.
Consul UISetup
Consul provides us with a useful interface using that we can manage things at ease. You can easily bring up the consul user interface on any port you desire. The Consul UI can be divided into three important parts, which are −
ACL − Set of Rules to easily lock your clusters easily
Datacenter − Enables you to easily manage datacenters and work out with your cluster.
Nodes − Quick update on the nodes that Consul cluster is using
Using Consul UI
In order to use the Consul UI, we have to install the UI package provided by the Hashicorp team on Consul's project site. So, let us try to download it from the source and start using it. Please use sudo ahead of every command in case the Permission Denied error is shown.
$ mkdir /opt/consul-ui
$ cd /opt/consul-ui
$ wget https://releases.hashicorp.com/consul/0.7.2/consul_0.7.2_web_ui.zip
$ unzip consul_0.7.2_web_ui.zip
$ rm consul_0.7.2_web_ui.zip
You can view the output of Consul UI using the following command over any agent.
$ consul agent -dev -ui -data-dir /tmp/consul
The output would be as shown in the following screenshot.
By default, you will observe the UI at http://localhost:8500/ui. The /ui part is same as the consuls HTTP API.
For using the Consul UI over a Docker, please run the following command for the Docker image (progrium/consul) −
$ docker run -p 8400:8400 -p 8500:8500 -p 8600:53/udp -h node1 progrium/consul
-server -bootstrap -ui-dir /ui
The output would be as shown in the following screenshot.

Features of Consul UI
You can start browsing Consul UI by looking at some of its features, such as −
- Nodes
- ACL
- Key/Value
- Settings
- Datacenter
- Services
Let us understand each of these in detail.
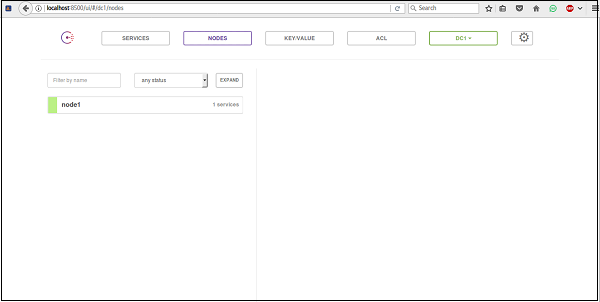
Nodes
The basic usage of Nodes on the UI Dashboard can be observed as shown in the following screenshot.
When you click on the particular node like node1 in our case, we can see that the information on the node can be easily seen as −
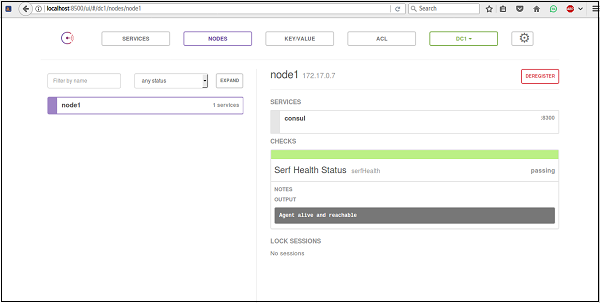
You can anytime deregister the node from Consul. It makes it easy to manage nodes from a high consul cluster point of view.
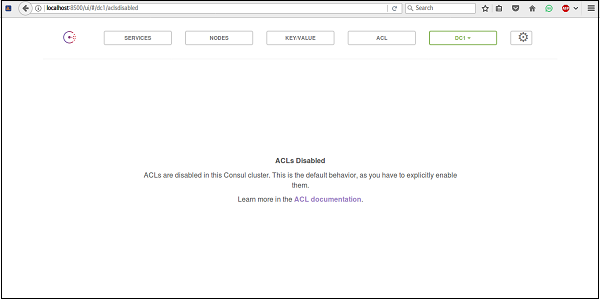
ACL (Access Control Lists)
One of the best features of Consul is the Access Control Lists. You can write your different permissions for different clusters across various datacenters. One of the easiest way to turn on the ACLs is to add a new json file in Consuls data directory. To enable and update the ACL, you can add the master ACL token in the field in settings, and refresh it using the ACL tab
For more information, please check here
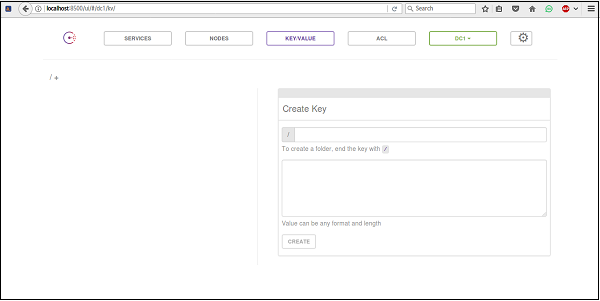
Key/Value
The Key Value option for Consul is by default present in the Consul UI. You can create your own key by using the Consul UI. It also provides an option to create a folder to store your key.
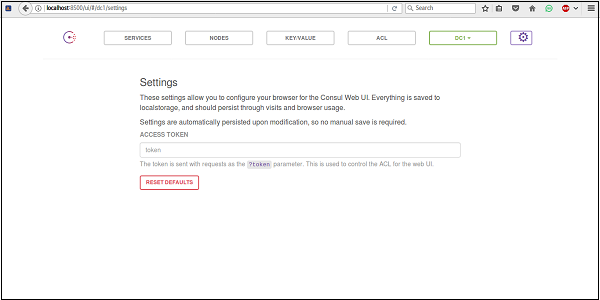
Settings
You can check the settings option of the Consul UI on the top right hand side of the screen. Upon clicking that option, you can easily see that Consul provides you an option using which you can configure its local storage settings and token system for verification.
Datacenter
The datacenter option can be easily changed and switched over by choice. The Consul UI automatically updates the detection of the number of data centers Consul is working on.
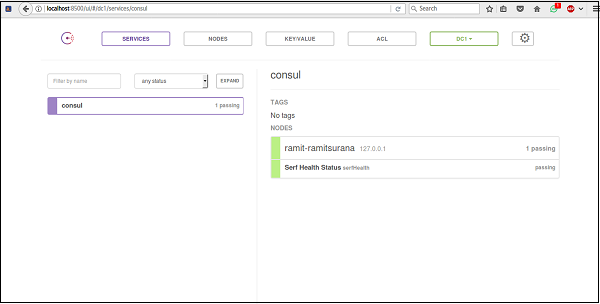
Services
The Consul UI also provides you a Services tab to configure and view services that are currently deployed using Consul. It provides us an option to configure services depending on the nodes.
