- Consul - Home
- Consul - Introduction
- Consul - Architecture
- Consul - Installation
- Consul - Working with Microservices
- Consul - Bootstrapping & DNS
- Consul - Querying Nodes
- Consul - Failover Events
- Consul - Using UI
- Consul - Using Consul on AWS
Consul - Installation
For demonstration purposes, we are going to use consul agent in the developer mode using the -dev mode. Just for the local machine setup, we are going to do a single system consul setup. Please do not use this single node consul cluster in your production. As Hashicorp already mentions it in the case scenario of a single node consul cluster, the data loss is inevitable.
Installing Consul
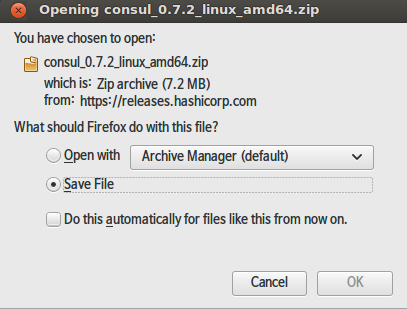
Consul can be installed via the Downloads page at www.consul.io/downloads.html
You can extract the binary package in your Downloads section of your machine.
$ cd Downloads
$ chmod +x consul
$ sudo mv consul /usr/bin/
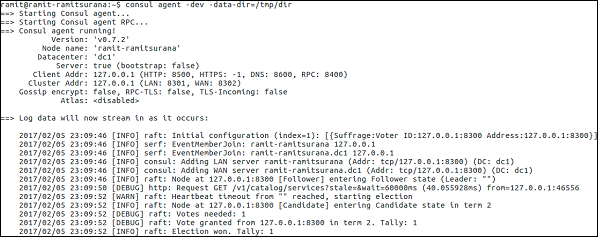
Now let us start using consul using the -dev flag.
$ consul agent -dev -data-dir=/tmp/consul
The output would be as shown in the following screenshot.
Now you can check your consul members using the following command.
$ consul members
The output would be as shown in the following screenshot.

If you want to join other nodes to this node −
$ consul join <Node 2> <Node 3>
Alternatively, you can run the following command on Node 2 & 3 −
$ consul join <Node 1>
Using the Command Line
The command line of consul consists of several different options, some of the most commonly used ones are as follows −
agent − which runs a Consul agent.
configtest − to validate a config file.
event − to start up a new event.
exec − to execute a command on Consul nodes.
force-leave − forcing a member of the cluster to leave the cluster.
info − it provides us the debugging information for operators.
join − to make a Consul agent join the cluster.
keygen − to generate a new encryption key.
keyring − to manage gossip layer encryption keys.
kv − to interact with the key-value store.
leave − to leave the Consul cluster and shut it down without force.
lock − to execute a command to hold down a lock.
maint − to control node or service maintenance mode.
members − it lists the members of a Consul cluster.
monitor − it streams logs from a Consul agent.
operator − it provides us a cluster of tools for Consul operators.
reload − it triggers the agent to reload configuration files.
rtt − it estimates network round trip time between nodes.
snapshot − it saves, restores and inspects snapshots of Consul server state.
version − to print the current Consul version.
watch − to Watch out for changes in the Consul.
Consul Template
The consul-template provides us a daemon that queries the Consul instance and updates any number of specified templates on the file system. The consul-template can optionally run arbitrary commands when the update process completes. This option helps us to setup the consul cluster without manually doing everything on our own.
The consul template is to be formed at /tmp/<name-of-file>.conf.tmpfl. The language in which the template is written according to Hashicorp Configuration Language (HCL).
You can download the consul-template from this page.

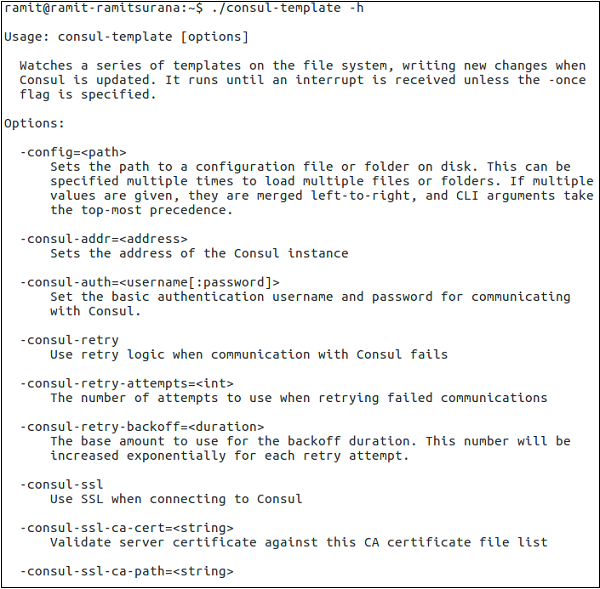
Try it out by using the following command −
$ ./consul-template -h
The output would be as shown in the following screenshot.
If you wish to move this binary to a more prominent space, so that it is available for the user every time. You can type in the following commands −
$ chmod +x consul-template
$ sudo mv consul-template /usr/share/bin/
For demo purposes, we are going to use a sample configuration of nginx to be used as our service. You can try out more demos at https://github.com/hashicorp/consul-template/tree/master/examples or better write down your own template.
$ vim /tmp/nginx.conf.ctmpl
The output would be as shown in the following screenshot.
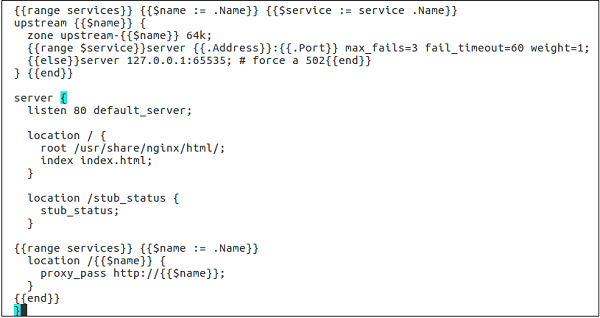
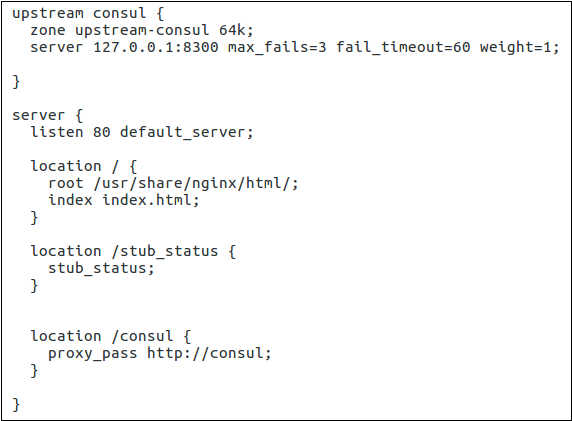
The config file may look like −
{{range services}} {{$name := .Name}} {{$service := service .Name}}

upstream {{$name}} {
   zone upstream-{{$name}} 64k;
   {{range $service}}server {{.Address}}:{{.Port}} max_fails = 3 fail_timeout = 60
   weight = 1;
   {{else}}server 127.0.0.1:65535; # force a 502{{end}}
} {{end}}

server {
   listen 80 default_server;
   location / {
      root /usr/share/nginx/html/;
      index index.html;
   }
   location /stub_status {
      stub_status;
   }
   {{range services}} {{$name := .Name}}
   location /{{$name}} {
      proxy_pass http://{{$name}};
   }
   {{end}}
}
Now using the consul template binary file, please run the following commands −
$ consul-template \
 -template = "/tmp/nginx.conf.ctmpl:/etc/nginx/conf.d/default.conf"
With the previous command the process has started. You can later open up another terminal and view the nginx.conf file being completely rendered using the following command.
$ cat /etc/nginx/conf.d/default.conf
The output would be as shown in the following screenshot.