- Angular Tutorial
- Angular - Home
- Angular - Overview
- Angular - Features
- Angular - Advantages & Disadvantages
- Angular Basics
- Angular - Environment setup
- Angular - First Application
- Angular - MVC Architecture
- Angular Components
- Angular - Components
- Angular - Component Lifecycle
- Angular - View Encapsulation
- Angular - Emulated Encapsulation
- Angular - ShadowDom Encapsulation
- Angular - Component Interaction
- Angular - Using @Input Decorator
- Angular - Using @Output Decorator
- Angular - Using Local Variable
- Angular - Using @ViewChild Decorator
- Angular - Using Services
- Angular - Component Styles
- Angular - Nested Components
- Angular - Content projection
- Angular - Single-slot Content Projection
- Angular - Multi-slot Content Projection
- Angular - Conditional Content Projection
- Angular - Dynamic components
- Angular - Using NgComponentOutlet
- Angular - Using ViewContainerRef
- Angular - Elements
- Angular Templates
- Angular - Templates
- Angular - Template statements
- Angular - Template Variables
- Angular - SVG as Templates
- Angular Binding
- Angular - Data Binding
- Angular - Interpolation
- Angular - Event Binding
- Angular - Property Binding
- Angular - Attribute Binding
- Angular - Class Binding
- Angular - Style Binding
- Angular - Two-way Binding
- Angular Directives
- Angular - Directives
- Angular - Attribute Directives
- Angular - Structural Directives
- Angular - Custom Directives
- Angular Pipes
- Angular - Pipes
- Angular - Built-in Pipes
- Angular - Custom Pipes
- Angular Forms
- Angular - Forms
- Angular - Template Driven Forms
- Angular - Reactive Forms
- Angular - Form Validation
- Angular - Dynamic Forms
- Angular Dependency Injection
- Angular - Dependency Injection
- Angular - Injectable Service
- Angular Routing
- Angular - Routing
- Angular - Dynamic Routes
- Angular - Wildcard Routes
- Angular - Nested Routes
- Angular - Navigation
- Angular - Routing in SPA
- Angular - Custom Route Matches
- Angular - Router Reference
- Angular HTTP Client programming
- Angular - Services
- Angular - HTTP Client
- Angular - Express based REST API
- Angular - Request
- Angular - Request Response Workflow
- Angular - Response
- Angular - Express based Upload API
- Angular - GET
- Angular - POST
- Angular - PUT
- Angular - DELETE
- Angular - JSONP
- Angular - CRUD Operations Using HTTP
- Angular Modules
- Angular - Introduction to Modules
- Angular - Root Module
- Angular - Feature Module
- Angular - Sharing Module
- Angular - Routing Module
- Angular - NgModules
- Angular Animation
- Angular - Animations
- Angular Service Workers & PWA
- Angular - Service Workers & PWA
- Angular Testing
- Angular - Testing Overview
- Angular Design Patterns
- Angular - Design Patterns
- Angular - Lazy Loading
- Angular - Singleton Pattern
- Angular - Observer Pattern
- Angular Libraries
- Angular - Libraries
- Angular - Angular Material
- Angular - PrimeNG
- Angular - RxJS
- Angular Advanced
- Angular - Signals
- Angular - Authentication & Authorization
- Angular - Internationalization
- Angular - Standalone Component
- Angular - Accessibility
- Angular - Web Workers
- Angular - Server Side Rendering
- Angular - Ivy Compiler
- Angular - Building with Bazel
- Angular - Backward Compatibility
- Angular - Reactive Programming
- Angular Tools
- Angular - CLI
- Angular Material UI Elements
- Angular - Paginator
- Angular - Datepicker
- Angular - Select Drop-down
- Angular Miscellaneous
- Angular - Third Party Controls
- Angular - Configuration
- Angular - Displaying Data
- Angular - Decorators & Metadata
- Angular - Basic Example
- Angular - Error Handling
- Angular - Testing & Building a Project
- Angular - Lifecycle Hooks
- Angular - User Input
- Angular - What's New?
- Angular Useful Resources
- Angular - Quick Guide
- Angular - Useful Resources
- Angular - Discussion
Angular - Adding Bootstrap
The day-to-day task of a front-end developer is to create a website design that is user-friendly, visually appealing and SEO-friendly. A normal user may think it is a very basic and easy task. However, the hard work, effort, time and patience that goes into designing a website is inevitable.
That's when a team of developers at Twitter started to build a toolkit with the purpose of making web development faster and easier. Today, this toolkit is known as Bootstrap and it has 12 million active users worldwide. Let's explore how you can use Bootstrap in your Angular application.
What is Bootstrap?
Bootstrap is an open-source front-end development framework written in HTML, CSS and JavaScript. Instead of creating everything from scratch, you can use its ready-to-use themes, layouts and components like buttons, forms, navigation bars, and more.
It helps developers to design web pages that are responsive which means websites created using Bootstrap can work well on all devices, including desktops, tablets, and mobile phones.
Bootstrap Features
Angular itself is a front-end development framework. Then why should you use Bootstrap for your Angular project? For this, we need to understand some key features of Bootstrap, which are as follows −
- Bootstrap is designed to make your website responsive. It will automatically adjust to fit different screen sizes, whether it's a mobile phone, tablet, or desktop.
- As discussed above this framework comes with a lot of pre-built components like navigation bars, buttons, tables, cards, and forms. These components are ready to use, so you don't have to create them from scratch.
- Bootstrap has its own predefined grid system which allows you to create layouts using rows and columns. You just need to fill the container with your content.
- It is also customizable. You can choose which components you want to use, and you can also change its colors, fonts, and other styles to match your website's design.
- Bootstrap includes several JavaScript plugins that add interactive features like pop-up windows, tooltips (information pop-ups when you hover over an item), carousels (image sliders), and more.
Adding Bootstrap in Angular
There are two ways to add Bootstrap to your angular application −
- Using Bootstrap CDN
- Using npm
Using Bootstrap CDN
The Bootstrap CDN provides links to JavaScript files and CSS style sheets through a content delivery network which is needed for using Bootstrap. These files are served from a nearby server based on the location of user.
CDN stands for Content Delivery Network. It is a group of servers distributed in different geographical locations that work together for the quick transfer of assets needed for loading Internet content, including HTML pages, JavaScript files, style sheets, images, and videos.
Example
In this example, we are going to explain how to add Bootstrap to your Angular application using its CDN links. Follow the steps given below:
Step 1: Create an angular application using the below command −
ng new bootstrap-app
And, navigate to the project folder using the cd command.
Step 2: First, open index.html file of your angular application. Then, paste the following stylesheet link in the head section.
<link href="https://cdn.jsdelivr.net/npm/bootstrap@5.3.3/dist/css/bootstrap.min.css" rel="stylesheet" integrity="sha384-QWTKZyjpPEjISv5WaRU9OFeRpok6YctnYmDr5pNlyT2bRjXh0JMhjY6hW+ALEwIH" crossorigin="anonymous">
Step 3: Now, paste the following script link at the bottom of body section −
<script src="https://cdn.jsdelivr.net/npm/bootstrap@5.3.3/dist/js/bootstrap.bundle.min.js" integrity="sha384-YvpcrYf0tY3lHB60NNkmXc5s9fDVZLESaAA55NDzOxhy9GkcIdslK1eN7N6jIeHz" crossorigin="anonymous"></script>
Step 4: Your index.html file will look something like this −
<!doctype html>
<html lang="en">
<head>
   <meta charset="utf-8">
   <title>BootstrapApp</title>
   <base href="/">
   <meta name="viewport" content="width=device-width, initial-scale=1">
   <link rel="icon" type="image/x-icon" href="favicon.ico">
   <link href="https://cdn.jsdelivr.net/npm/bootstrap@5.3.3/dist/css/bootstrap.min.css"
   rel="stylesheet"
   integrity="sha384-QWTKZyjpPEjISv5WaRU9OFeRpok6YctnYmDr5pNlyT2bRjXh0JMhjY6hW+ALEwIH"
   crossorigin="anonymous">
</head>
<body>
   <app-root></app-root>
   <script src="https://cdn.jsdelivr.net/npm/bootstrap@5.3.3/dist/js/bootstrap.bundle.min.js"  integrity="sha384-YvpcrYf0tY3lHB60NNkmXc5s9fDVZLESaAA55NDzOxhy9GkcIdslK1eN7N6jIeHz"
   crossorigin="anonymous">
   </script>
</body>
</html>
Step 5: Open app.component.html file and add the code given below −
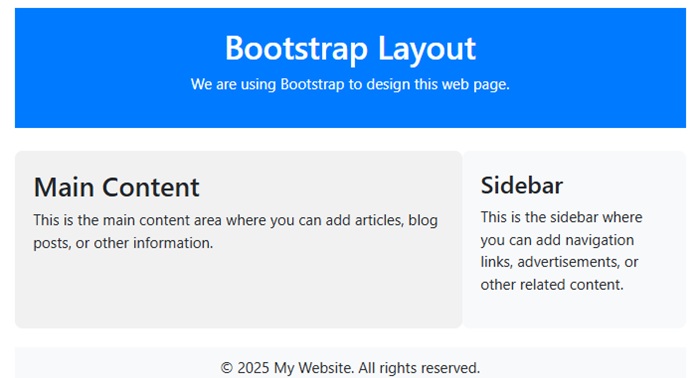
<div class="container">
  <header class="row">
    <div class="col-12">
      <h1>Bootstrap Layout</h1>
      <p>We are using Bootstrap to design this web page.</p>
    </div>
  </header>

  <main class="row mt-4">
    <div class="col-md-8 main-content">
      <h2>Main Content</h2>
      <p>This is the main content area where you can add articles, blog posts, or other information. </p>
    </div>
    <aside class="col-md-4 sidebar">
      <h3>Sidebar</h3>
      <p>This is the sidebar where you can add navigation links, advertisements, or other related content.</p>
    </aside>
  </main>

  <footer class="row">
    <div class="col-12">
      <p>© 2025 My Website. All rights reserved.</p>
    </div>
  </footer>
</div>
In the above code, we have designed header section, main body, sidebar section and footer.
Step 6: Let's customize the application using CSS. Open app.component.css file and add the code given below −
header {
   margin-top: 20px;
   background-color: #007bff;
   color: white;
   padding: 20px 0;
   text-align: center;
}
footer {
   background-color: #f8f9fa;
   padding: 10px 0;
   text-align: center;
   margin-top: 20px;
}
.main-content {
   background-color: #f1f1f1;
   padding: 20px;
   border-radius: 8px;
}
.sidebar {
   background-color: #f8f9fa;
   padding: 20px;
   border-radius: 8px;
}
Now run the application using ng serve command. You will get the following output −
Using npm
The npm is a package manager that stores and shares code packages. It is free to use. You can use Angular CLI to download and install packages available on npm.
To add Bootstrap to your Angular application, follow the steps given below −
Step 1: Navigate to your project folder in Angular CLI, then type the following command to install Bootstrap −
npm install --save bootstrap
The above command will install the latest bootstrap version. If you want any specific version you can also install that by specifying the version as shown below −
npm install --save bootstrap@3
You may already know that any package installed from npm is stored inside the node_modules folder. To verify whether Bootstrap is installed or not you can check that folder.
Step 2: Now open angular.json file. Inside this file, go to styles array and specify the path of bootstrap.min.css −
"styles": [
    "node_modules/bootstrap/dist/css/bootstrap.min.css",
    "src/styles.scss"
],
Step 3: Below the styles array, you can see scripts array. Inside this array, specify the path of bootstrap.min.js −
"scripts": [
    "node_modules/bootstrap/dist/js/bootstrap.min.js"
]
That's it. Now, you can use the code of the previous example as mentioned in your angular application. Try yourself.
