- Splunk Tutorial
- Splunk - Home
- Splunk - Overview
- Splunk - Environment
- Splunk - Interfaces
- Splunk - Data Ingestion
- Splunk - Source Types
- Splunk - Basic Searching
- Splunk - Field Searching
- Splunk - Time Range Search
- Splunk - Sharing and Exporting
- Splunk - Search Language
- Splunk - Search Optimization
- Splunk - Transforming commands
- Splunk - Reports
- Splunk - Dashboards
- Splunk - Pivot & Datasets
- Splunk - Lookups
- Splunk - Schedules and Alerts
- Splunk - Knowledge Management
- Splunk - Subseraching
- Splunk - Search Macros
- Splunk - Event Types
- Splunk - Basic Chart
- Splunk - Overlay chart
- Splunk - Sparklines
- Splunk - Managing Indexes
- Splunk - Calculated Fields
- Splunk - Tags
- Splunk - Apps
- Splunk - Removing Data
- Splunk - Custom Chart
- Splunk - Monitoring Files
- Splunk - Sort Command
- Splunk - Top Command
- Splunk - Stats Command
- Splunk Useful Resources
- Splunk - Quick Guide
- Splunk - Useful Resources
- Splunk - Discussion
Splunk - Environment
In this tutorial, we will aim to install the enterprise version. This version is available for a free evaluation for 60 days with all features enabled. You can download the setup using the below link which is available for both windows and Linux platforms.
https://www.splunk.com/en_us/download/splunk-enterprise.html.
Linux Version
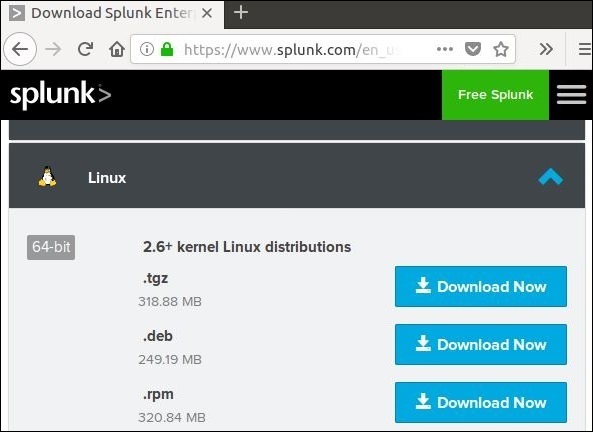
The Linux version is downloaded from the download link given above. We choose the .deb package type as the installation will be done in a Ubuntu platform.
We shall learn this with a step by step approach −
Step 1
Download the .deb package as shown in the screenshot below −
Step 2
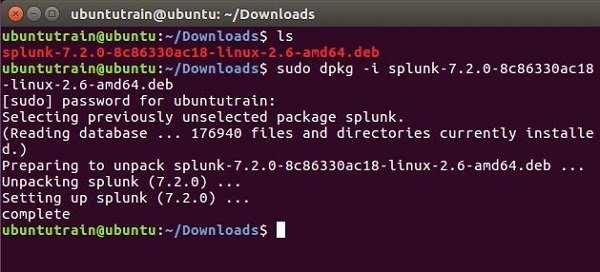
Go to the download directory and install Splunk using the above downloaded package.
Step 3
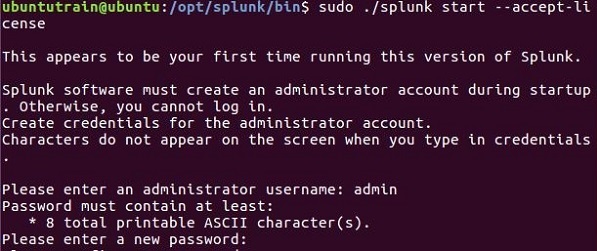
Next you can start Splunk by using the following command with accept license argument. It will ask for administrator user name and password which you should provide and remember.
Step 4
The Splunk server starts and mentions the URL where the Splunk interface can be accessed.
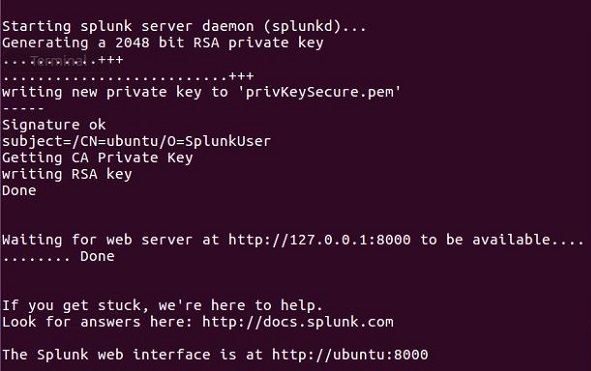
Step 5
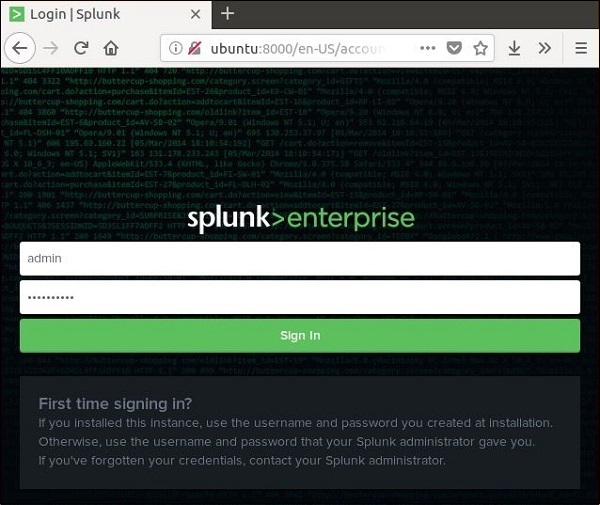
Now, you can access the Splunk URL and enter the admin user ID and password created in step 3.
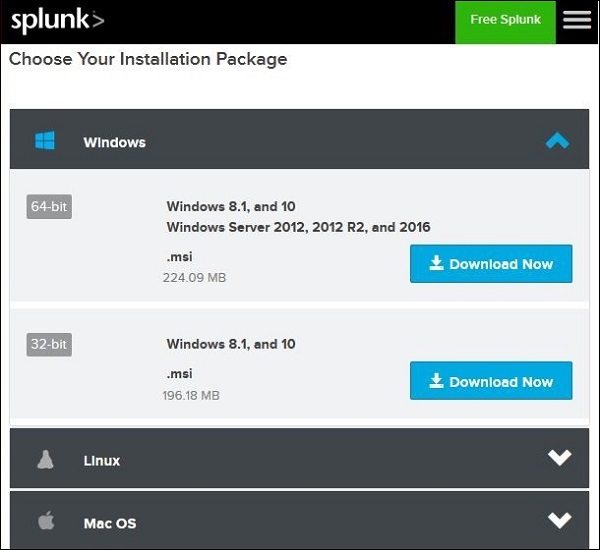
Windows Version
The windows version is available as a msi installer as shown in the below image −
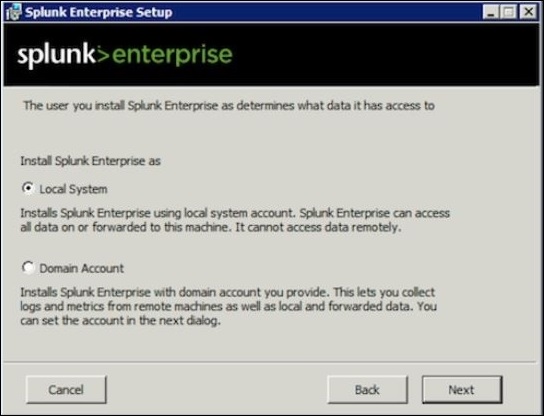
Double clicking on the msi installer installs the Windows version in a straight forward process. The two important steps where we must make the right choice for successful installation are as follows.
Step 1
As we are installing it on a local system, choose the local system option as given below −
Step 2
Enter the password for the administrator and remember it, as it will be used in the future configurations.
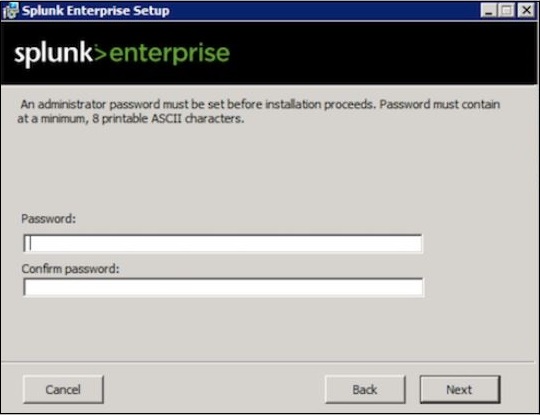
Step 3
In the final step, we see that Splunk is successfully installed and it can be launched from the web browser.
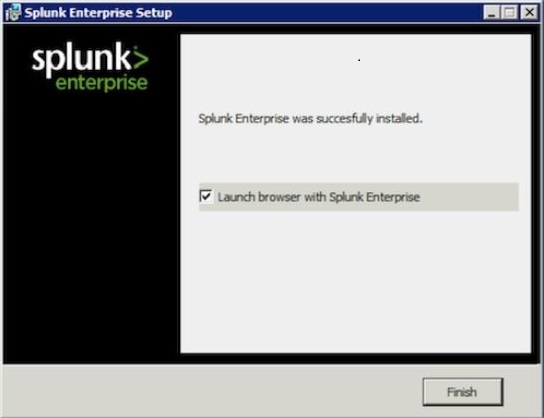
Step 4
Next, open the browser and enter the given url, http://localhost:8000, and login to the Splunk using the admin user ID and password.