- Postman Tutorial
- Postman - Home
- Postman - Introduction
- Postman - Environment Setup
- Postman - Environment Variables
- Postman - Authorization
- Postman - Workflows
- Postman - GET Requests
- Postman - POST Requests
- Postman - PUT Requests
- Postman - DELETE Requests
- Postman - Create Tests for CRUD
- Postman - Create Collections
- Postman - Parameterize Requests
- Postman - Collection Runner
- Postman - Assertion
- Postman - Mock Server
- Postman - Cookies
- Postman - Sessions
- Postman - Newman Overview
- Postman - Run Collections using Newman
- Postman - OAuth 2.0 Authorization
- Postman Useful Resources
- Postman - Quick Guide
- Postman - Useful Resources
- Postman - Discussion
Postman - POST Requests
Postman POST request allows appending data to the endpoint. This is a method used to add information within the request body in the server. It is commonly used for passing delicate information.
Once we send some the request body via POST method, the API in turn yields certain information to us in Response. Thus, a POST request is always accompanied with a body in a proper format.
Create a POST Request
Follow the steps given below to create a POST request successfully in Postman −
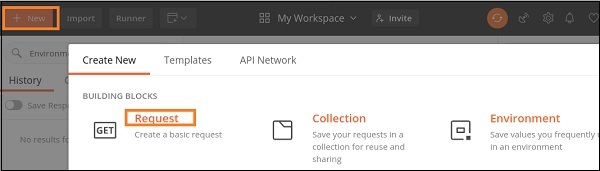
Step 1 − Click on the New menu from the Postman application. The Create New pop-up comes up. Then, click on the Request link.
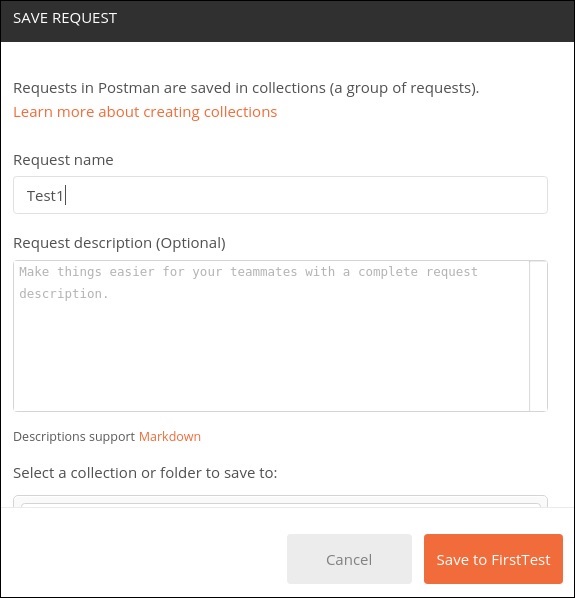
Step 2 − SAVE REQUEST pop-up comes up. Enter the Request name then click on Save.
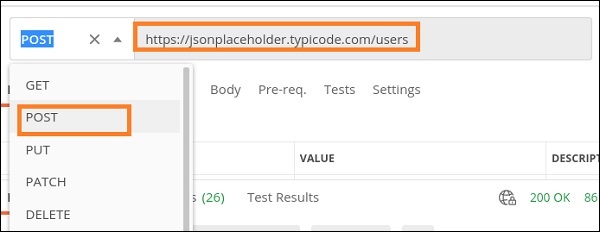
Step 3 − The Request name (Test1) gets reflected on the Request tab. Also, we shall select the option POST from the HTTP request dropdown.
Then, enter an URL https://jsonplaceholder.typicode.com/users in the address bar.
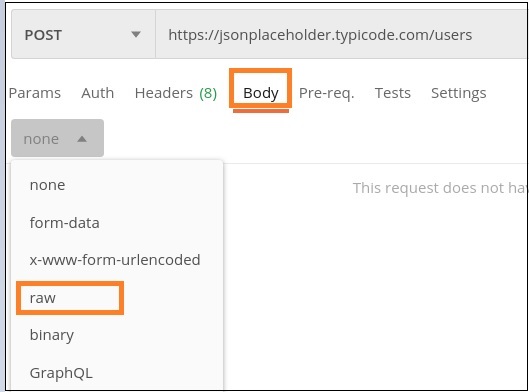
Step 4 − Move to the Body tab below the address bar and select the option raw.
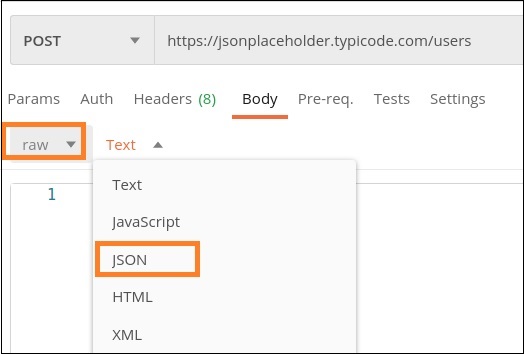
Step 5 − Then, choose JSON from the Text dropdown.
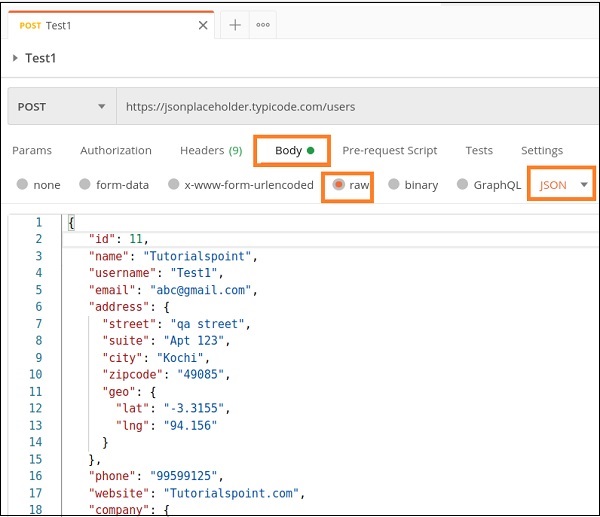
Step 6 − Copy and paste the below information in the Postman Body tab.
{
	"id": 11,
	"name": "Tutorialspoint",
	"username": "Test1",
	"email": "abc@gmail.com",
	"address": {
		"street": "qa street",
		"suite": "Apt 123",
		"city": "Kochi",
		"zipcode": "49085",
		"geo": {
			"lat": "-3.3155",
			"lng": "94.156"
		}
	},
	"phone": "99599125",
	"website": "Tutorialspoint.com",
	"company": {
		"name": "Tutorialspoint",
		"catchPhrase": "Simple Easy Learning",
		"bs": "Postman Tutorial"
	}
}
The above data that is being sent via POST method is only applicable to the endpoint: https://jsonplaceholder.typicode.com/users.
To pass the data in the correct JSON format, we can use the Jsonformatter available in the below link −
https://jsonformatter.curiousconcept.com/
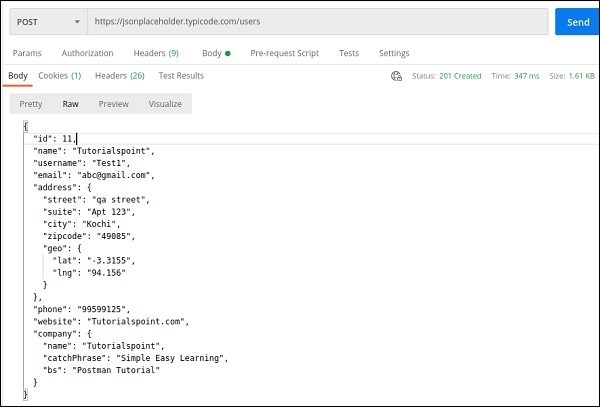
Step 7 − Click on the Send button.

Response
Once a request has been sent, we can see the response code 201 Created populated in the Response. This signifies a successful request and the request we have sent has been accepted by the server.
Also, information on the time consumed to complete the request (347 ms) and payload size (1.61 KB) are populated.
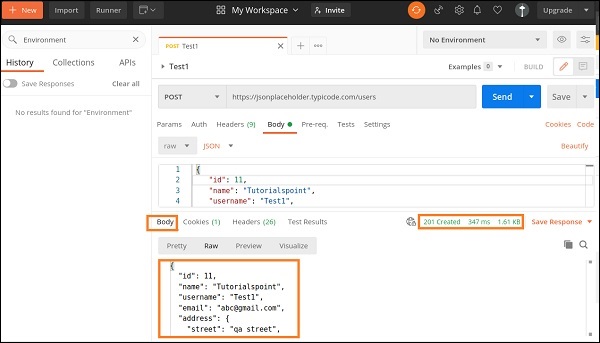
We can see that the Response body is the same as the request body which we have sent to the server.