- WPF - Home
- WPF - Overview
- WPF - Environment Setup
- WPF - Hello World
- WPF - XAML Overview
- WPF - Elements Tree
- WPF - Dependency Properties
- WPF - Routed Events
- WPF - Controls
- WPF - Layouts
- WPF - Nesting Of Layout
- WPF - Input
- WPF - Command Line
- WPF - Data Binding
- WPF - Resources
- WPF - Templates
- WPF - Styles
- WPF - Triggers
- WPF - Debugging
- WPF - Custom Controls
- WPF - Exception Handling
- WPF - Localization
- WPF - Interaction
- WPF - 2D Graphics
- WPF - 3D Graphics
- WPF - Multimedia
WPF - XAML Overview
One of the first things you will encounter while working with WPF is XAML. XAML stands for Extensible Application Markup Language. Its a simple and declarative language based on XML.
In XAML, it very easy to create, initialize, and set properties of objects with hierarchical relations.
It is mainly used for designing GUIs, however it can be used for other purposes as well, e.g., to declare workflow in Workflow Foundation.
Basic Syntax
When you create your new WPF project, you will encounter some of the XAML code by default in MainWindow.xaml as shown below.
<Window x:Class = "Resources.MainWindow"
   xmlns = "http://schemas.microsoft.com/winfx/2006/xaml/presentation"
   xmlns:x = "http://schemas.microsoft.com/winfx/2006/xaml"
   Title = "MainWindow" Height = "350" Width = "525">

   <Grid>

   </Grid>

</Window>
The above XAML file contains different kinds of information. The following table briefly explains the role of each information.
| Information | Description |
|---|---|
| <Window | It is the opening object element or container of the root. |
| x:Class = "Resources.MainWindow" | It is a partial class declaration which connects the markup to the partial class code defined behind. |
| xmlns = "http://schemas.microsoft.com/win fx/2006/xaml/presentation" | Maps the default XAML namespace for WPF client/framework |
| xmlns:x = "http://schemas.microsoft.com/w infx/2006/xaml" | XAML namespace for XAML language which maps it to x: prefix |
| > | End of object element of the root |
<Grid> </Grid> |
It is starting and closing tags of an empty grid object. |
| </Window> | Closing the object element |
The syntax rules for XAML is almost similar to XML. If you look at an XAML document, then you will notice that it is actually a valid XML file, but an XML file is not necessarily an XAML file. It is because in XML, the value of the attributes must be a string while in XAML, it can be a different object which is known as Property element syntax.
The syntax of an Object element starts with a left angle bracket (<) followed by the name of an object, e.g. Button.
Define some Properties and attributes of that object element.
The Object element must be closed by a forward slash (/) followed immediately by a right angle bracket (>).
Example of simple object with no child element
<Button/>
Example of object element with some attributes
<Button Content = "Click Me" Height = "30" Width = "60" />
Example of an alternate syntax do define properties (Property element syntax)
<Button>
   <Button.Content>Click Me</Button.Content>
   <Button.Height>30</Button.Height>
   <Button.Width>60</Button.Width>
</Button>
Example of Object with Child Element: StackPanel contains Textblock as child element
<StackPanel Orientation = "Horizontal">
   <TextBlock Text = "Hello"/>
</StackPanel>
Why XAML in WPF
XAML is not only the most widely known feature of WPF, but it's also one of the most misunderstood features. If you have exposure to WPF, then you must have heard of XAML; but take a note of the following two less known facts about XAML −
- WPF doesn't need XAML
- XAML doesn't need WPF
They are in fact separable pieces of technology. To understand how that can be, let's look at a simple example in which a button is created with some properties in XAML.
<Window x:Class = "WPFXAMLOverview.MainWindow"
   xmlns = "http://schemas.microsoft.com/winfx/2006/xaml/presentation"
   xmlns:x = "http://schemas.microsoft.com/winfx/2006/xaml"
   Title = "MainWindow" Height = "350" Width = "604">

   <StackPanel>
      <Button x:Name = "button" Content = "Click Me" HorizontalAlignment = "Left"
         Margin = "150" VerticalAlignment = "Top" Width = "75" />
   </StackPanel>

</Window>
In case you choose not to use XAML in WPF, then you can achieve the same GUI result with procedural language as well. Lets have a look at the same example, but this time, we will create a button in C#.
using System.Windows;
using System.Windows.Controls;

namespace WPFXAMLOverview {
   /// <summary>
      /// Interaction logic for MainWindow.xaml
   /// </summary>

   public partial class MainWindow : Window {

      public MainWindow() {
         InitializeComponent();

         // Create the StackPanel
         StackPanel stackPanel = new StackPanel();
         this.Content = stackPanel;

         // Create the Button
         Button button = new Button();
         button.Content = "Click Me";
         button.HorizontalAlignment = HorizontalAlignment.Left;
         button.Margin = new Thickness(150);
         button.VerticalAlignment = VerticalAlignment.Top;
         button.Width = 75;
         stackPanel.Children.Add(button);
      }
   }
}
When you compile and execute either the XAML code or the C# code, you will see the same output as shown below.
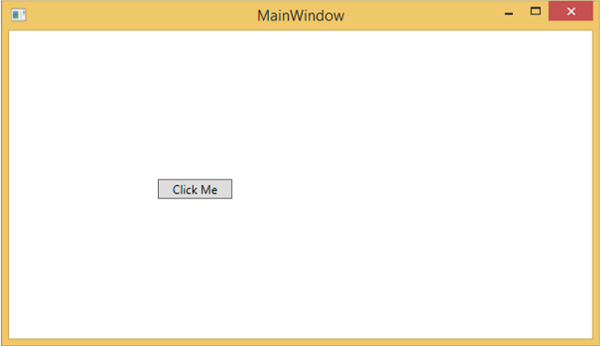
From the above example, it is clear that what you can do in XAML to create, initialize, and set properties of objects, the same tasks can also be done using code.
XAML is just another simple and easy way to design UI elements.
With XAML, it doesnt mean that what you can do to design UI elements is the only way. You can either declare the objects in XAML or define them using code.
XAML is optional, but despite this, it is at the heart of WPF design.
The goal of XAML is to enable visual designers to create user interface elements directly.
WPF aims to make it possible to control all visual aspects of the user interface from mark-up.
