- Svelte - Home
- Svelte - Introduction
- Svelte - Installation
- Svelte - Reactivity
- Svelte - Props
- Svelte - Logic
- Svelte - Events
- Svelte - Bindings
- Svelte - Classes
- Svelte - Actions
- Svelte - Transitions
- Svelte - Advance Reactivity
- Svelte - Reusing Content
- Svelte - Motion
- Svelte - Advanced Binding
- Svelte - Advanced Transitions
- Svelte - Context API
- Svelte - Special Elements
- SvelteKit Basics
- SvelteKit - Introduction
- SvelteKit - Headers
- SvelteKit - Cookies
- SvelteKit - Shared Modules
- SvelteKit - Forms
- SvelteKit - API Routes
- SvelteKit - States
- SvelteKit - Errors
- SvelteKit - Redirects
- SvelteKit Advanced
- SvelteKit - Hooks
- SvelteKit - Page Options
- SvelteKit - Link Options
- SvelteKit - Advanced Routing
- SvelteKit - Advanced Loading
- SvelteKit - Environment Variables
- Svelte Resources
- svelte - Useful Resources
- svelte - Discussion
Sveltekit - Forms
The form elements chapter of SvelteKit explains how to create a form for submitting data or collecting user input data. This chapter provides a brief understanding of <form> element, Form validation, Named form actions, Progressive enhancement, Customizing use:enhance in SvelteKit.
The <form> Element
The <form> element is used to collect user input and submit it to the server. This comes with various interactive controls that effectively help to gather or submit information in SvelteKit applications.
Syntax
The basic syntax of using form element is mentioned below:
<form action="/submit" method="POST">
   <!-- Form elements go here -->
</form>
Named Form Actions
Named form actions in SvelteKit allows developers to create different actions for handling form submissions on one page, making applications more functional.
Defining Named Actions
In your server-side file (for e.g., +page.server.js), define an actions object with named actions such as mentioned below:
/** @satisfies {import('./$types').Actions} */
export const actions = {
    create: async ({ request }) => {
    const data = await request.formData();
    // Logic to create a new item
    },
    delete: async ({ request }) => {
    const data = await request.formData();
    // Logic to delete an item
    }
};
Using Named Actions in Forms
In your Svelte component (e.g., +page.svelte), specify the action in the tag using the action attribute with a query parameter.
<form method="POST" action="?/create">
   <input name="description" required />
   <button type="submit">Add Item</button>
</form>

<form method="POST" action="?/delete">
   <input type="hidden" name="id" value={item.id} />
   <button type="submit">Delete Item</button>
</form>
Form Validation
Form validation in SvelteKit is important to make sure users send correct information and to stop any wrong or harmful input. This approach enhances user experience while maintaining application security and reliability.
Key Concepts
Form Validation can be done in the following ways:
- Client-Side Validation: Client-side validation can be easily specified using HTML attributes as required. However, in client-side validations, users can manipulate the HTML using developer tools, bypassing these checks, so these are insufficient.
- Server-Side Validation: Server-side validation is an extra layer of protection that makes sure all the data the server processes meets the necessary standards. This includes checking if the data is present and if it is unique.
Progressive enhancement
Progressive enhancement in SvelteKit is a design method that makes sure web applications work for everyone, even for users who don't have JavaScript.
Implementation
To implement progressive enhancement in SvelteKit, follow these steps:
- Import the Enhance Function: In your Svelte component, import the enhance function from $app/forms.
<script>
   import { enhance } from '$app/forms';
</script>
<form method="POST" action="?/create" use:enhance>
    <label>
        Add a todo:
        <input name="description" required />
    </label>
  <button type="submit">Submit</button>
</form>
Example
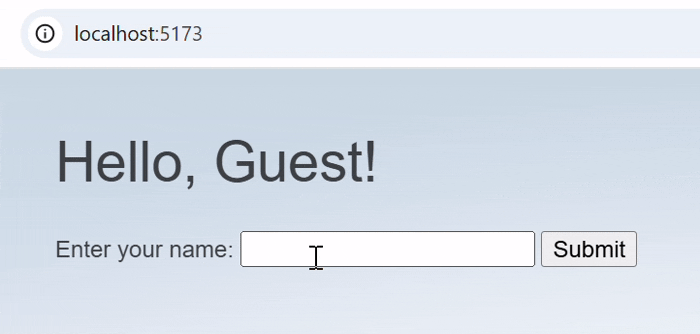
The following is a simple example of SvelteKit forms. This example will allow users to enter their name and display a greeting.
 <!--src/routes/+server.js-->
let name = 'Guest'; // Default name

export const POST = async ({ request }) => {
    const formData = await request.formData();
    name = formData.get('name') || 'Guest'; // Update name from form input

    return new Response(JSON.stringify({ success: true }), {
        headers: { 'Content-Type': 'application/json' },
    });
};

export const GET = async () => {
    return new Response(JSON.stringify({ name }), {
        headers: { 'Content-Type': 'application/json' },
    });
};

<!-- src/routes/+page.svelte -->
<script>
    let name = 'Guest'; // Default name

    const fetchName = async () => {
        const response = await fetch('/?GET');
        const data = await response.json();
        name = data.name;
    };

    const handleSubmit = async (event) => {
        event.preventDefault(); // Prevent default form submission
        const formData = new FormData(event.target);

        await fetch('/?POST', {
            method: 'POST',
            body: formData,
        });

        fetchName(); // Refresh the name after setting it
    };

    // Fetch name when component mounts
    import { onMount } from 'svelte';
    onMount(fetchName);
</script>

<h1>Hello, {name}!</h1>

<form on:submit={handleSubmit}>
    <label>
        Enter your name:
        <input type="text" name="name" required autocomplete="off" />
    </label>
    <button type="submit">Submit</button>
</form>
Output