- Svelte - Home
- Svelte - Introduction
- Svelte - Installation
- Svelte - Reactivity
- Svelte - Props
- Svelte - Logic
- Svelte - Events
- Svelte - Bindings
- Svelte - Classes
- Svelte - Actions
- Svelte - Transitions
- Svelte - Advance Reactivity
- Svelte - Reusing Content
- Svelte - Motion
- Svelte - Advanced Binding
- Svelte - Advanced Transitions
- Svelte - Context API
- Svelte - Special Elements
- SvelteKit Basics
- SvelteKit - Introduction
- SvelteKit - Headers
- SvelteKit - Cookies
- SvelteKit - Shared Modules
- SvelteKit - Forms
- SvelteKit - API Routes
- SvelteKit - States
- SvelteKit - Errors
- SvelteKit - Redirects
- SvelteKit Advanced
- SvelteKit - Hooks
- SvelteKit - Page Options
- SvelteKit - Link Options
- SvelteKit - Advanced Routing
- SvelteKit - Advanced Loading
- SvelteKit - Environment Variables
- Svelte Resources
- svelte - Useful Resources
- svelte - Discussion
Svelte - Advanced Transitions
Advanced Transitions in Svelte provides more advanced features such as deferred transitions and animations to simply add attractive transitions to our web page. It improves user experience by adding smooth and attractive animations when elements appear, change, or disappear.
Deferred Transitions
Deferred transitions in Svelte are a technique that allows for smooth animations when multiple elements enter or leave the DOM simultaneously. This feature is particularly useful for creating the illusion of motion between elements, such as when an item is moved from one list to another.
How to Use Deferred Transitions?
To use deferred transitions of svelte in your svelte application follow the steps mentioned below:
- Import the Crossfade Function: Firstly, you need to import crossfade from the Svelte transition module.
import { crossfade } from 'svelte/transition';
const [send, receive] = crossfade();
let complete = [...]; // Array of completed items
    let incomplete = [...]; // Array of incomplete items
<ul>
{#each incomplete as item}
    <li in:receive={{ key: item.id }} out:send={{ key: item.id }}>
    {item.name}
    </li>
{/each}
</ul>
Animations
Svelte animations allow developers to create engaging animations that improve user experience. Animations in svelte make it easy to create smooth and engaging animations without needing to write complex code. We can simply apply animations in svelte using :animate directive.
How to Use Animations?
To use Animations in your Svelte application follow the steps mentioned below:
- Import the Animation Function: Firstly, you need to import the flip function from the svelte/animate module.
<script>
   import { flip } from 'svelte/animate';
   </script>
let list = [1, 2, 3];
{#each list as n (n)}
<div animate:flip={{ delay: 250, duration: 250, easing: cubicOut }}>
    {n}
</div>
{/each}
Example
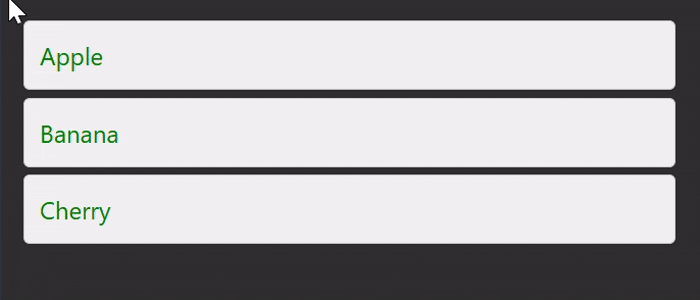
The following example is creating a simple interactive list of fruits with a flip animation effect when items are clicked.
<!--App.svelte-->
<script>
    import { flip } from 'svelte/animate';

    let items = ['Apple', 'Banana', 'Cherry'];

    function moveItem(index) {
    // Move the clicked item to the end of the list
    const item = items[index];
    items = items.filter((_, i) => i !== index);
    items = [...items, item];
    }
</script>

<style>
    ul {
    list-style-type: none;
    padding: 0;
    }
    li {
    margin: 5px 0;
    cursor: pointer;
    padding: 10px;
    background-color: #f0f0f0;
    border: 1px solid #ccc;
    border-radius: 4px;
    transition: background-color 0.3s;
        color:green;
    }
    li:hover {
    background-color: #ccc;
        font-weight:bold;
    }
</style>

<ul>
    {#each items as item, index (item)}
    <li animate:flip on:click={() => moveItem(index)}>
        {item}
    </li>
    {/each}
</ul>
Output