- Svelte - Home
- Svelte - Introduction
- Svelte - Installation
- Svelte - Reactivity
- Svelte - Props
- Svelte - Logic
- Svelte - Events
- Svelte - Bindings
- Svelte - Classes
- Svelte - Actions
- Svelte - Transitions
- Svelte - Advance Reactivity
- Svelte - Reusing Content
- Svelte - Motion
- Svelte - Advanced Binding
- Svelte - Advanced Transitions
- Svelte - Context API
- Svelte - Special Elements
- SvelteKit Basics
- SvelteKit - Introduction
- SvelteKit - Headers
- SvelteKit - Cookies
- SvelteKit - Shared Modules
- SvelteKit - Forms
- SvelteKit - API Routes
- SvelteKit - States
- SvelteKit - Errors
- SvelteKit - Redirects
- SvelteKit Advanced
- SvelteKit - Hooks
- SvelteKit - Page Options
- SvelteKit - Link Options
- SvelteKit - Advanced Routing
- SvelteKit - Advanced Loading
- SvelteKit - Environment Variables
- Svelte Resources
- svelte - Useful Resources
- svelte - Discussion
Svelte - Bindings
Bindings in svelte is an important feature that makes it easier for developers to work by reducing the extra code needed to update the webpage and handle events. Developers can easily build responsive and interactive applications by using one-way and two-way bindings, handling events, and grouping items.
What are Bindings in Svelte?
Bindings in Svelte connect the data in a component to its user interface, allowing them to update automatically. This means that when the data changes, the UI updates to show that change, and if the user interacts with the UI, the data updates too. This makes it simpler to handle the state and user interactions in your app.
Syntax
We can simply bind component data and its user interface by using bind: directive. The syntax of binding is as follows:
<input bind:value={variableName} />
Types of Bindings
There are several types of bindings, each serving different purposes:
- Two-Way Binding: Two-way binding connects a variable directly to an input element, so when you change the input, the variable updates, and when the variable changes, the input updates too.
- One-Way Binding: One-way binding links a variable to a property of an element, so when the variable changes, the UI updates to show that change, but changes in the UI do not affect the variable.
- Group Binding: Group binding is helpful for handling several related inputs, like checkboxes or radio buttons. It links a group of these inputs to one variable (like an array or object), which makes it easier to manage the data.
- Event Binding: Event binding allows you to define event handlers that respond to user actions, like clicks or keyboard presses.
- Component Binding: Svelte also allows you to bind properties between parent and child components. This means data can flow from child components back to parent components.
Text Inputs
Svelte uses the bind: directive to set up two-way data binding for text inputs. This means that when you change something in the input field, it automatically updates the related variable in the script. Likewise, if that variable changes, the input field will also update to show the new value.
Syntax
<script>
let inputValue = ''; // Variable to hold input value
</script>

<input type="text" bind:value={inputValue} placeholder="Type something..." />
<p>You typed: {inputValue}</p>
Numeric Inputs
In Svelte, numeric inputs are managed the same way as text inputs by using the bind: directive for two-way data binding. This keeps the input field and the related variable in the component updated with each other automatically.
Syntax
<script>
let numberValue = 0; // Initialize a numeric variable
</script>

<input type="number" bind:value={numberValue} min="0" max="100 />
<p>Current value: {numberValue}</p>
Checkbox Inputs
In Svelte, you can connect a checkbox to a variable using the bind: checked directive. This sets up a two-way connection between the checkbox's checked state and a boolean variable in your component.
Syntax
<script>
    let isChecked = false; // This variable will hold the checkbox state
</script>

<label>
    <input type="checkbox" bind:checked={isChecked}> Check me!
</label>

<p>Checkbox is {isChecked ? 'checked' : 'unchecked'}</p>
Select Binding
In Svelte, select bindings allow you to create dropdown menus that work closely with your component's state. To connect a <select> element to a variable, you use the bind:value directive. This links the selected option in the dropdown to a specific variable in your component.
Syntax
<script>
let selectedOption = ''; // Variable to hold the selected value
</script>

<label for="options">Choose an option:</label>
<select id="options" bind:value={selectedOption}>
    <option value="" disabled>Select an option</option>
    <option value="option1">Option 1</option>
    <option value="option2">Option 2</option>
    <option value="option3">Option 3</option>
</select>

<p>Selected: {selectedOption}</p>
Select Multiples
In Svelte, you can use multiple select bindings to allow users choose several options from a dropdown menu. This is done by adding the multiple attribute to the <select> element, along with Svelte's binding features.
Syntax
<select multiple bind:value={selectedOptions}>
{#each availableOptions as option}
    <option value={option}>{option}</option>
{/each}
</select>
Textarea Inputs
Binding a <textarea> input in Svelte is simple and works like other form elements. By using bind:value, you can easily manage what users type, keeping your application's state in sync with their input.
Syntax
<textarea bind:value={value}></textarea>
Group Inputs
Group inputs in Svelte make it easy to manage several related input elements using data binding. By using bind:group, developers can easily create groups of radio buttons or checkboxes, ensuring that user selections are correctly shown in the application's state.
Example
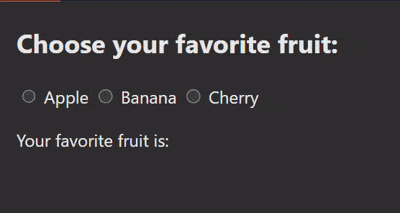
The following is a simple example of using group inputs in Svelte with radio buttons, enabling the selection of only one fruit, which is also displaying the selected fruit in the paragraph.
<!--App.svelte-->
<script>
    let selectedOption = ''; // Variable to hold the selected radio button value
</script>

<h2>Choose your favorite fruit:</h2>
<label>
    <input type="radio" bind:group={selectedOption} value="Apple"> Apple
</label>
<label>
    <input type="radio" bind:group={selectedOption} value="Banana"> Banana
</label>
<label>
    <input type="radio" bind:group={selectedOption} value="Cherry"> Cherry
</label>

<p>Your favorite fruit is: {selectedOption}</p>
Output