- Svelte - Home
- Svelte - Introduction
- Svelte - Installation
- Svelte - Reactivity
- Svelte - Props
- Svelte - Logic
- Svelte - Events
- Svelte - Bindings
- Svelte - Classes
- Svelte - Actions
- Svelte - Transitions
- Svelte - Advance Reactivity
- Svelte - Reusing Content
- Svelte - Motion
- Svelte - Advanced Binding
- Svelte - Advanced Transitions
- Svelte - Context API
- Svelte - Special Elements
- SvelteKit Basics
- SvelteKit - Introduction
- SvelteKit - Headers
- SvelteKit - Cookies
- SvelteKit - Shared Modules
- SvelteKit - Forms
- SvelteKit - API Routes
- SvelteKit - States
- SvelteKit - Errors
- SvelteKit - Redirects
- SvelteKit Advanced
- SvelteKit - Hooks
- SvelteKit - Page Options
- SvelteKit - Link Options
- SvelteKit - Advanced Routing
- SvelteKit - Advanced Loading
- SvelteKit - Environment Variables
- Svelte Resources
- svelte - Useful Resources
- svelte - Discussion
Svelte - Installation
Svelte is a simple, open-source framework that can be used without a huge and complex setup. It is a component-based architecture that contains reusable components that can be used easily throughout the project. This chapter will guide you through the installation of the Svelte framework for the project.
Requirements
- Node Js: Firstly, Nodejs installation is necessary for Svelte because it provides the runtime environment needed to run JavaScript outside the browser and enables the use of Node Package Manager.
- IDE: An Integrated Development Environment is required for the better integration of the Svelte project. The suggested IDE is Visual Studio Code because the Svelte team maintains a VS Code extension.
Installation
The simplest way to use Svelte for a starter application is to download the starter template. You can find it by going to sveltejs/template on GitHub. The template is as follows:
npx degit sveltejs/template hello-world
You can replace the hello-world with the name of your workplace folder
You can setup Svelte in two ways:
Using NPM
To install Svelte using Node Package Manager follows the steps mentioned below:
- Open the terminal window of your device or Visual Studio Code.
- Run the following command on the terminal to download the Svelte starter template from GitHub. This command will create the clone workplace folder that you have mentioned for the Svelte project.
- Now, use the command mentioned below to navigate your directory.
- Then, you have to use the following command to install Nodejs packages required for Svelte setup.
- Finally, to run your Svelte starter application use the command mentioned below.

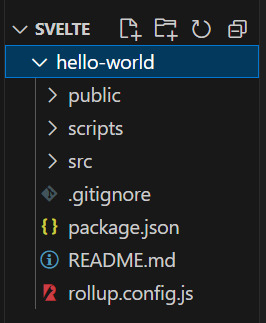
Your cloned folder will be like this hello-world folder.


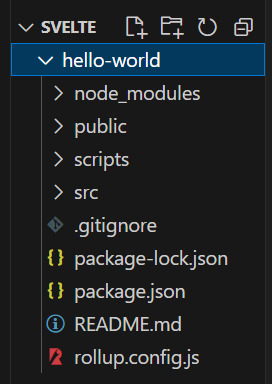
This will add a node modules folder in your directory will look like below.

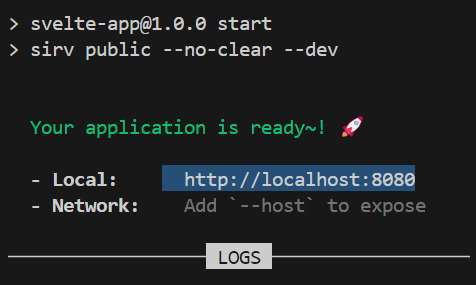
You will get the link to your project that is running on the localhost.
And your final cloned application will look like this.

Using Yarn
To install Svelte using Yarn follows the commands mentioned below same as using npm:
yarn create svelte my-app
cd my-app
yarn install
yarn dev
Application Structure
The starter template comes with the following structure:
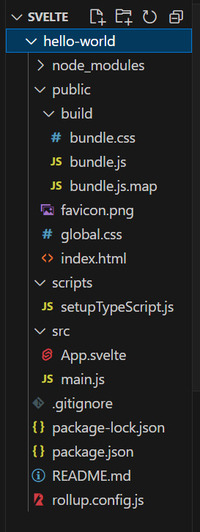
The application structure content are as follows:
- package.json and package-lock.json: They have details about the project that Node.js/npm uses to stay organized.
- node_modules: The place where Node stores the project's dependencies. These dependencies are only for development and won't be included when the project is sent to production.
- .gitignore: This shows Git which files or folders to ignore in the project
- rollup.config.js: Svelte uses rollup.js to combine files. This configuration file tells rollup how to set up and build your app.
- scripts: It contains setup scripts as needed. Right now, it should only have setupTypeScript.js.
- setupTypeScript.js: This script sets up TypeScript support in Svelte.
- src: This folder is where your application's source code is stored. It is the place where you will write the code for your app.
- App.svelte: This is the main part of your app. Right now, it just shows the 'Hello World!' message.
- main.js: This is where our application starts. It simply creates the App component and connects it to the body of our HTML page.
- public: This directory contains all the files that will be published in production.
- favicon.png: This is the favicon for your app. Currently, it's the Svelte logo.
- index.html: This is the main page of your app. At first, it is just a blank HTML page that loads the CSS files and JavaScript bundles created by Svelte.
- global.css: This file has general styles. It's a regular CSS file that will affect the entire application.
- build: This folder contains the generated CSS and JavaScript source code.
- bundle.css: The CSS file created by Svelte from the styles set for each component.
- bundle.js: The JavaScript file made from all your JavaScript code.
