
 Data Structure
 Networking
 RDBMS
RDBMS Operating System
 Java
Java MS Excel
 iOS
iOS HTML
HTML CSS
CSS Android
 Python
 C Programming
 C++
C++ C#
C# MongoDB
 MySQL
MySQL Javascript
 PHP
PHP
- Selected Reading
- UPSC IAS Exams Notes
- Developer's Best Practices
- Questions and Answers
- Effective Resume Writing
- HR Interview Questions
- Computer Glossary
- Who is Who
Step by Step guide to install Intellij Idea
IntelliJ Idea is a cross-platform integrated development environment that is designed to develop applications written in JVM based languages like Java and Kotlin. JetBrains has developed this java IDE. It is supported on all popular operating systems like Windows, Mac, Linux.
If you want to install this powerful IDE then you are at the right place. In this article, we will provide you step by step guide to installing IntelliJ Idea.
The following table shows the system requirements ?
Requirements |
Details |
|---|---|
RAM |
8 GB of total system RAM out of which need 2 GB of free space |
CPU |
Multi-core CPU |
Disk Space |
Minimum 5 GB free space of SSD Drive |
Monitor Resolution |
1024 x 768 minimum |
Operating System |
Latest 64 bit versions of Windows, Mac or Linux |
For more details, you can check this link- https://www.jetbrains.com/help/idea/installation-guide.html#requirements
Steps to install IntelliJ Idea
There are two editions of IntelliJ Idea available:
Community edition ? Free and open source.
IntelliJ Idea Ultimate edition ? For commercial purposes.
We will install the community edition on our Windows 10 operating system.
Step 1
Search intelliJ Idea on Google or simply go to the link ? https://www.jetbrains.com/idea/ Click on the first link there.

Step 2
Next, you will see the following interface. Click on Download.

Step 3
Now, you will be redirected to the following page. Click on the Download button again. It will take some time to get downloaded. Once download gets completed locate your file in your system and double click on it. Then, a pop-up will appear, click YES.

Step 4
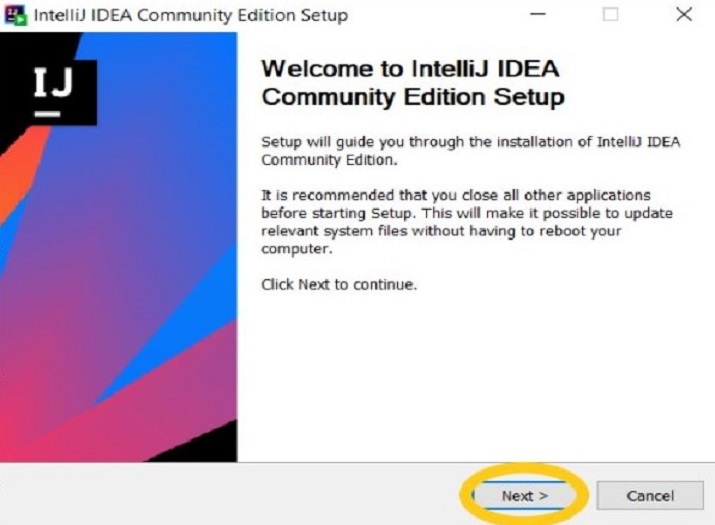
This is the IntelliJ Idea community setup window. Now click on Next.
Step 5
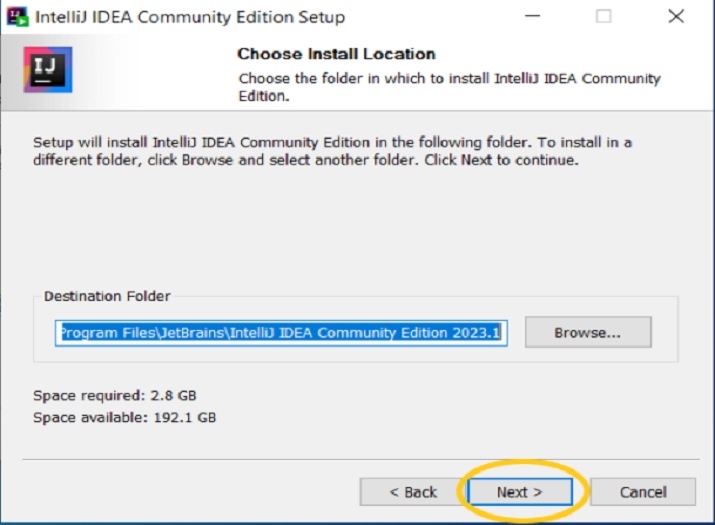
You can see it is asking to choose a location to install but we will leave it as default and click on Next.
Step 6
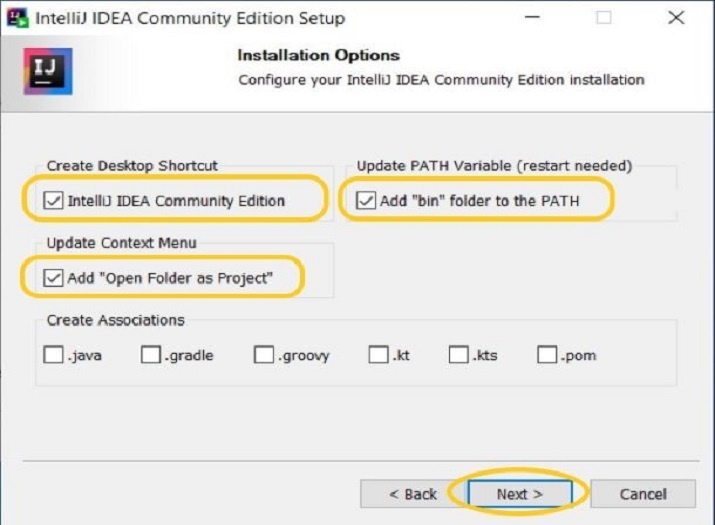
From the following options, check those we have checked and leave the rest as it is. Then click Next.
Step 7
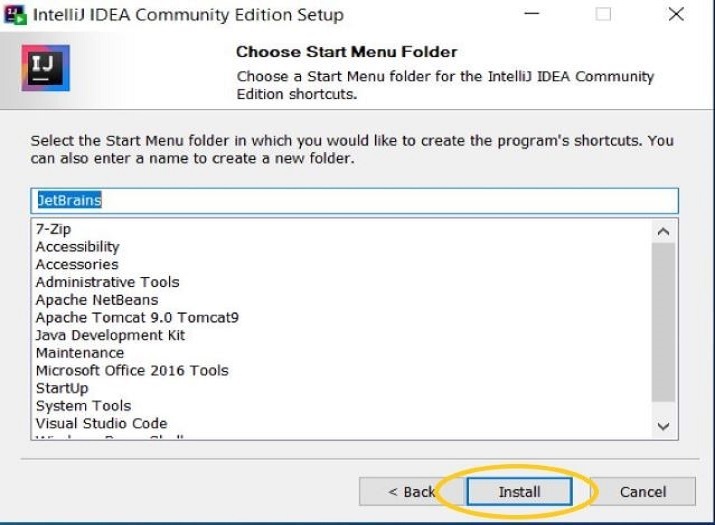
Now click on Install button.
Step 8
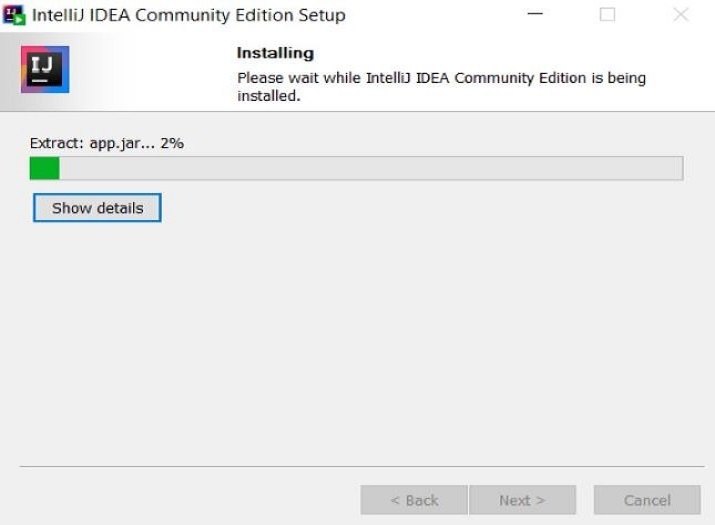
You may see the progress bar. The installation speed depends on your machine configuration.
Step 9
Leave everything as it is and click on Finish.
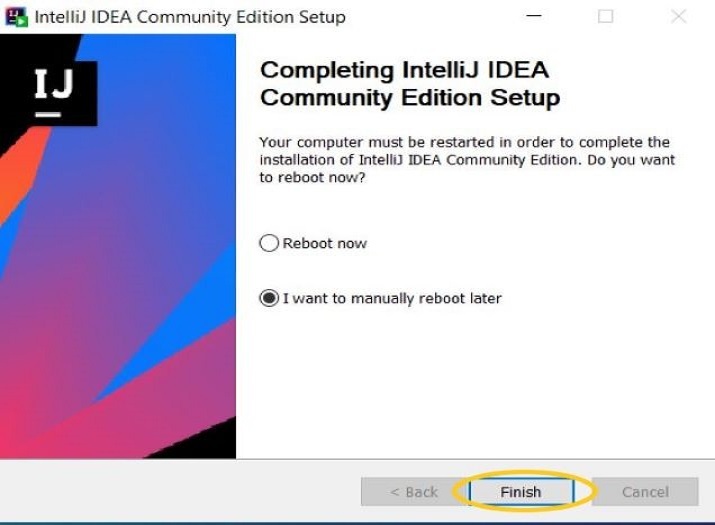
Now, the IntelliJ Idea IDE has been installed on your local machine.
Conclusion
In this article, we have listed out all the steps of installing IntelliJ Idea on your computer system. For your convenience, we have attached snapshots of each step. You will surely enjoy developing applications using its rich features.

