- Intellij Idea - Home
- Intellij Idea - Introduction
- Installation and Configuration
- Intellij Idea − Getting Familiar
- Create First Java Project
- Intellij Idea − Deep Dive
- Intellij Idea − Deep Dive into Editor
- Intellij Idea − Code Refactoring
- Intellij Idea − Running Projects
- Intellij Idea − Build Tools
- Intellij Idea − Unit Testing
- Intellij Idea − Debugging
- Intellij Idea − Profiling
- Intellij Idea − Version Control
- Intellij Idea − Databases
- Migrating from NetBeans
- Intellij Idea − Migrating from Eclipse
Intellij Idea - Unit Testing
Unit testing plays an important role in software development. IntelliJ supports various unit testing frameworks like JUnit, TestNG, Spock and many more. In this chapter, we are going to use JUnit3.
Create Unit test
In this section, we will learn how to create a Unit Test. Follow these steps to create the test −
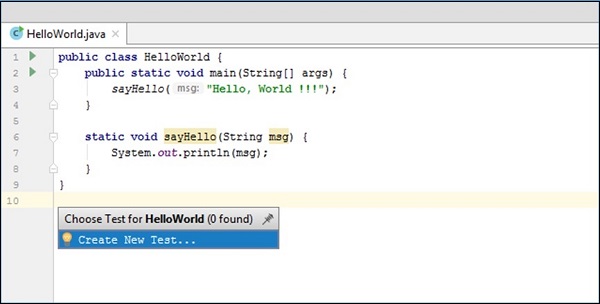
Select the Navigate → Test option.
A dialog box will appear wherein, you have to select Create New Test.
Follow the on-screen instructions to continue −
Provide the details about the test like testing library, class details, setUp, tearDown methods and so on.
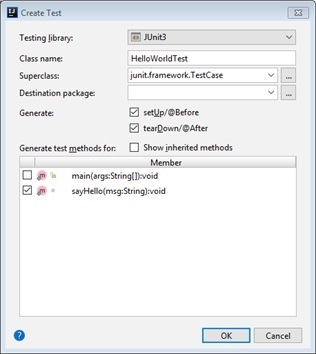
Click on the OK button to continue.
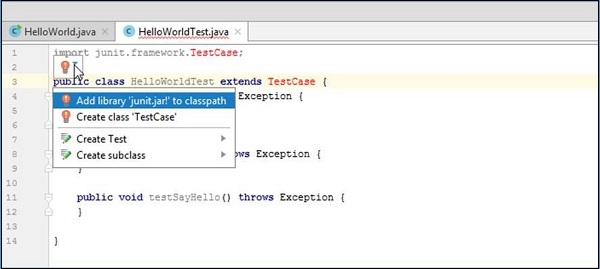
A test class will be created. Initially it may fail to resolve some symbols. Navigate the cursor to the error line, it will show the hint symbol.
Select the appropriate option from the dropdown menu. We have selected the Add library junit.jar! to classpath option −
You can add logic inside each test according to your business requirement. I have kept it empty for simplicity.
Run Unit Test
Follow these steps to run unit test −
Select unit test class from the Editor window.
Navigate to the Run menu and select the Run option.
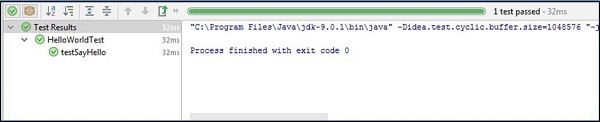
The following result will be generated