- Spring MVC - Home
- Spring MVC - Overview
- Spring MVC - Environment Setup
- Spring MVC - Hello World Example
Spring MVC - Form Handling
Spring MVC - Form Tag library
- Spring MVC - Textbox
- Spring MVC - Password
- Spring MVC - Textarea
- Spring MVC - Checkbox
- Spring MVC - Checkboxes
- Spring MVC - Radiobutton
- Spring MVC - Radiobuttons
- Spring MVC - Dropdown
- Spring MVC - Listbox
- Spring MVC - Hidden
- Spring MVC - Errors
- Spring MVC - Upload
Spring MVC - Handler Mapping
Spring MVC - Controller
- Spring MVC - Multi Action Controller
- Properties Method Name Resolver
- Parameter Method Name Resolver
- Parameterizable View Controller
Spring MVC - View Resolver
- Internal Resource View Resolver
- Spring MVC - Xml View Resolver
- Resource Bundle View Resolver
- Multiple Resolver Mapping
Spring MVC - Integration
- Spring MVC - Hibernate Validator
- Spring MVC - Generate RSS Feed
- Spring MVC - Generate XML
- Spring MVC - Generate JSON
- Spring MVC - Generate Excel
- Spring MVC - Generate PDF
- Spring MVC - Using log4j
Spring Q & A
Spring MVC Useful Resources
Spring MVC - Multiple Resolver Mapping Example
In case you want to use a Multiple View Resolver in a Spring MVC application then priority order can be set using the order property. The following example shows how to use the ResourceBundleViewResolver and the InternalResourceViewResolver in the Spring Web MVC Framework.
Note* − ResourceBundleViewResolver is deprecated from Spring 5.3 onwards. This example is written using earlier version of Spring.
hello-servlet.xml
<bean class = "org.springframework.web.servlet.view.ResourceBundleViewResolver">
   <property name = "basename" value = "views" />
   <property name = "order" value = "0" />
</bean>
<bean class = "org.springframework.web.servlet.view.InternalResourceViewResolver">
   <property name = "prefix" value = "/WEB-INF/jsp/" />
   <property name = "suffix" value = ".jsp" />
   <property name = "order" value = "1" />
</bean>
Here, the order property defines the ranking of a view resolver. In this, 0 is the first resolver and 1 is the next resolver and so on.
views.properties
hello.(class) = org.springframework.web.servlet.view.JstlView
hello.url = /WEB-INF/jsp/hello.jsp
For example, using the above configuration, if URI −
/hello is requested, DispatcherServlet will forward the request to the hello.jsp defined by bean hello in views.properties.
To start with, let us have a working Eclipse IDE in place and consider the following steps to develop a Dynamic Form based Web Application using Spring Web Framework −
| Step | Description |
|---|---|
| 1 | Create a project with a name hello under a package com.tutorialspoint as explained in the Spring MVC - Hello World Example chapter. |
| 2 | Create Java class HelloController under the com.tutorialspoint package. |
| 3 | Create view files hello.jsp under the jsp sub-folder in WEB-INF folder. |
| 4 | Create properties file views.properties under the src > main > resources folder. |
| 5 | The final step is to create the content of the source and configuration files and export the application as explained below. |
HelloController.java
package com.tutorialspoint;

import org.springframework.stereotype.Controller;
import org.springframework.web.bind.annotation.GetMapping;
import org.springframework.web.bind.annotation.RequestMapping;
import org.springframework.ui.ModelMap;

@Controller
@RequestMapping("/hello")
public class HelloController{

   @GetMapping
   public String printHello(ModelMap model) {
      model.addAttribute("message", "Hello Spring MVC Framework!");
      return "hello";
   }
}
hello-servlet.xml
<beans xmlns = "http://www.springframework.org/schema/beans"
   xmlns:context = "http://www.springframework.org/schema/context"
   xmlns:xsi = "http://www.w3.org/2001/XMLSchema-instance"
   xsi:schemaLocation = "
   http://www.springframework.org/schema/beans
   http://www.springframework.org/schema/beans/spring-beans-3.0.xsd
   http://www.springframework.org/schema/context
   http://www.springframework.org/schema/context/spring-context-3.0.xsd">

   <context:component-scan base-package = "com.tutorialspoint" />
   <bean class = "org.springframework.web.servlet.view.ResourceBundleViewResolver">
      <property name = "basename" value = "views" />
      <property name = "order" value = "0" />
   </bean>
   <bean class = "org.springframework.web.servlet.view.InternalResourceViewResolver">
      <property name = "prefix" value = "/WEB-INF/jsp/" />
      <property name = "suffix" value = ".jsp" />
      <property name = "order" value = "1" />
</beans>
views.properties
hello.(class) = org.springframework.web.servlet.view.JstlView
hello.url = /WEB-INF/jsp/hello.jsp
hello.jsp
<%@ page contentType = "text/html; charset = UTF-8" %>
<html>
   <head>
      <title>Hello World</title>
   </head>
   <body>
      <h2>${message}</h2>
   </body>
</html>
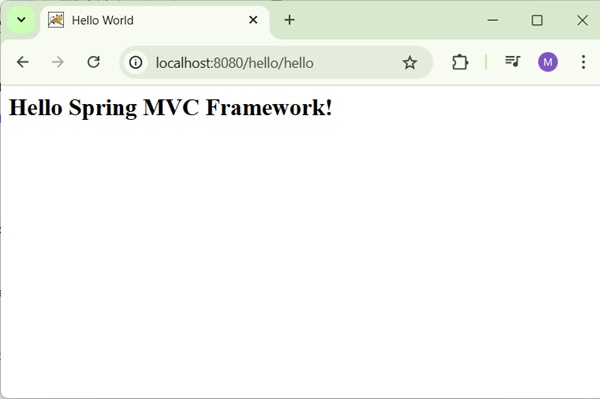
Output
Once you are done with creating source and configuration files, export your application. Right click on your application, use Run As → Maven Install option and save your hello.war file in Tomcat's webapps folder.
Now, start your Tomcat server and make sure you are able to access other webpages from the webapps folder using a standard browser. Try to access the URL http://localhost:8080/hello/hello and if everything is fine with the Spring Web Application, we will see the following screen.