- Spring Boot - Home
- Spring Boot - Introduction
- Spring Boot - Quick Start using CLI
- Spring Boot - Bootstrapping
- Spring Tool Suite
- Spring Boot - Tomcat Deployment
- Spring Boot - Build Systems
- Spring Boot - Code Structure
- Spring Boot - Beans & Dependency Injection
- Spring Boot - Runners
- Spring Boot - Starters
- Spring Boot - Application Properties
- Spring Boot - Configuration
- Spring Boot - Annotations
- Spring Boot - Logging
- Building RESTful Web Services
- Spring Boot - Exception Handling
- Spring Boot - Interceptor
- Spring Boot - Servlet Filter
- Spring Boot - Tomcat Port Number
- Spring Boot - Rest Template
- Spring Boot - File Handling
- Spring Boot - Service Components
- Spring Boot - Thymeleaf
- Consuming RESTful Web Services
- Spring Boot - CORS Support
- Spring Boot - Internationalization
- Spring Boot - Scheduling
- Spring Boot - Enabling HTTPS
- Spring Boot - Eureka Server
- Service Registration with Eureka
- Gateway Proxy Server and Routing
- Spring Cloud Configuration Server
- Spring Cloud Configuration Client
- Spring Boot - Actuator
- Spring Boot - Admin Server
- Spring Boot - Admin Client
- Spring Boot - Enabling Swagger2
- Spring Boot - Using SpringDoc OpenAPI
- Spring Boot - Creating Docker Image
- Tracing Micro Service Logs
- Spring Boot - Flyway Database
- Spring Boot - Sending Email
- Spring Boot - Hystrix
- Spring Boot - Web Socket
- Spring Boot - Batch Service
- Spring Boot - Apache Kafka
- Spring Boot - Twilio
- Spring Boot - Unit Testing
- Rest Controller Unit Testing
- Spring Boot - Database Handling
- Securing Web Applications
- Spring Boot - OAuth2 with JWT
- Spring Boot - Google Cloud Platform
- Spring Boot - Google OAuth2 Sign-In
Spring Boot Resources
Spring Boot - Actuator
Spring Boot Actuator provides secured endpoints for monitoring and managing your Spring Boot application. By default, all actuator endpoints are secured. In this chapter, you will learn in detail about how to enable Spring Boot actuator to your application.
Enabling Spring Boot Actuator
To enable Spring Boot actuator endpoints to your Spring Boot application, we need to add the Spring Boot Starter actuator dependency in our build configuration file.
Maven users can add the below dependency in your pom.xml file.
<dependency>
   <groupId>org.springframework.boot</groupId>
   <artifactId>spring-boot-starter-actuator</artifactId>
</dependency>
Gradle users can add the below dependency in your build.gradle file.
compile group: 'org.springframework.boot', name: 'spring-boot-starter-actuator'
In the application.properties file, we need to disable the security for actuator endpoints.
management.security.enabled = false
YAML file users can add the following property in your application.yml file.
management:
   security:
      enabled: false
If you want to use the separate port number for accessing the Spring boot actutator endpoints add the management port number in application.properties file.
management.port = 9000
YAML file users can add the following property in your application.yml file.
management:
   port: 9000
Output
Now, you can create an executable JAR file, and run the Spring Boot application by using the following Maven or Gradle commands.
For Maven, you can use the following command −
mvn clean install
After BUILD SUCCESS, you can find the JAR file under the target directory.
For Gradle, you can use the following command −
gradle clean build
After BUILD SUCCESSFUL, you can find the JAR file under the build/libs directory.
Now, you can run the JAR file by using the following command −
java jar <JARFILE>
Now, the application has started on the Tomcat port 8080. Note that if you specified the management port number, then same application is running on two different port numbers.
  .   ____          _            __ _ _
 /\\ / ___'_ __ _ _(_)_ __  __ _ \ \ \ \
( ( )\___ | '_ | '_| | '_ \/ _` | \ \ \ \
 \\/  ___)| |_)| | | | | || (_| |  ) ) ) )
  '  |____| .__|_| |_|_| |_\__, | / / / /
 =========|_|==============|___/=/_/_/_/

 :: Spring Boot ::                (v3.5.6)

[2025-09-29T16:15:38Z] [org.springframework.boot.StartupInfoLogger] [main] [53] [INFO ] Starting DemoApplication using Java 21.0.6 with PID 15076 (D:\Projects\demo\target\classes started by mahes in D:\Projects\demo)
[2025-09-29T16:15:38Z] [org.springframework.boot.SpringApplication] [main] [652] [INFO ] No active profile set, falling back to 1 default profile: "default"
[2025-09-29T16:15:39Z] [org.springframework.boot.web.embedded.tomcat.TomcatWebServer] [main] [111] [INFO ] Tomcat initialized with port 8080 (http)
[2025-09-29T16:15:39Z] [org.apache.juli.logging.DirectJDKLog] [main] [168] [INFO ] Initializing ProtocolHandler ["http-nio-8080"]
[2025-09-29T16:15:39Z] [org.apache.juli.logging.DirectJDKLog] [main] [168] [INFO ] Starting service [Tomcat]
[2025-09-29T16:15:39Z] [org.apache.juli.logging.DirectJDKLog] [main] [168] [INFO ] Starting Servlet engine: [Apache Tomcat/10.1.46]
[2025-09-29T16:15:39Z] [org.apache.juli.logging.DirectJDKLog] [main] [168] [INFO ] Initializing Spring embedded WebApplicationContext
[2025-09-29T16:15:39Z] [org.springframework.boot.web.servlet.context.ServletWebServerApplicationContext] [main] [301] [INFO ] Root WebApplicationContext: initialization completed in 1563 ms
[2025-09-29T16:15:40Z] [org.springframework.boot.autoconfigure.web.servlet.WelcomePageHandlerMapping] [main] [59] [INFO ] Adding welcome page template: index
[2025-09-29T16:15:40Z] [org.springframework.boot.actuate.endpoint.web.EndpointLinksResolver] [main] [60] [INFO ] Exposing 1 endpoint beneath base path '/actuator'
[2025-09-29T16:15:40Z] [org.apache.juli.logging.DirectJDKLog] [main] [168] [INFO ] Starting ProtocolHandler ["http-nio-8080"]
[2025-09-29T16:15:40Z] [org.springframework.boot.web.embedded.tomcat.TomcatWebServer] [main] [243] [INFO ] Tomcat started on port 8080 (http) with context path '/'
[2025-09-29T16:15:40Z] [org.springframework.boot.StartupInfoLogger] [main] [59] [INFO ] Started DemoApplication in 3.11 seconds (process running for 3.636)
[2025-09-29T16:15:53Z] [org.apache.juli.logging.DirectJDKLog] [http-nio-8080-exec-1] [168] [INFO ] Initializing Spring DispatcherServlet 'dispatcherServlet'
[2025-09-29T16:15:53Z] [org.springframework.web.servlet.FrameworkServlet] [http-nio-8080-exec-1] [532] [INFO ] Initializing Servlet 'dispatcherServlet'
[2025-09-29T16:15:53Z] [org.springframework.web.servlet.FrameworkServlet] [http-nio-8080-exec-1] [554] [INFO ] Completed initialization in 4 ms
Some important Spring Boot Actuator endpoints are given below. You can enter them in your web browser and monitor your application behavior.
| ENDPOINTS | USAGE |
|---|---|
| /metrics | To view the application metrics such as memory used, memory free, threads, classes, system uptime etc. |
| /env | To view the list of Environment variables used in the application. |
| /beans | To view the Spring beans and its types, scopes and dependency. |
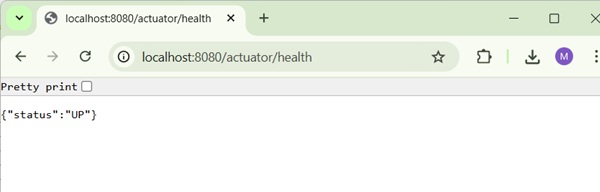
| /health | To view the application health |
| /info | To view the information about the Spring Boot application. |
| /trace | To view the list of Traces of your Rest endpoints. |
Open http://localhost:8080/actuator/health to check the status of the application as running or stopped.