
Article Categories
- All Categories
-
 Data Structure
-
 Networking
-
 RDBMS
RDBMS
-
 Operating System
-
 Java
Java
-
 MS Excel
-
 iOS
iOS
-
 HTML
HTML
-
 CSS
CSS
-
 Android
-
 Python
-
 C Programming
-
 C++
C++
-
 C#
C#
-
 MongoDB
-
 MySQL
MySQL
-
 Javascript
-
 PHP
PHP
-
 Economics & Finance
How does spring boot connect localhost MySQL
For this, use application.properties −
spring.datasource.username=yourMySQLUserName
spring.datasource.password=yourMySQLPassword
spring.datasource.url=jdbc:mysql://localhost:3306/yoruDatabaseName
spring.datasource.driver-class-name=com.mysql.cj.jdbc.Driver
To understand the above syntax, let us create a table −
mysql> create table demo71
−> (
−> id int,
−> name varchar(20)
−> );
Query OK, 0 rows affected (3.81 sec)
Insert some records into the table with the help of insert command −
mysql> insert into demo71 values(100,'John');
Query OK, 1 row affected (0.13 sec)

mysql> insert into demo71 values(101,'David');
Query OK, 1 row affected (0.49 sec)

mysql> insert into demo71 values(102,'Bob');
Query OK, 1 row affected (0.15 sec)
Display records from the table using select statement −
mysql> select *from demo71;
This will produce the following output −
+------+-------+
| id   | name  |
+------+-------+
| 100  | John  |
| 101  | David |
| 102  | Bob  |
+------+-------+
3 rows in set (0.00 sec)
To verify the above application.properties is working with local MySQL or not, you can write spring boot application to test.
Following is the application.properties file.

Following is the controller class code. The code is as follows −
package com.demo.controller;
import java.util.Iterator;
import java.util.List;
import javax.persistence.EntityManager;
import javax.persistence.Query;
import org.springframework.beans.factory.annotation.Autowired;
import org.springframework.web.bind.annotation.GetMapping;
import org.springframework.web.bind.annotation.RequestMapping;
import org.springframework.web.bind.annotation.ResponseBody;
import org.springframework.web.bind.annotation.RestController;
@RestController
@RequestMapping("/table")
public class TableController {
   @Autowired
   EntityManager entityManager;
   @ResponseBody
   @GetMapping("/demo71")
   public String getData() {
      Query sqlQuery= entityManager.createNativeQuery("select name from demo71");
      List<String> result= sqlQuery.getResultList();
      StringBuilder sb=new StringBuilder();
      Iterator itr= result.iterator();
      while(itr.hasNext()) {
         sb.append(itr.next()+" ");
      }
      return sb.toString();
   }
}
Following is the main class. The Java code is as follows −
package com.demo;
import org.springframework.boot.SpringApplication;
import org.springframework.boot.autoconfigure.SpringBootApplication;
@SpringBootApplication
public class JavaMysqlDemoApplication {
   public static void main(String[] args) {
      SpringApplication.run(JavaMysqlDemoApplication.class, args);
   }
}
To run the above, go to the main class and right click and select “Run as Java Application”.After successfully executing, you need to hit below url.
The url is as follows −
http://localhost:8093/table/demo71
This will produce the following output −
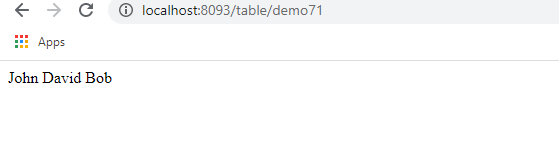

2K+ Views
