- Snowflake - Home
- Snowflake - Introduction
- Snowflake - Data Architecture
- Snowflake - Functional Architecture
- Snowflake - How to Access
- Snowflake - Editions
- Snowflake - Pricing Model
- Snowflake - Objects
- Snowflake - Table and View Types
- Snowflake - Login
- Snowflake - Warehouse
- Snowflake - Database
- Snowflake - Schema
- Snowflake - Table & Columns
- Snowflake - Load Data From Files
- Snowflake - Sample Useful Queries
- Snowflake - Monitor Usage and Storage
- Snowflake - Cache
- Unload Data from Snowflake to Local
- External Data Loading (from AWS S3)
- External Data Unloading (Into AWS S3)
- Snowflake Resources
- Snowflake - Quick Guide
- Snowflake - Useful Resources
- Snowflake - Discussion
Snowflake - Warehouse
As Warehouse is important for computing. Let's discuss about how to create warehouse, alter it and view details of warehouse.
Snowflake provides two ways to create/modify/view warehouses first way is UI and the another one is SQL statements.
Working on Warehouses using Snowflake's UI
Let's start with creating a warehouse −
Create Warehouse
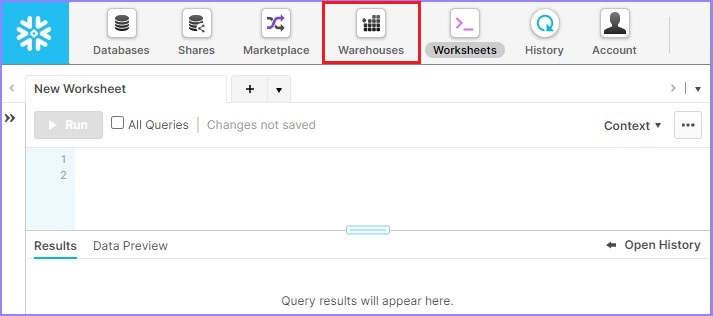
Login into Snowflake using unique URL. Click Warehouses present at top ribbon as shown in the following screenshot −
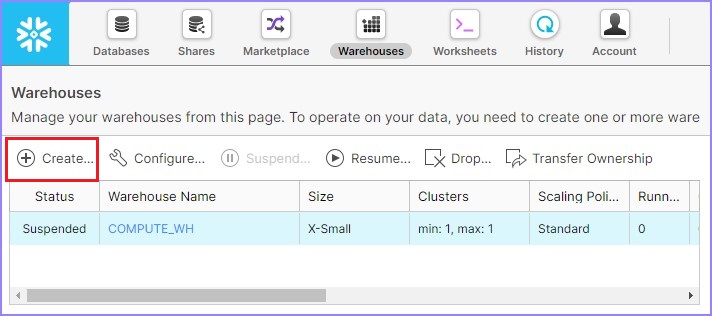
It navigates to the next screen. Click Create above the list of warehouses as shown in the below.
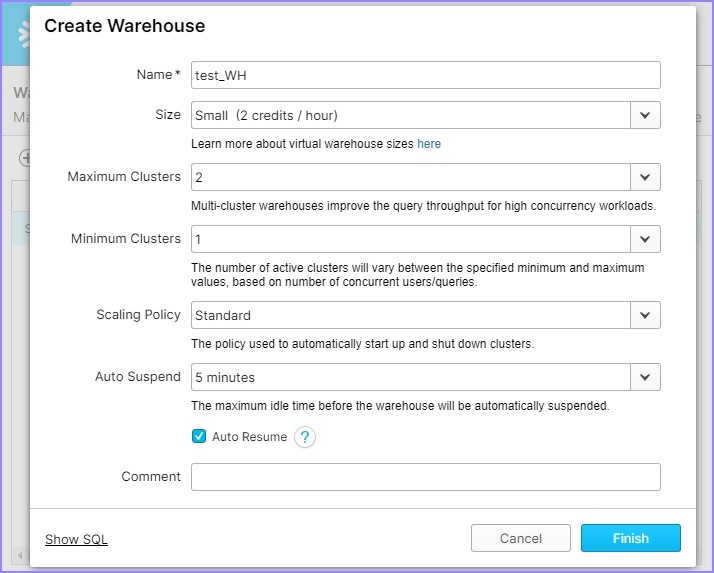
It opens the Create warehouse dialog box. The following fields should be entered to create a warehouse.
- Name − test_WH
- Size − Small
- Set Auto-Suspend to 5 minutes
Then click the Finish button.
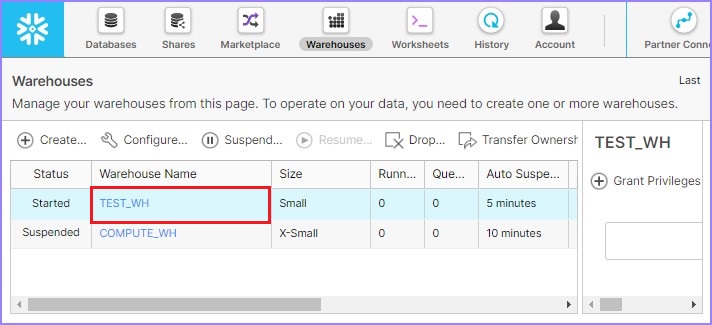
Once the warehouse is created, user can view in the list as shown in the following screenshot −
Edit/Modify/Alter Warehouse
Snowflake provides the facility to modify or alter the Warehouses based on the requirements. For example, after creation and usage, user can update warehouse size, clusters, suspension time.
Click the Warehouse button present at the top ribbon. It displays the warehouse page details. Select the warehouse that requires to be altered from the list of warehouses. Click Configure as shown in the following screenshot −
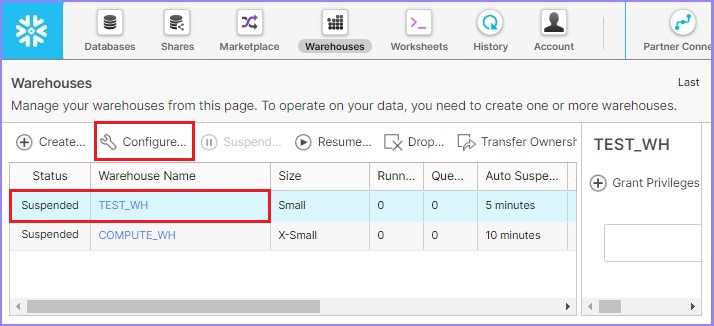
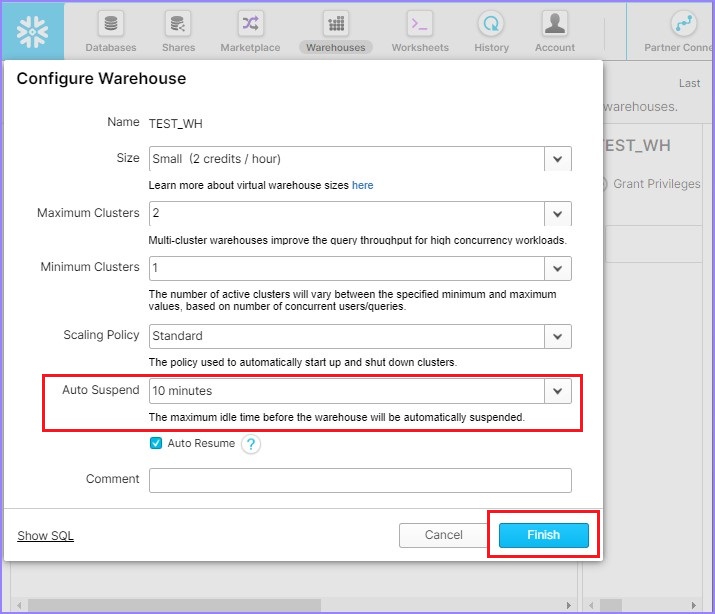
It pop ups the Configure Warehouse dialog box. Users can modify all details other than Name. Update the auto suspend time from 5 minutes to 10 minutes. Click the Finish button as shown in the following screenshot.
As the users clicks the Finish button, they will be able to see the updated details in the view panel.
View Warehouse
Click the Warehouses button present at top ribbon. It displays the View panel of warehouses where all the created warehouses are present.
Use the Create button for creating a new warehouse.
Use the Configure button for altering/modifying an existing warehouse.
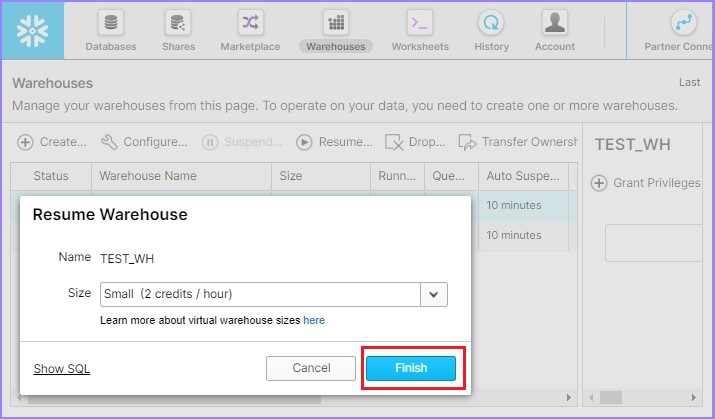
Use the Resume button to activate the selected warehouse, if it is in suspended mode.
The following screenshot demonstrates how you can Resume a warehouse which is in suspended mode −

After clicking the Resume button, its pops up a dialog box. Click on the Finish button there as shown in the following screenshot −
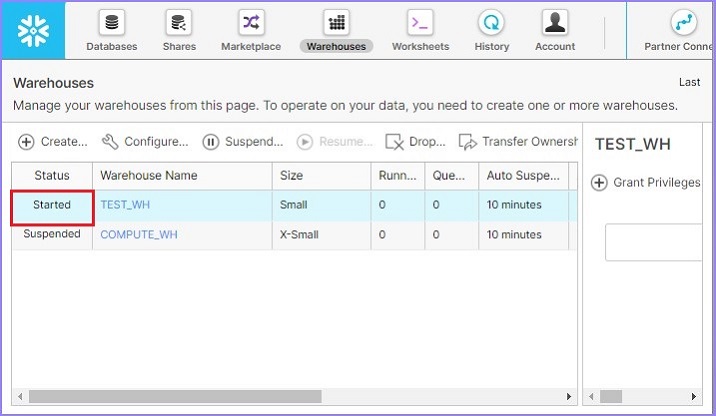
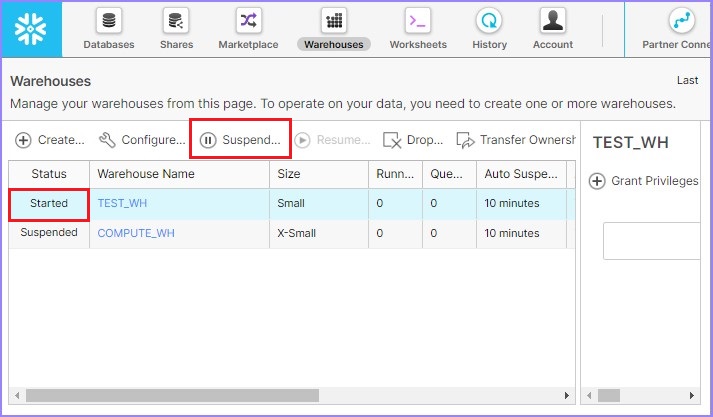
Now the user can see the warehouse is started as shown in the following screenshot −
Similarly, user can suspend a warehouse immediately using the Suspend button. This button enables if any of your warehouses are in Started mode. Select the warehouse to suspend and click the Suspend button. It pops up a dialog box, click Yes to suspend, else No.
The following screenshot displays the suspend functionality −
User can delete a warehouse as well, by selecting a warehouse and by clicking the Drop button as shown in the following screenshot −
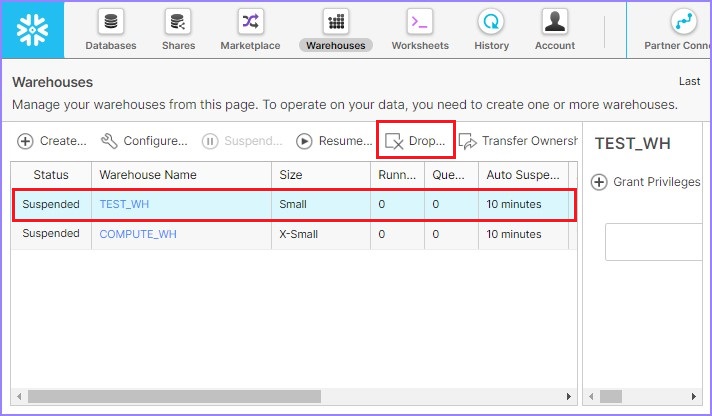
It pops up a dialog box for confirmation. Click Yes for deletion, else No.
Working on Warehouses using Snowflake's SQL Interface
Now let's check how to work with warehouses using Snowflake's SQL Interface.
Create Warehouse
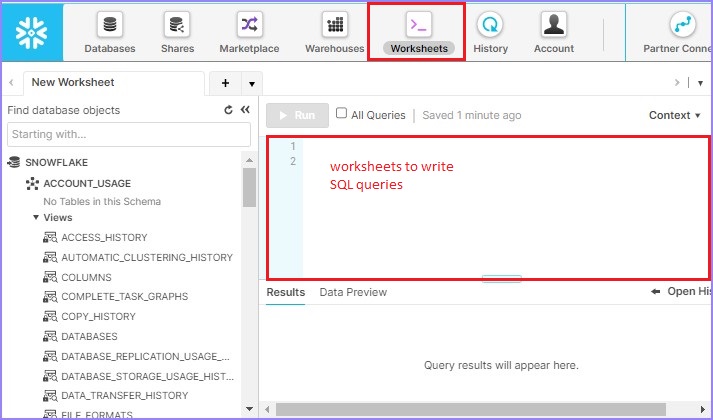
Login into Snowflake and navigate to Worksheets. By default, Worksheet is opened once the user logs in, else click the Worksheets present at the top ribbon as shown in the following screenshot.
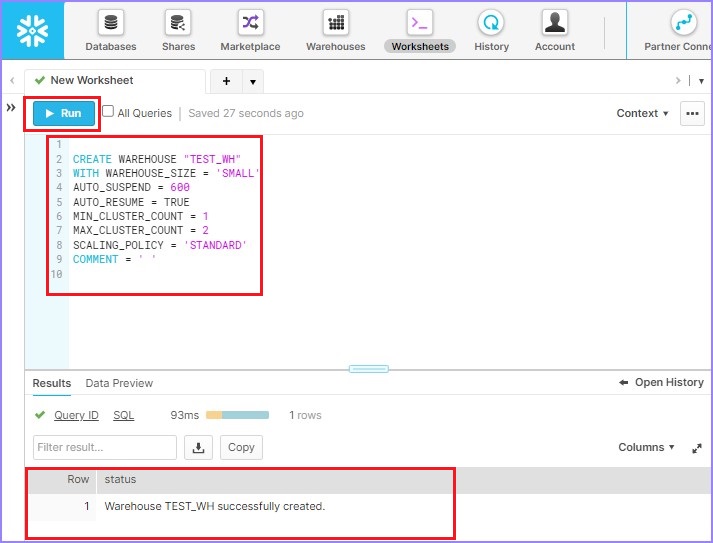
Use the following query to create a warehouse TEST_WH −
CREATE WAREHOUSE "TEST_WH"
WITH WAREHOUSE_SIZE = 'SMALL'
AUTO_SUSPEND = 600
AUTO_RESUME = TRUE
MIN_CLUSTER_COUNT = 1
MAX_CLUSTER_COUNT = 2
SCALING_POLICY = 'STANDARD'
COMMENT = ' '
Click Run to execute the query. Result will be displayed in Results panel as the warehouse "TEST_WH" was successfully created.
The following screenshot displays the output processed by using SQL −
Edit/Modify/Alter Warehouse
To alter/modify the warehouse, use the following query and run it −
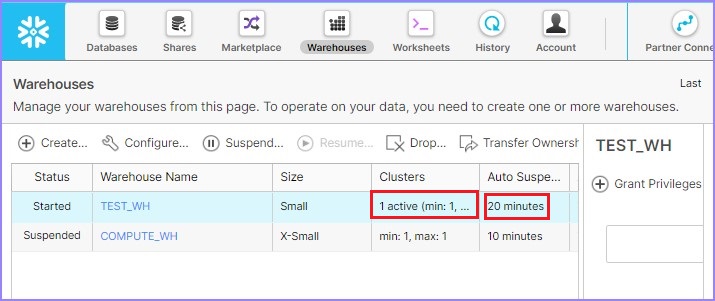
ALTER WAREHOUSE "TEST_WH"
SET WAREHOUSE_SIZE = 'SMALL'
AUTO_SUSPEND = 1200
AUTO_RESUME = TRUE
MIN_CLUSTER_COUNT = 1
MAX_CLUSTER_COUNT = 1
SCALING_POLICY = 'STANDARD'
COMMENT = ' '
User can go to the View panel and verify the updated details as shown below −
View Warehouses
To view all listed warehouses, user can use following SQL. It brings details of all listed warehouses.
SHOW WAREHOUSES
To suspend a warehouse, use following SQL −
ALTER WAREHOUSE TEST_WH SUSPEND
To resume a warehouse, use following SQL −
ALTER WAREHOUSE "TEST_WH" RESUME If SUSPENDED
To delete a warehouse, use the following SQL −
DROP WAREHOUSE "TEST_WH"
