- SAP Business Workflow - Home
- Introduction
- Challenges
- Benefits/Features
- Layers
- Architecture
- Linking Process, Business Logic & People
- Business Object
- Start & Termination
- Condition Editor
- Administration
- Event Manager Administration
- Workflows With Errors
- Workflow Configuration
- Workflow Builder
- Import/Export
- Creating Steps
- Business Object Builder
- Abap Classes
- Extended Notifications
- Notifications Configuration
- Integration With Non-Sap Workflow Apps
- Universal Worklist
- Creating Workflows
- Archiving Workitems
- Using Swi2_Diag Diagnosis
- Using The Event Trace
- Transactions
- Function Modules
- Job Responsibilities
SAP Business - Creating Workflows
You can create your workflows in SAP system to automate the business processes that contains sequence of tasks, steps, and events. When you automate tasks using the workflow, this helps the user to easily take action without facing technical/functional difficulties. You can set notifications in the user SAP inbox about pending workitems and with a single click, it calls the correct transaction and navigates to the relevant screen.
Let us see how to create a Workflow, when an employee raises a leave request in the system. Following steps have to be performed −
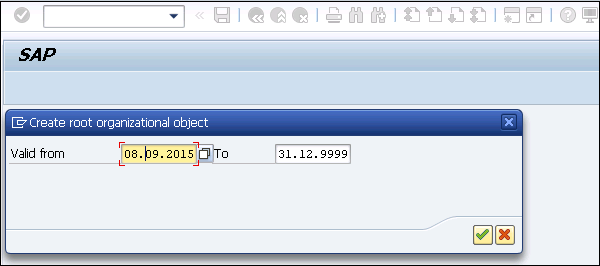
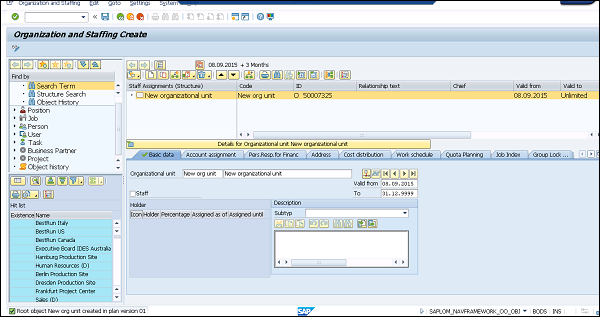
Step 1 − Define Organization Plan T-Code PPOCE
This transaction is the easiest way to define an organization plan in SAP system. You need to enter the start date of Organization unit → click the Green tick mark as shown in the following screenshot.
Step 2 − Create a Workflow template T-Code PFTC_INS
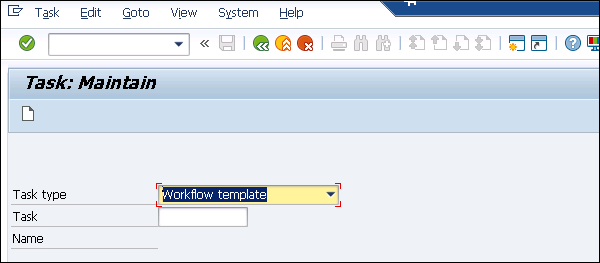
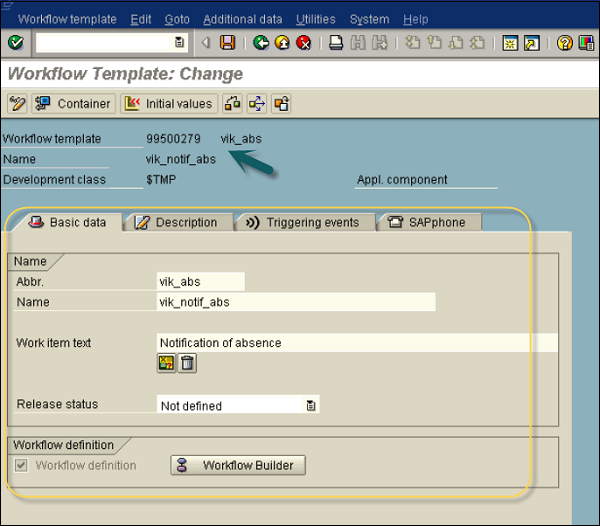
In the Task type field, choose the Workflow template. For Creating tasks: Choose Standard Task in the Task type field as shown above and click Create.
Now to build the workflow in the workflow builder, navigate to T-Code: SWDD
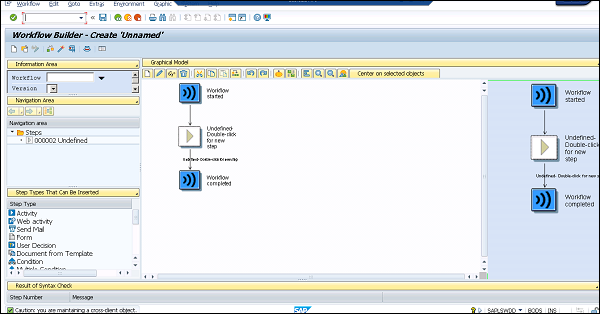
In the Workflow Builder, you have different options called Step types, you can drag and drop and insert into the Workflow.
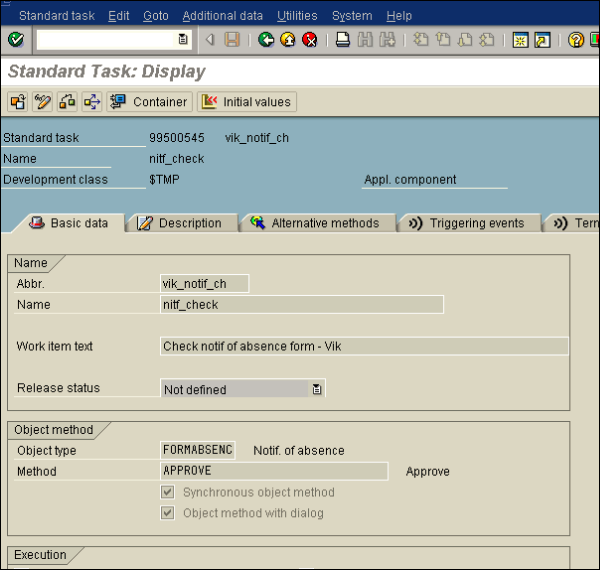
Step 3 − Create a notification of absence.
To define the first task, navigate to T-Code: PFTC_INS
Select Standard Task in the Task type field.
Enter the following values and Save the task. Once you save the task, you will get code ID in number 93XXX989
- In the Name field, select Form_created
- In Abbr, select create_form
- In Workitem text, select vik_notif_absence-create
- In Object Type, select FORMABSENC
- In Method field, select CREATE
- Checkbox Synchronous object method, Object method with dialog checked
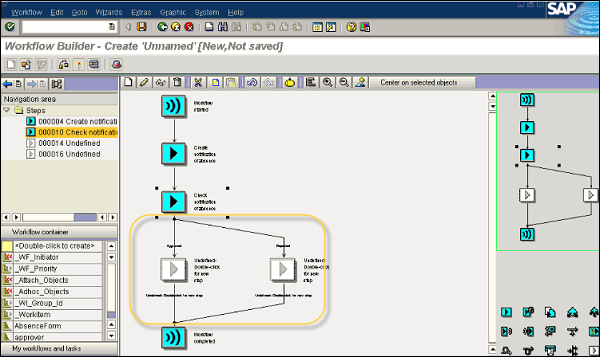
Step 4 − Add the task created in the previous step to the Workflow.
In place of the undefined step in the Workflow, you have to add an activity to your workflow.
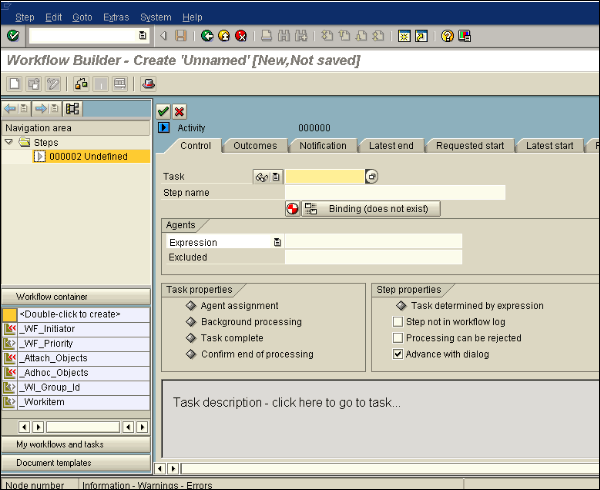
As seen in the following screenshot, using T-Code: PFTC_INS, a Task TS99500654 has been created separately.
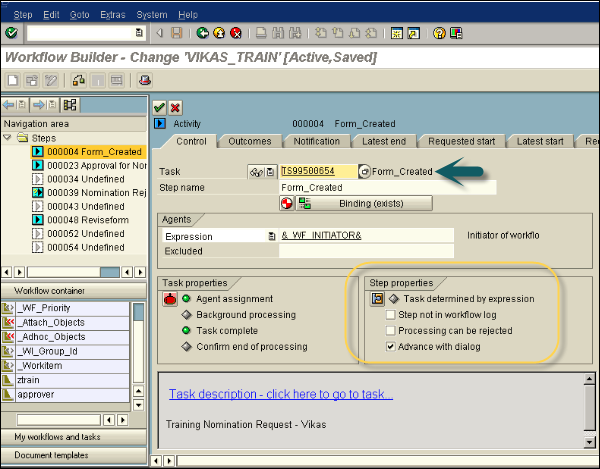
In Step Properties, you can select different options as per the requirement. Here, let us select the checkbox - Advance with dialog as shown in the above screenshot. It shows that the workitem of the workflow is made available for processing immediately. As we have entered WF_INITIATOR in Expression under Agents, the person who will start the workflow is one of the recipients of workitem. Binding option is also defined that confirms absence notification is not only in this task but also in the workflow - _WI_ObjectId → &ABSENCEFORM&.
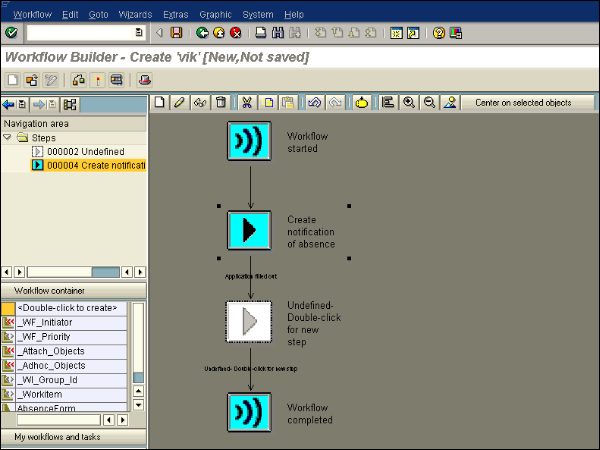
Now the Workflow Builder in graphical mode looks like this −
Step 5 − First task in SAP Inbox.
Now the workflow is executed, it creates workitems such as e-mails in the SAP Inbox. When it is executed, it calls the respective task or the transaction screen. When you run this workflow, it shows the notification of absence form.
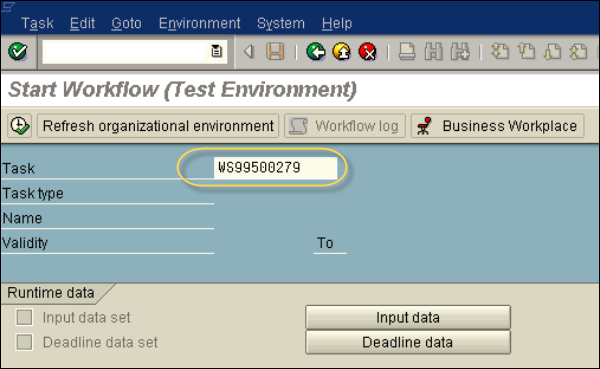
Click Cancel to cancel the processing of the first notification. The workflow inbox holds one item for processing - creating a notification of absence. Select the workitem and click Execute (F8). This will return to Create notification of absence screen where the notification of absence form is displayed. Enter the details in the form and click Save. This will remove the Workitem from the inbox.
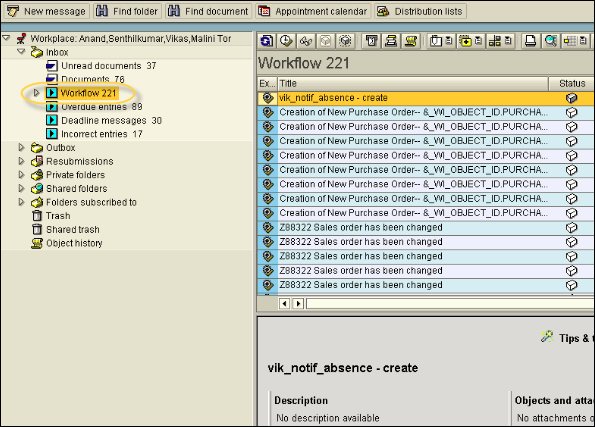
Step 6 − Check Notification of absence in the inbox.
The form that has been created will be sent to the supervisor for approval using the object formabsenc-approve object. Next is to create a new task using T-Code: PFTC_INS
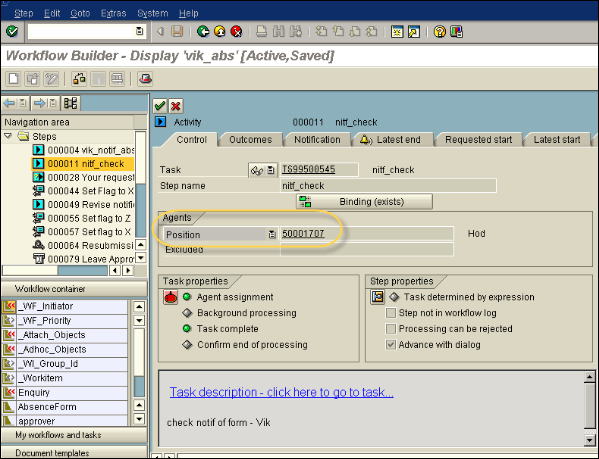
Step 7 − Add a second task in the Workflow.
You have to include Task Check Notification of Absence in the Workflow using the task code generated in the previous step.
Also, define the binding properties as shown in the following screenshot.
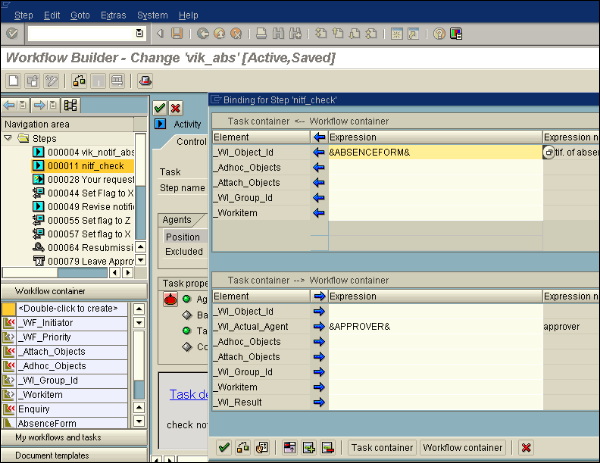
You have to create the Approver variable in the workflow container. Navigate to the left side menu at the bottom, you will see a menu option Workflow container. Double-click the option to create.
Enter the following fields −
- Element − Approver
- Name − Approver
- Description − Approver of the absence request
- Reference table − WFSYST
- Reference field − AGENT
In the Position field, you have to enter the position ID as per the organization plan. This can be checked using T-Code: PPOCE. Dont prefix S in the text field.
If an approver has not made a decision about Leave request, you can also add deadlines to add a workitem for the missed deadline in Approvers Business Workplace.
You can see two outcomes in the workflow builder: Approved and Rejected.
Step 8 − Again test in the Inbox.
Next is to execute the workflow and you will be moved to the workitem for creating notification of absence for processing. This is because of Advancing with immediate dialog option selected at the time of creating a task.
Now, navigate to Business Workplace using the user-id of the approver and you will see the workitem to process and other attributes to mention in the Workitem. Select the workitem for checking the notification of absence and choose Execute.
Either reject or approve the request. Notice the two buttons: Approve and Reject.
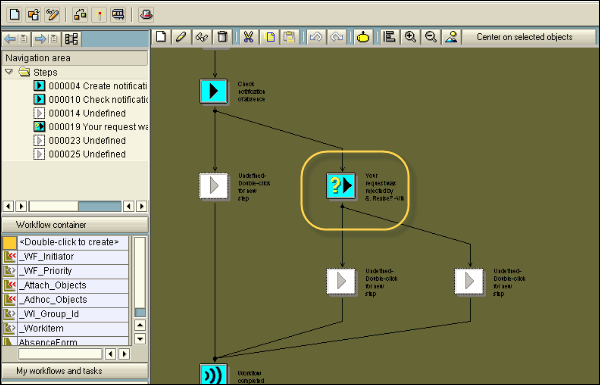
Step 9 − Integrate User Decision for resubmit.
In case, the leave request is rejected by the approver, you also have an option to add user decision to the rejected output. This allows the requester to make changes and resubmit the request for approval.
You need to add Step type: User Decision to the workflow. This will make your Workflow look like the following −
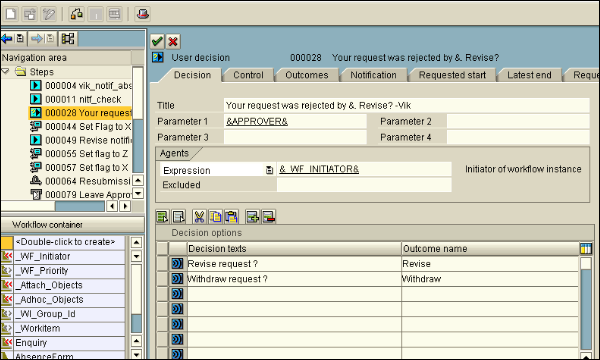
User Decision step is defined as follows −
Step 10 − Third Test in SAP Inbox.
When the request is not approved, the next Step is user decision. As we have entered: (&WF_INITIATOR&) as the agent for the step, the request will come back to make the decision. You have two options Revise request or withdraw the request.
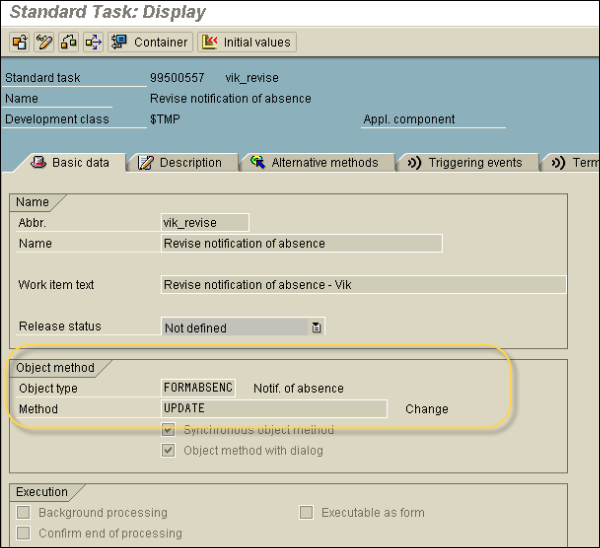
Step 11 − Define revise notification of absence
For this, you have to add undefined step - Revise notification.
Step 12 − Add activity → third task to the workflow.
To add this step, you have to make the following entries −
Use FORMABSENC-UPDATE as an object.
In the binding option, enter _WI_Object_ID <= &ABSENCEFORM&
In the Agents → add &_WF_INITIATOR& in the expression field
Step 13 − Send Notification for approval of leave.
To send a notification, you have to add a new step Send mail. You have to drag this step to the Undefined Step - after the outcome of the step Check notification of absence.
To add this step, you have to make the following entries −
Select the Recipient type − Enter the Organizational object
Select Agents → Choose the Expression &_WF_INITIATOR&.
Enter the subject line as <Leave Approved>
Enter the email text as <Approved>
When you hit the Enter button, you will be asked for the name and abbreviation of the task.
