- SAP BEx - Home
- SAP BEx - Overview
- SAP BEx - Architecture
- SAP BEx - Query Designer
- SAP BEx - Query Designer Features
- SAP BEx - Web
- SAP BEx - Web Integration
- SAP BEx - Analyzer
- SAP BEx - Analysis Functions
- SAP BEx - Objects
- SAP BEx - Accessibility Mode
- SAP BEx - Information Broadcasting
- SAP BEx - Integration With BO
SAP BEx - Web
In this chapter, we will discuss in detail about BEx Web and understand its functions. We will also learn how to use the Web Application Designer. In addition, we will learn how to do the Analysis and Reporting along with creating a Web Application and the various BEx Web Analyzer options.
Business Explorer Web Application Designer
Web Application Designer (WAD) is a tool under SAP Business Explorer which can be used to develop web applications based on BW content like Charts, Maps and Tables. Applications that are developed using the WAD can be saved as web templates and they are referred as Web Applications when called from the web browser.
These web templates can be edited in the Web Application Designer for any changes. The web templates are HTML pages which can be designed to meet individual requirement based on the standard markup language and Web Design API.
To open the Web Application Designer, you should navigate to Business Explorer folder → Web Application Designer.
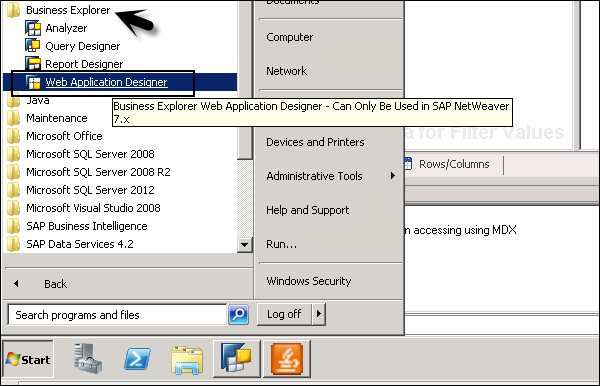
When you click on the Web Application Designer, you need to pass the details of the BW System −
- Client
- User Name
- Password
- Language
The BEx Web Application Designer (WAD) consists of the four screens that provides different functions to develop various web applications −
- Web Items Screen Area
- Web Template Screen Area
- Properties Screen Area
- Error and Warnings Screen Area
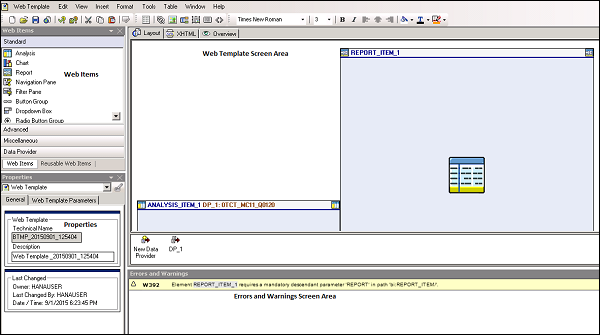
Web Items Screen Area
The web item screen provides the list of web items that can be used to develop web applications. You can define how data from a data provider is displayed in aweb application.
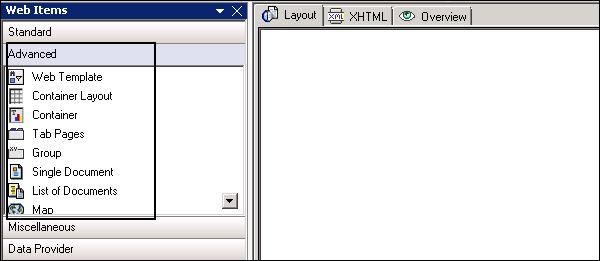
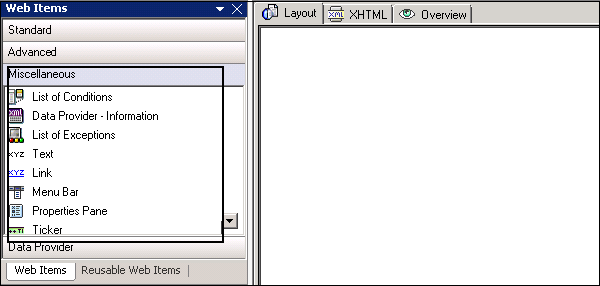
The Web Item screen is divided into different sections −
- Web-Item Grouping: Standard
- Web-Item Grouping: Advanced
- Web-Item Grouping: Miscellaneous

Under the Web Items Standard option, you can use the following item types −
- Analysis
- Chart
- Report
- Navigation area
- Filter area
- Button group
- Dropdown box
- Radio button groups
- Checkbox group
- List box
- Hierarchical filter selection
Under the Web Items Advance option, you can use the following item types −
- Web Template
- Container Layout
- Container
- Tab Pages
- Group
- Single Document
- Document List
- Map
- System Messages
- Information Field
- Input Field
Under the web items miscellaneous option, you can use the following item types −
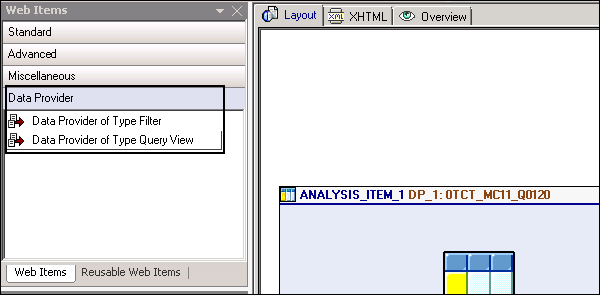
- Data Provider - Information
- Text
- Link
- List of Exceptions
- List of Conditions
- Menu Bar
- Properties Pane
- Ticker
- Context Menu
- Script
- Custom Enhancement
- Page Break
The Data Provider section can be used to create data providers of type Filter or of type Query View. To add a data provider, you can drag the required data provider type into your Web template.
Web Template Screen Area
This area contains web templates that you add to the web application. A web template is known as the HTML page that can be used to specify the structure of a web application.
In the Web Template screen area, you have three different tabs at the top −
- Layout tab
- XHTML tab
- Overview tab
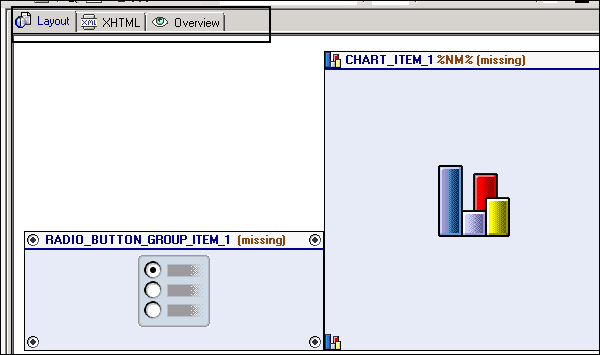
Layout tab − This tab is used to design the visual focus of a web template. You can drag and drop the items from the web item section into the web template.
XHTML tab page − This tab is used to view XHTML w.r.t the layout view of web items added to template. Each component in the XHTML code has different color.
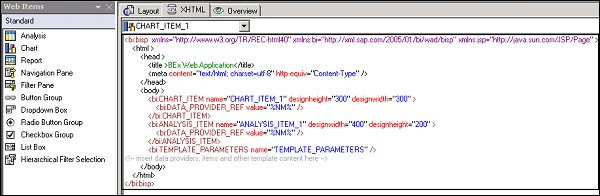
- Comments: Gray
- Attributes: Red
- Attribute values: Blue
- HTML tags: Black
- Web items, Commands, Data Providers: Dark red
- Texts: Green
- Hyperlinks: Violet
<bi:bisp  xmlns = "http://www.w3.org/TR/REC-html40"
   xmlns:bi = "http://xml.sap.com/2005/01/bi/wad/bisp" xmlns:jsp="http://java.sun.com/JSP/Page" >
   <html>
      <head>
         <title >BEx Web Application</title>
         <meta content = "text/html; charset = utf-8" http-equiv = "Content-Type" />
      </head>

      <body>
         <bi:CHART_ITEM name = "CHART_ITEM_1" designheight = "300" designwidth = "300" >
            <bi:DATA_PROVIDER_REF value = "%NM%" />
         </bi:CHART_ITEM>

         <bi:ANALYSIS_ITEM name = "ANALYSIS_ITEM_1" designwidth = "400" designheight = "200" >
            <bi:DATA_PROVIDER_REF value = "%NM%" />
         </bi:ANALYSIS_ITEM>

         <bi:TEMPLATE_PARAMETERS name = "TEMPLATE_PARAMETERS" />
         <!-- insert data providers, items and other template content here -->
      </body>
   </html>
</bi:bisp>
You can make changes to the XHTML of a web template and they are reflected directly in the Layout tab. In the above program, you can see the XHTML code of the web items added to the Web template.
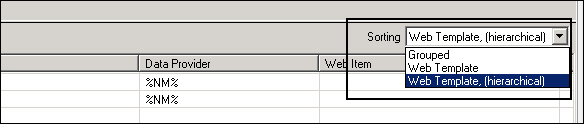
Overview − In overview tab, you can see all data providers, web items and commands. To display any of these field, you can select check box.

You can also select different sort order for each object −
Grouped − Using this, you can list the objects used by type: Data Providers, Web Items and Commands.
Web Template − Using this sort order, sequence of objects used in the web templates are displayed as a flat structure.
Web Template Hierarchical − The web template sequence is displayed in the form of the hierarchical structure.
Property Screen Area
This area is used to define properties of web items and web templates.
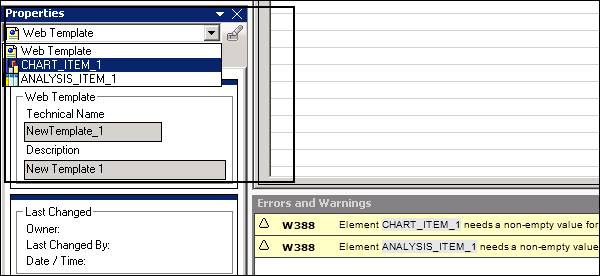
From the drop down list, you can select the web template or the individual web item. Under Properties, when you select a Web template from the dropdown box this allows you to set the parameters for web template.
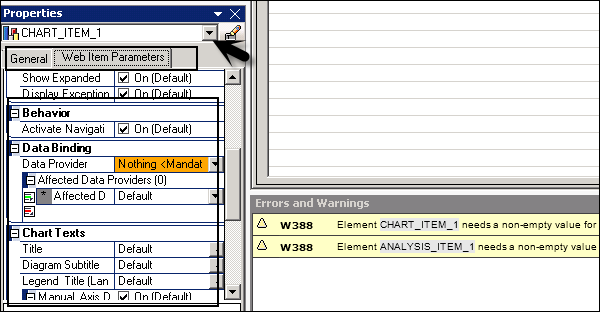
When you select a web item from the drop down list, the following settings can be done −
General Tab Page − This option allows you to create a new data provider for the web item and assign it to web item of your web template.
Web Item Parameter Tab Page − This option is used to select parameter for selected web item. You can set different parameters for a web item related to display, internal display, data binding, chart text, etc.
Error and Warning Screen Area
This option is used to view errors and warnings when you validate a web template in WAD.

Business Explorer Analysis and Reporting
Using BEx Web applications you can perform data analysis and reporting on the BW Content. To perform reporting and analysis, you should design the web applications and open it in a web browser.
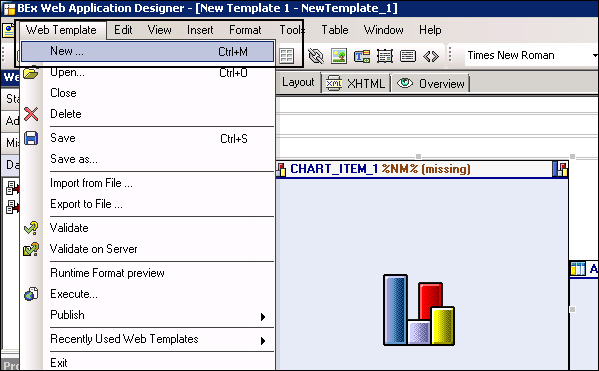
Creating a Web application in WAD
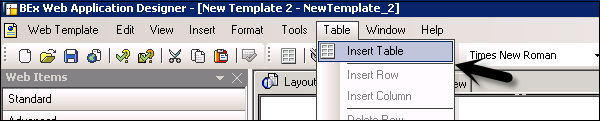
To create a web application in the BEx Web Application Designer, you need to create a new web template. To create a new web template, you can go to Web Template → New.
You can also open a new web template by clicking on the new icon in the Web Application tool bar. The next step is to assign a data provider to the web item. You can assign one data provider to multiple web items.
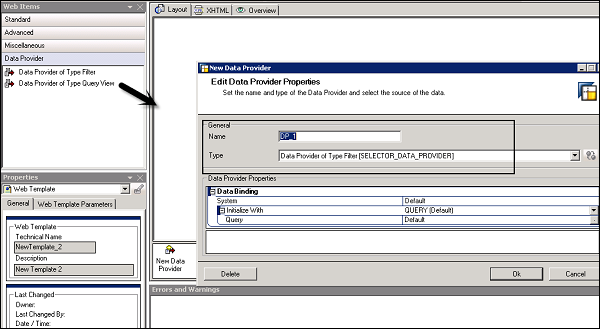
Assigning of Data Provider Using Different Options
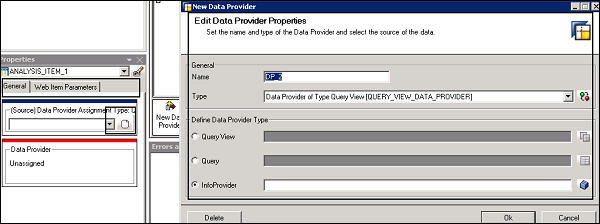
You can use the Data Provider option under the Web Item section. You can select if you want to create a data provider of type Filter or type Query View and drag the corresponding line into the lower data provider section of the Web template screen area. This opens the Data Provider dialog box.
Enter the name of the data provider in the dialog box and make the settings as per the data provider.
To add a web item, you can drag it from the Web Section: Under Standard, Advanced and Miscellaneous. The web item appears in the web template screen area. You can rename a web item by clicking on the Rename web item button under the Properties tab.
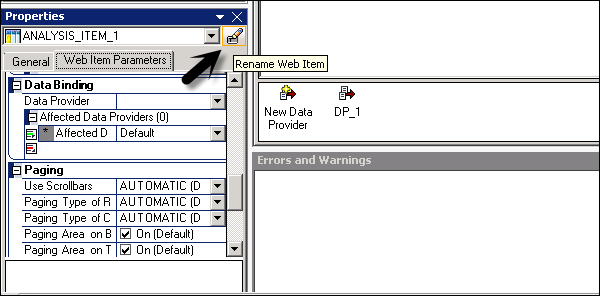
The next step is to navigate to Properties → Select General tab to make or change the assignment of a data provider for the corresponding Web item. The next step is to navigate to Web Item Parameters tab page where you can define the parameters for the web items.
To define the layout, you need to use the Format tab in the tool bar.
Click on the Format tab at the top → Select Align Left in the menu bar of the Web Application Designer that allows you to left justify the Web item.
Click on the Format tab at the top → Select Align Right in the menu bar of the Web Application Designer that allows you to right justify the Web item.
Click on the Format tab at the top → Select Align Center in the menu bar of the Web Application Designer that allows you to center justify the Web item.
You can also drag a web item to the Web template screen area to any position. You can also arrange web items in the HTML table by going to the Table tab.
To arrange the web items, you need to drag different Web items into the individual table cells.

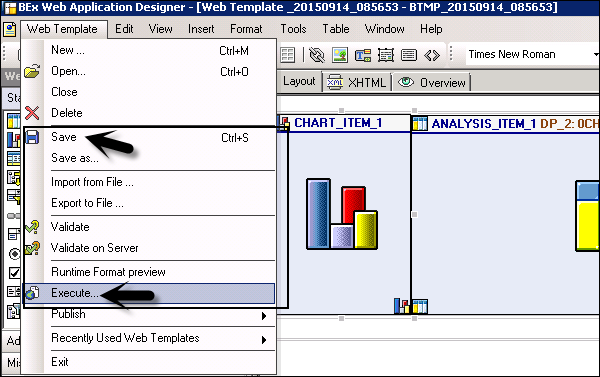
Now to save the web template, navigate to the web template, Select Web Template → Save it in the Web Application Designer menu bar.
To execute the web template, navigate to the Web Template → Execute to view your Web application in the browser. To execute the web template, you need to save the web template.
You can also print the web application by selecting the Print option in the context menu of the executed web application.
Business Explorer BEx Web Analyzer Options
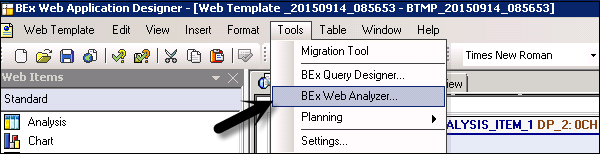
The Web Analyzer is a tool to perform data analysis and can be called using a URL. You can launch the BEx Web Analyzer from the Web Application Designer by navigating to Tools → BEx Web Analyzer.
You can perform the adhoc data analysis and can also use other Web analyzer functions like the broadcasting function that allows you to broadcast the analysis to other users.
In the Web Analyzer, you can also save the data view by selecting the save view option under the context menu.
You have a wide range of functions that are provided under the Web Analyzer which can be used to perform the adhoc analysis −
- Navigation Pane
- Links
- Push Buttons
- Context Menu

In the Web Analyzer, you can see different functions that can be performed at the push of a button. All these functions have been explained in detail −
New Analysis − With the use of the New Analysis push button, you can create a new analysis by selecting a data provider to base your analysis on. For New Analysis, you can select data providers either from a SAP BW system or a non-SAP data provider to be used in the New Analysis.
Open − This option is used to access the saved analysis. You can save your data analysis under the Favorites section to quickly access them.
Save As − You use this option to save the analysis in your portal favorites or inside the BEx portfolio by passing the name of the analysis. Using this option, you can save the type of data display and it can be further accessed during the analysis using the Open button.
Display As − This options allows you to view the saved data analysis in a different format. You specify the type of display using the drop down option. The following options are available under the Display drop down list −
- Table
- Graphic
- Table and Graphic
Information − This button can be used to view the information about the data provider in the analysis.
Send − This option provide broadcasting information for the analysis.
Print Version − This option can be used to make the setting for Print of your data analysis. You can make different selections and click OK and a PDF is generated.
Export to Excel − This push button is used to display the query result to Microsoft Excel. It also shows you to filter restrictions and the exceptions are highlighted.
Comment − This option can be used to add a comment about the data provider in the analysis.
