- MS SQL Server - Home
- MS SQL Server - Overview
- MS SQL Server – Editions
- MS SQL Server – Installation
- MS SQL Server – Architecture
- MS SQL Server – Managment Studio
- MS SQL Server – Login Database
- MS SQL Server - Create Database
- MS SQL Server - Select Database
- MS SQL Server - Drop Database
- MS SQL Server - Creating Backups
- MS SQL Server - Restoring Databases
- MS SQL Server - Create Users
- MS SQL Server - Assign Permissions
- MS SQL Server - Monitor Database
- MS SQL Server - Services
- MS SQL Server - HA Technologies
- MS SQL Server - Reporting services
- MS SQL Server - Execution Plans
- MS SQL Server - Integration Services
- MS SQL Server - Analysis Services
MS SQL Server - Installation
SQL Server supports two types of installation −
- Standalone
- Cluster based
Checks
- Check RDP access for the server.
- Check OS bit, IP, domain of server.
- Check if your account is in admin group to run setup.exe file.
- Software location.
Requirements
- Which version, edition, SP and hotfix if any.
- Service accounts for database engine, agent, SSAS, SSIS, SSRS, if any.
- Named instance name if any.
- Location for binaries, system, user databases.
- Authentication mode.
- Collation setting.
- List of features.
Pre-requisites for 2005
- Setup support files.
- .net framework 2.0.
- SQL Server native client.
Pre-requisites for 2008&2008R2
- Setup support files.
- .net framework 3.5 SP1.
- SQL Server native client.
- Windows installer 4.5/later version.
Pre-requisites for 2012&2014
- Setup support files.
- .net framework 4.0.
- SQL Server native client.
- Windows installer 4.5/later version.
- Windows PowerShell 2.0.
Installation Steps
Step 1 − Download the Evaluation Edition from https://www.microsoft.com/en-us/evalcenter/download-sql-server-2019
Once the software is downloaded, the following files will be available based on your download (32 or 64 bit) option.
ENU\x86\SQLFULL_x86_ENU_Core.box
ENU\x86\SQLFULL_x86_ENU_Install.exe
ENU\x86\SQLFULL_x86_ENU_Lang.box
OR
ENU\x86\SQLFULL_x64_ENU_Core.box
ENU\x86\SQLFULL_x64_ENU_Install.exe
ENU\x86\SQLFULL_x64_ENU_Lang.box
Note − X86 (32 bit) and X64 (64 bit)
Step 2 − Double-click the SQLFULL_x86_ENU_Install.exe or SQLFULL_x64_ENU_Install.exe, it will extract the required files for installation in theSQLFULL_x86_ENU or SQLFULL_x86_ENU folder respectively.
Step 3 − Click the SQLFULL_x86_ENU or SQLFULL_x64_ENU_Install.exe folder and double-click SETUP application.
For understanding, here we have used SQLFULL_x64_ENU_Install.exe software.
Step 4 − Once we click on 'setup' application, the following screen will open.
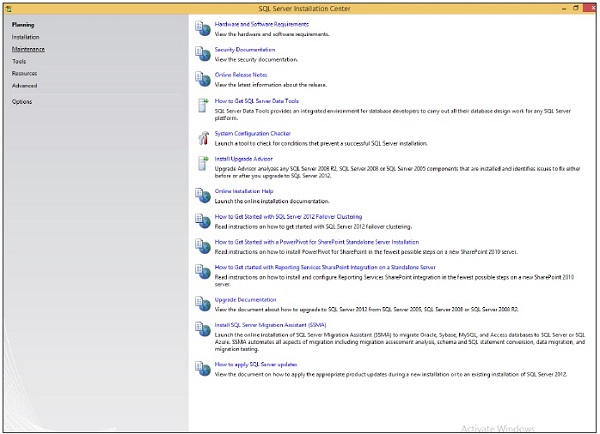
Step 5 − Click Installation which is on the left side of the above screen.
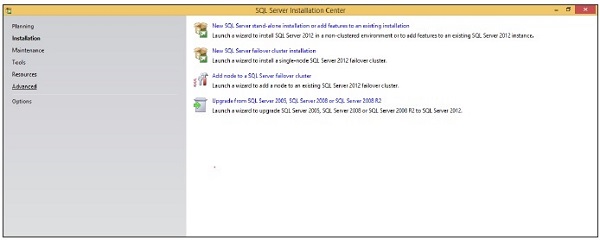
Step 6 − Click the first option of the right side seen on the above screen. The following screen will open.
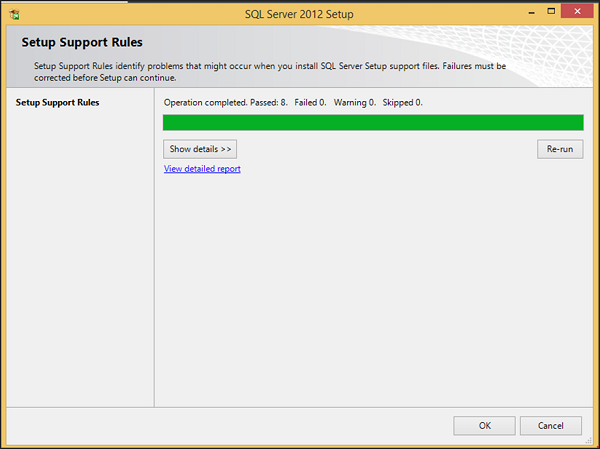
Step 7 − Click OK and the following screen pops up.

Step 8 − Click Next to get the following screen.
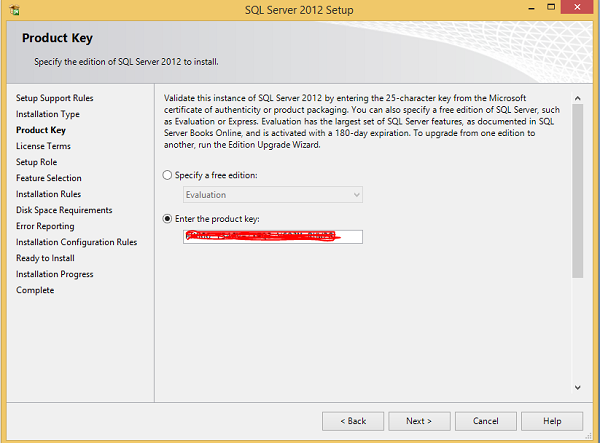
Step 9 − Make sure to check the product key selection and click Next.
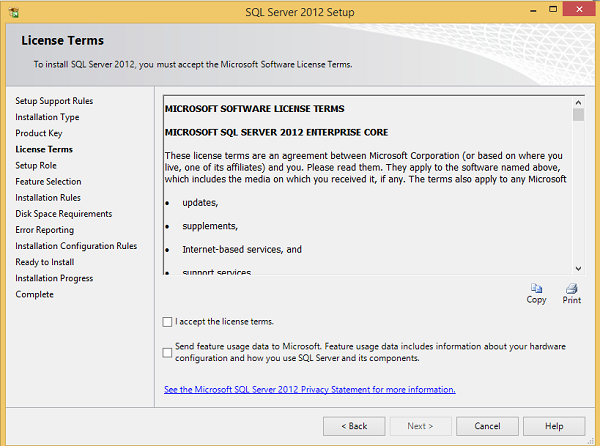
Step 10 − Select the checkbox to accept the license option and click Next.
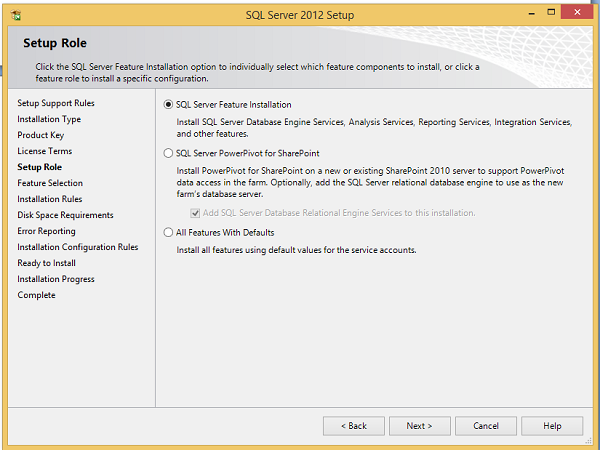
Step 11 − Select SQL Server feature installation option and click Next.
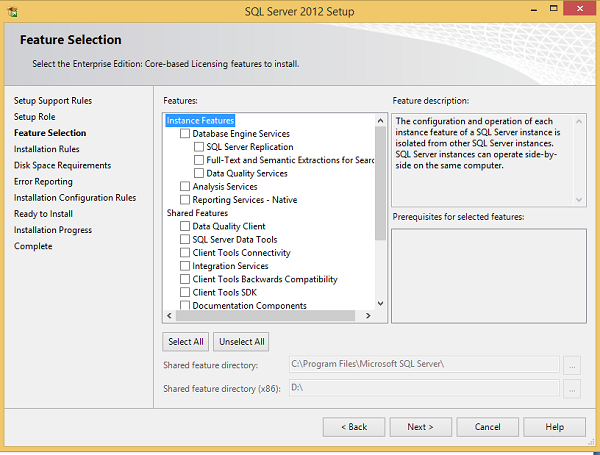
Step 12 − Select Database engine services checkbox and click Next.
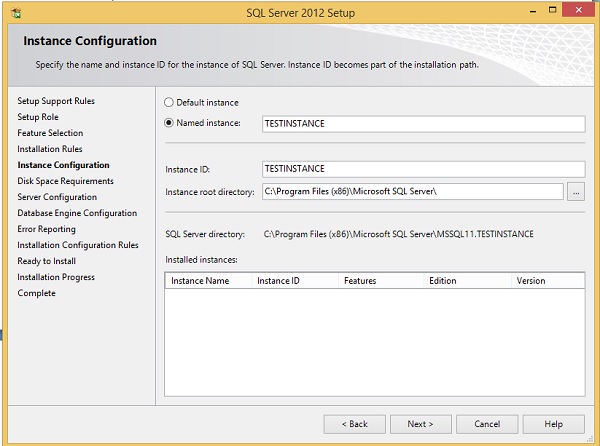
Step 13 − Enter the named instance (here I used TestInstance) and click Next.
Step 14 − Click Next on the above screen and the following screen appears.
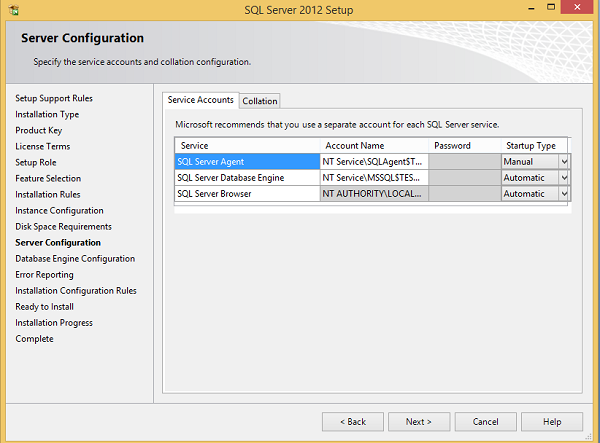
Step 15 − Select service account names and start-up types for the above listed services and click Collation.
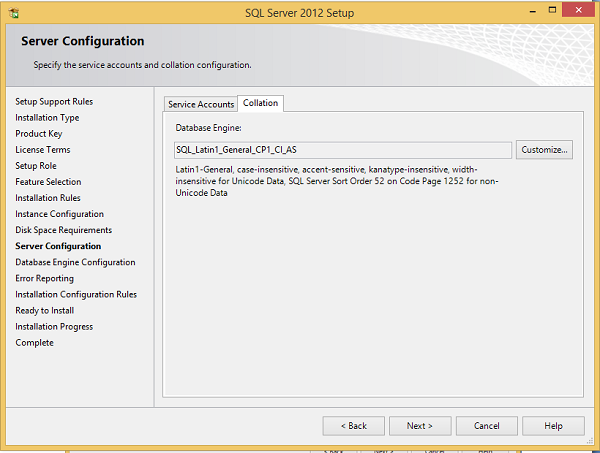
Step 16 − Make sure the correct collation selection is checked and click Next.
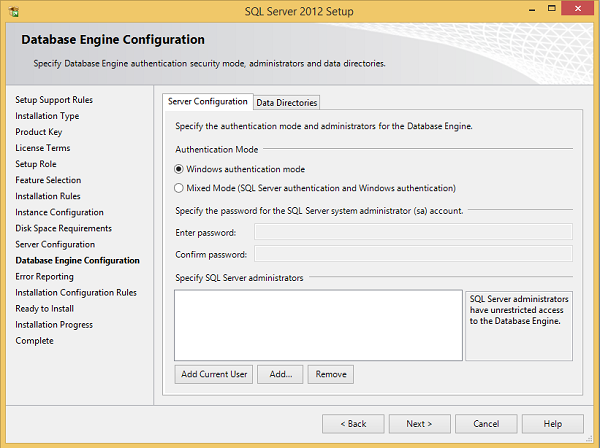
Step 17 − Make sure authentication mode selection and administrators are checked and click Data Directories.
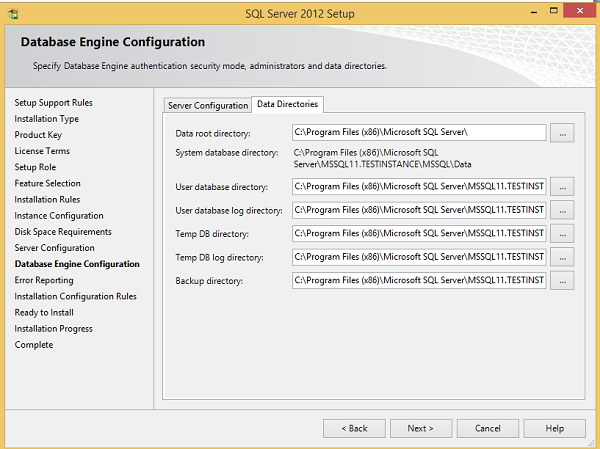
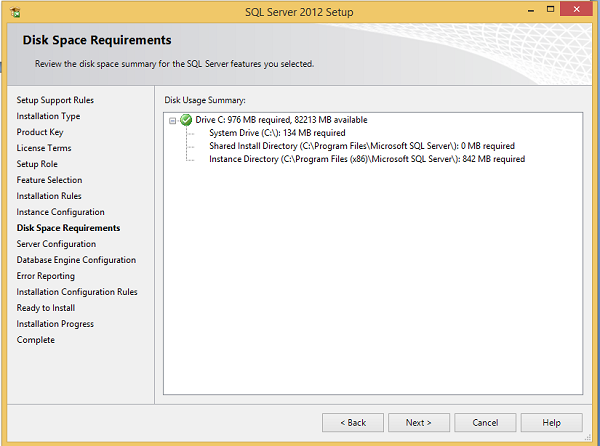
Step 18 − Make sure to select the above directory locations and click Next. The following screen appears.
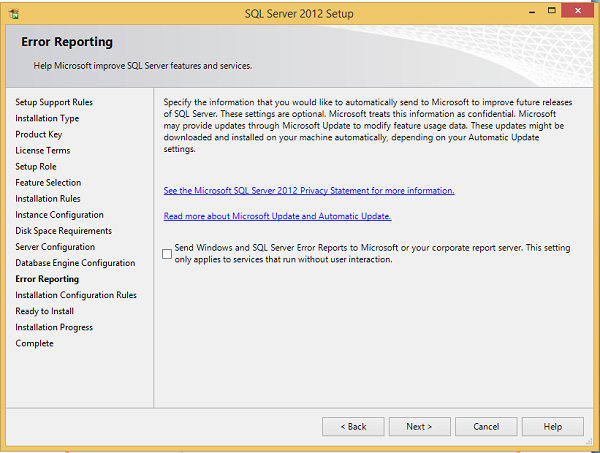
Step 19 − Click Next on the above screen.
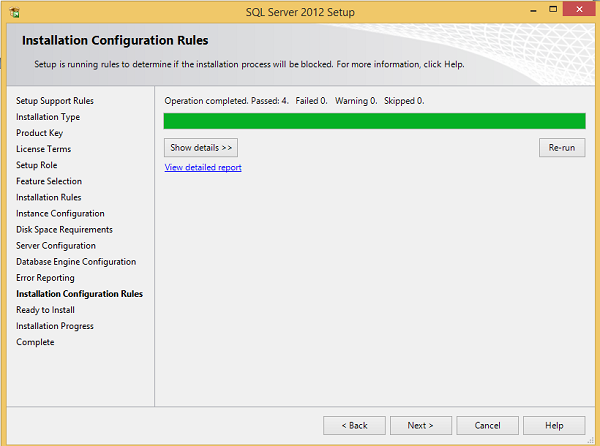
Step 20 − Click Next on the above screen to the get the following screen.
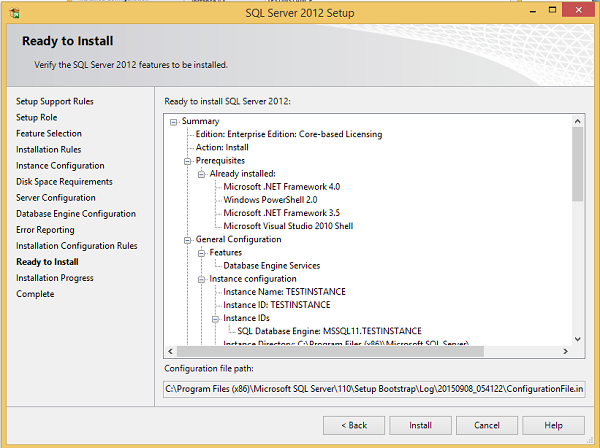
Step 21 − Make sure to check the above selection correctly and click Install.
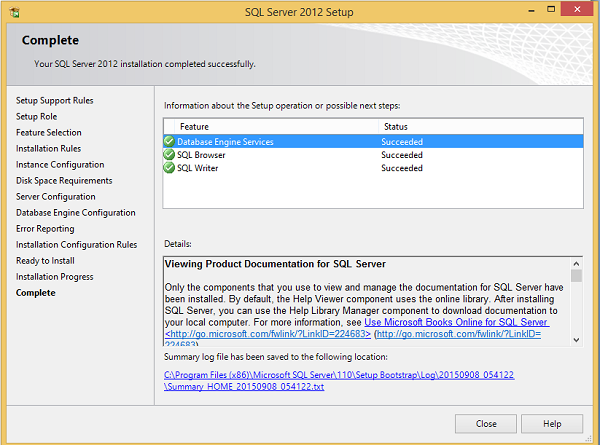
Installation is successful as shown in the above screen. Click Close to finish.
