- Meteor - Home
- Meteor - Overview
- Meteor - Environment Setup
- Meteor - First Application
- Meteor - Templates
- Meteor - Collections
- Meteor - Forms
- Meteor - Events
- Meteor - Session
- Meteor - Tracker
- Meteor - Packages
- Meteor - Core API
- Meteor - Check
- Meteor - Blaze
- Meteor - Timers
- Meteor - EJSON
- Meteor - HTTP
- Meteor - Email
- Meteor - Assets
- Meteor - Security
- Meteor - Sorting
- Meteor - Accounts
- Meteor - Methods
- Meteor - Package.js
- Meteor - Publish & Subscribe
- Meteor - Structure
- Meteor - Deployment
- Meteor - Running on mobile
- Meteor - ToDo App
- Meteor - Best Practices
Meteor - Quick Guide
Meteor - Overview
According to Meteor official documentation −
Meteor is a full-stack JavaScript platform for developing modern web and mobile applications. Meteor includes a key set of technologies for building connected-client reactive applications, a build tool, and a curated set of packages from the Node.js and general JavaScript community.
Features
Web and Mobile − Meteor offers a platform for developing Web, Android and IOS apps.
Universal Apps − The same code for web browsers and mobile devices.
Packages − Huge number of packages that are easy to install and use.
Meteor Galaxy − Cloud service for Meteor app deployment.
Advantages
- Developers only need JavaScript for server and client side development.
- Coding is very simple and beginner friendly.
- Meteor apps are real time by default.
- Official and community packages are huge time saver.
Limitations
Meteor isn't very suitable for large and complex applications.
There is a lot of magic going on when working with Meteor, so developers might find themselves limited in some way.
Meteor - Environment Setup
In this chapter, we will learn how to install Meteor on Windows operating system. Before we start working with Meteor, we will need NodeJS. If you don't have it installed, you can check the links provided below.
Prerequisite
NodeJS is the platform needed for Meteor development. If you do not have NodeJS environment setup ready, then you can check out our NodeJS Environment Setup.
Install Meteor
Download the official meteor installer from this page
If any error occurs during the installation, try running the installer as an administrator. Once the installation is complete, you will be asked to create a Meteor account.
When you finish installing Meteor installer, you can test if everything is installed correctly by running the following code in the command prompt window.
C:\Users\username>meteor
Following will be the output −

Meteor - First Application
In this chapter, we will learn how to create your first Meteor application.
Step 1 - Create the App
To create the app, we will run the meteor create command from the command prompt window. The apps name will be meteorApp.
C:\Users\username\Desktop\Meteor>meteor create meteorApp
Step 2 - Run the App
We can run the app by typing the meteor command.
C:\Users\username\Desktop\meteorApp>meteor
This command will start several processes, which can be seen in the following image.

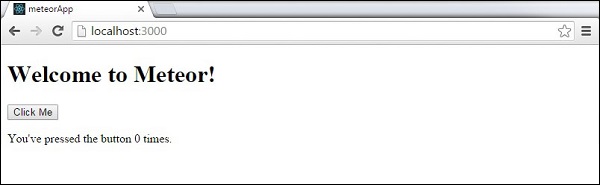
Step 3 - Verify the Result
Now, we can open the http://localhost:3000/ address to see how our first Meteor App looks like.
Meteor - Templates
Meteor templates are using three top level tags. The first two are head and body. These tags perform the same functions as in regular HTML. The third tag is template. This is the place, where we connect HTML to JavaScript.
Simple Template
Following example shows how this works. We are creating a template with name = "myParagraph" attribute. Our template tag is created below the body element, however, we need to include it before it is rendered on the screen. We can do it by using {{> myParagraph}} syntax. In our template, we are using double curly braces ({{text}}). This is meteor template language called Spacebars.
In our JavaScript file, we are setting Template.myParagraph.helpers({}) method that will be our connection to our template. We are only using text helper in this example.
meteorApp.html
<head>
   <title>meteorApp</title>
</head>

<body>
   <h1>Header</h1>
   {{> myParagraph}}
</body>

<template name = "myParagraph">
   <p>{{text}}</p>
</template>
meteorApp.js
if (Meteor.isClient) {

   // This code only runs on the client
   Template.myParagraph.helpers({
      text: 'This is paragraph...'
   });
}
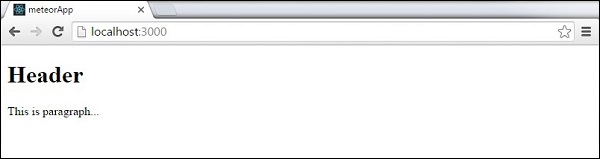
After we save the changes, following will be the output −
Block Template
In the following example, we are using {{#each paragraphs}} to iterate over the paragraphs array and return template name = "paragraph" for each value.
meteorApp.html
<head>
   <title>meteorApp</title>
</head>

<body>
   <div>
      {{#each paragraphs}}
         {{> paragraph}}
      {{/each}}
   </div>
</body>

<template name = "paragraph">
   <p>{{text}}</p>
</template>
We need to create paragraphs helper. This will be an array with five text values.
meteorApp.js
if (Meteor.isClient) {

   // This code only runs on the client
   Template.body.helpers({
      paragraphs: [
         { text: "This is paragraph 1..." },
         { text: "This is paragraph 2..." },
         { text: "This is paragraph 3..." },
         { text: "This is paragraph 4..." },
         { text: "This is paragraph 5..." }
      ]
   });
}
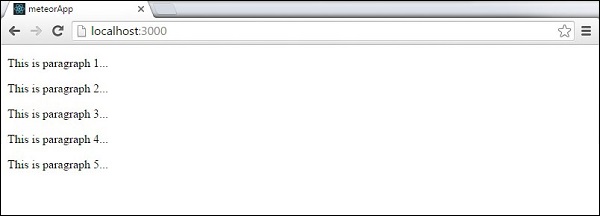
Now, we can see five paragraphs on the screen.
Meteor - Collections
In this chapter, we will learn how to use MongoDB collections.
Create a Collection
We can create a new collection with the following code −
meteorApp.js
MyCollection = new Mongo.Collection('myCollection');
Add Data
Once the collection is created, we can add data by using the insert method.
meteorApp.js
MyCollection = new Mongo.Collection('myCollection');

var myData = {
   key1: "value 1...",
   key2: "value 2...",
   key3: "value 3...",
   key4: "value 4...",
   key5: "value 5..."
}

MyCollection.insert(myData);
Find Data
We can use the find method to search for data in the collection.
meteorApp.js
MyCollection = new Mongo.Collection('myCollection');
var myData = {
key1: "value 1...",
key2: "value 2...",
key3: "value 3...",
key4: "value 4...",
key5: "value 5..."
}
MyCollection.insert(myData);
var findCollection = MyCollection.find().fetch();
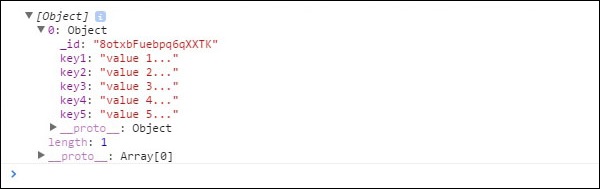
console.log(findCollection);
The console will show the data we inserted previously.
We can get the same result by adding the search parameters.
meteorApp.js
MyCollection = new Mongo.Collection('myCollection');

var myData = {
   key1: "value 1...",
   key2: "value 2...",
   key3: "value 3...",
   key4: "value 4...",
   key5: "value 5..."
}

MyCollection.insert(myData);

var findCollection = MyCollection.find({key1: "value 1..."}).fetch();
console.log(findCollection);
Update Data
The next step is to update our data. After we have created a collection and inserted new data, we can use the update method.
meteorApp.js
MyCollection = new Mongo.Collection('myCollection');
var myData = {
key1: "value 1...",
key2: "value 2...",
key3: "value 3...",
key4: "value 4...",
key5: "value 5..."
}
MyCollection.insert(myData);
var findCollection = MyCollection.find().fetch();
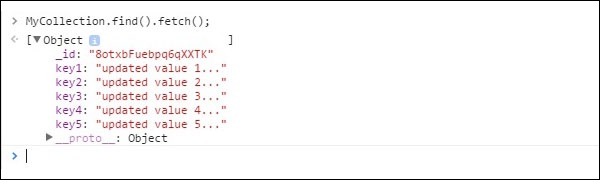
var myId = findCollection[0]._id;
var updatedData = {
key1: "updated value 1...",
key2: "updated value 2...",
key3: "updated value 3...",
key4: "updated value 4...",
key5: "updated value 5..."
}
MyCollection.update(myId, updatedData);
var findUpdatedCollection = MyCollection.find().fetch();
console.log(findUpdatedCollection);
The console will show that our collection is updated.
Delete Data
Data can be deleted from the collection using the remove method. We are setting id in this example as a parameter to delete specific data.
meteorApp.js
MyCollection = new Mongo.Collection('myCollection');

var myData = {
   key1: "value 1...",
   key2: "value 2...",
   key3: "value 3...",
   key4: "value 4...",
   key5: "value 5..."
}

MyCollection.insert(myData);

var findCollection = MyCollection.find().fetch();
var myId = findCollection[0]._id;

MyCollection.remove(myId);

var findDeletedCollection = MyCollection.find().fetch();
console.log(findDeletedCollection);
The console will show an empty array.

If we want to delete everything from the collection, we can use the same method, however, instead of id we will use an empty object {}. We need to do this on the server for security reasons.
meteorApp.js
if (Meteor.isServer) {

   MyCollection = new Mongo.Collection('myCollection');

   var myData = {
      key1: "value 1...",
      key2: "value 2...",
      key3: "value 3...",
      key4: "value 4...",
      key5: "value 5..."
   }

   MyCollection.insert(myData);
   MyCollection.remove({});

   var findDeletedCollection = MyCollection.find().fetch();
   console.log(findDeletedCollection);
}
We can also delete data using other parameters. As in the previous example, Meteor will force us to do this from the server.
meteorApp.js
if (Meteor.isServer) {

   MyCollection = new Mongo.Collection('myCollection');

   var myData = {
      key1: "value 1...",
      key2: "value 2...",
      key3: "value 3...",
      key4: "value 4...",
      key5: "value 5..."
   }

   MyCollection.insert(myData);
   MyCollection.remove({key1: "value 1..."});

   var findDeletedCollection = MyCollection.find().fetch();
   console.log(findDeletedCollection);
}
It can be seen that the data is deleted from the command window.

Meteor - Forms
In this chapter, we will learn how to work with Meteor forms.
Text Input
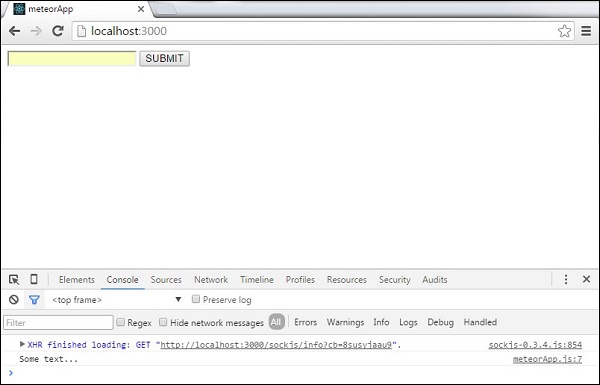
First, we will create a form element with text input field and a submit button.
meteorApp.html
<head>
   <title>meteorApp</title>
</head>

<body>
   <div>
      {{> myTemplate}}
   </div>
</body>

<template name = "myTemplate">
   <form>
      <input type = "text" name = "myForm">
      <input type = "submit" value = "SUBMIT">
   </form>
</template>
In a JavaScript file, we will create the submit event. We need to prevent default event behavior to stop the browser from refreshing. Next, we are going to take the content of the input field and assign it to textValue variable.
In the following example, we will only log that content to developers console. And the last thing we need is to clear the input field.
meteorApp.js
if (Meteor.isClient) {

   Template.myTemplate.events({

      'submit form': function(event) {
         event.preventDefault();
         var textValue = event.target.myForm.value;
         console.log(textValue);
         event.target.myForm.value = "";
      }
   });
}
When we type "Some text..." in our input field and submit it, the console will log the text we entered.
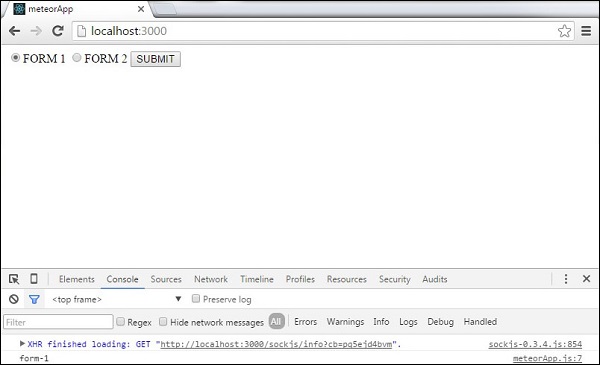
Radio Buttons
A similar concept can be used for radio buttons.
meteorApp.html
<head>
   <title>meteorApp</title>
</head>

<body>
   <div>
      {{> myTemplate}}
   </div>
</body>

<template name = "myTemplate">
   <form>
      <input type = "radio" name = "myForm" value = "form-1">FORM 1
      <input type = "radio" name = "myForm" value = "form-2">FORM 2
      <input type = "submit" value = "SUBMIT">
   </form>
</template>
meteorApp.js
if (Meteor.isClient) {

   Template.myTemplate.events({

      'submit form': function(event) {
         event.preventDefault();
         var radioValue = event.target.myForm.value;
         console.log(radioValue);
      }
   });
}
When we submit the first button, the console will show the following output.
Checkbox
Following example shows how to use checkboxes. You can see that we are just repeating the same process.
meteorApp.html
<head>
   <title>meteorApp</title>
</head>

<body>
   <div>
      {{> myTemplate}}
   </div>
</body>

<template name = "myTemplate">
   <form>
      <input type = "checkbox" name = "myForm" value = "form-1">FORM 1
      <input type = "checkbox" name = "myForm" value = "form-2">FORM 2
      <input type = "submit" value = "SUBMIT">
   </form>
</template>
meteorApp.js
if (Meteor.isClient) {

   Template.myTemplate.events({

      'submit form': function(event) {
         event.preventDefault();
         var checkboxValue1 = event.target.myForm[0].checked;
         var checkboxValue2 = event.target.myForm[1].checked;
         console.log(checkboxValue1);
         console.log(checkboxValue2);
      }
   });
}
Once the form is submitted, the checked input will be logged as true, while the unchecked one will be logged as false.

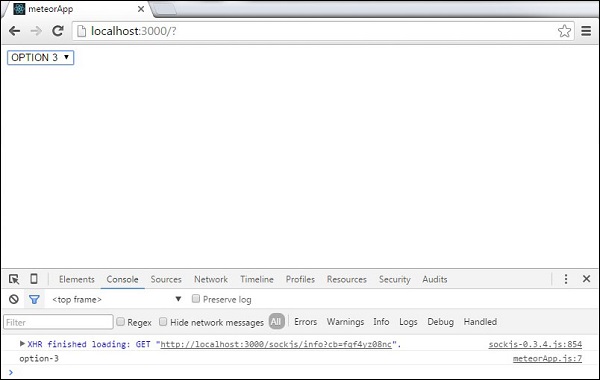
Select Dropdown
In the following example, we will learn how to use the select element. We will use the change event to update data every time the option changes.
meteorApp.html
<head>
   <title>meteorApp</title>
</head>

<body>
   <div>
      {{> myTemplate}}
   </div>
</body>

<template name = "myTemplate">
   <select>
      <option name = "myOption" value = "option-1">OPTION 1</option>
      <option name = "myOption" value = "option-2">OPTION 2</option>
      <option name = "myOption" value = "option-3">OPTION 3</option>
      <option name = "myOption" value = "option-4">OPTION 4</option>
   </select>
</template>
meteorApp.js
if (Meteor.isClient) {

   Template.myTemplate.events({

      'change select': function(event) {
         event.preventDefault();
         var selectValue = event.target.value;
         console.log(selectValue);
      }
   });
}
If we choose the third option, the console will log the option value.
Meteor - Events
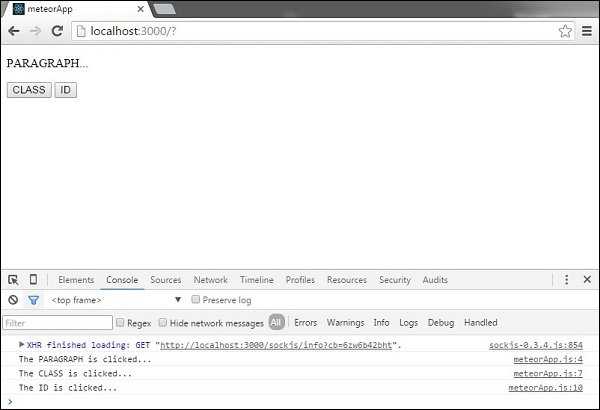
In this chapter, we will learn how to use tag, class and id as an event selector. Working with events is pretty straightforward.
Let's create three elements in the HTML template. The first one is p, the second one is myClass class and the last one is myId id.
meteorApp.html
<head>
   <title>meteorApp</title>
</head>

<body>
   <div>
      {{> myTemplate}}
   </div>
</body>

<template name = "myTemplate">
   <p>PARAGRAPH...</p>
   <button class = "myClass">CLASS</button>
   <button id = "myId">ID</button>
</template>
In our JavaScript file, we are setting three events for three elements that we created above. You can see that we are just adding p, .myClass and #myId after the click event. These are the selectors we mentioned above.
meteorApp.js
if (Meteor.isClient) {

   Template.myTemplate.events({

      'click p': function() {
         console.log("The PARAGRAPH is clicked...");
      },

      'click .myClass': function() {
         console.log("The CLASS is clicked...");
      },

      'click #myId': function() {
         console.log("The ID is clicked...");
      },
   });
}
To test this, we can first click on PARAGRAPH, then the CLASS button and finally the ID button. We will get the following console log.
We can use all the other JavaScript events - click, dbclick, contextmenu, mousedown, mouseup, mouseover, mouseout, mousemove - following the example above.
Meteor - Session
Sessions are used for saving data while the users are using the app. This data will be deleted when the user leaves the app.
In this chapter, we will learn how to set a session object, store some data, and return that data. We will use the basic HTML setup.
meteorApp.html
<head>
   <title>meteorApp</title>
</head>

<body>
   <div>
      {{> myTemplate}}
   </div>
</body>

<template name = "myTemplate">
</template>
Now, we will store myData locally using Session.set() method. Once the method is set, we can return it using Session.get() method.
meteorApp.js
if (Meteor.isClient) {

   var myData = {
      key1: "value1",
      key2: "value2"
   }

   Session.set('mySession', myData);

   var sessionDataToLog = Session.get('mySession');
   console.log(sessionDataToLog);
}
If we check the console, we will see that the stored data is logged.

In the next chapter, we will learn how to auto-update templates using the Session variable.
Meteor - Tracker
Tracker is a small library used for auto updating templates once the Session variable has changed. In this chapter, we will learn how the tracker works.
First, we will create a button that will be used for updating the session.
meteorApp.html
<head>
   <title>meteorApp</title>
</head>

<body>
   <div>
      {{> myTemplate}}
   </div>
</body>

<template name = "myTemplate">
   <button id = "myButton">CLICK ME</button>
</template>
Next, we will set the starting session value myData and create a mySession object. Tracker.autorun method is used for keeping an eye on mySession. Whenever this object changes, the template will auto-update. To test it, we will set a click event for updating.
meteorApp.js
if (Meteor.isClient) {

   var myData = 0
   Session.set('mySession', myData);

   Tracker.autorun(function () {
      var sessionData = Session.get('mySession');
      console.log(sessionData)
   });

   Template.myTemplate.events({

      'click #myButton': function() {
         Session.set('mySession', myData ++);
      }
   });
}
If we click the CLICK ME button five times, we will see that the tracker is logging new values every time the session updates.
Meteor - Packages
Meteor offers thousands of community packages that you can use while developing your app.
Adding Packages
You can check the official Meteor package server here. Just search for the package you need and add it in the command prompt window. If, for example, you want to add http package to your app, you can do it by running the following code −
C:\Users\username\Desktop\meteorApp>meteor add http
Removing Packages
A similar principle can be used to remove packages −
C:\Users\username\Desktop\meteorApp>meteor remove http
Updating Packages
You can update the package running the following code −
C:\Users\username\Desktop\meteorApp>meteor update http
Checking Current Packages
You can also check what packages your current application is using.
C:\Users\username\Desktop\meteorApp>meteor list
Package Maintenance
If a package has : in the name, it means that it is a community package, while the ones without the prefix are maintained by the Meteor Development group.
Adding Meteor Development Group Package
C:\Users\username\Desktop\meteorApp>meteor add http
Adding Community Package
C:\Users\username\Desktop\meteorApp>meteor add cfs:http-methods
Meteor - Core Api
If you want to limit the code to run only on the server or the client side, you can use the following code −
meteorApp.js
if (Meteor.isClient) {
   // Code running on client...
}

if (Meteor.isServer) {
   // Code running on server...
}
You can limit the code to run only when the app is using Cordova bundling.
if (Meteor.isCordova) {
   // Code running on Cordova...
}
Some plugins need to wait until the server and DOM are ready. You can use the following code to wait until everything begins.
Meteor.startup(function () {
   // Code running after platform is ready...
});
Following table lists some other core API methods.
| Sr.No. | Method & Details |
|---|---|
| 1 | Meteor.wrapAsync(function) Used for wrapping asynchronous code and convert it into synchronous. |
| 2 | Meteor.absoluteUrl([path], [options]) Used for generating absolute URL pointing to the app. |
| 3 | Meteor.settings Used for setting deployment configuration. |
| 4 | Meteor.publish(name, function) Used for publishing records to the client. |
Meteor - Check
The check method is used for find out if the argument or types are matching the pattern.
Installing Check Package
Open the command prompt window and install the package.
C:\Users\username\Desktop\meteorApp>meteor add check
Using Check
In the following example, we want to check if myValue is a string. Since it is true, the app will proceed without any errors.
meteorApp.js
var myValue = 'My Value...';
check(myValue, String);
In this example, myValue is not a string but a number, hence the console will log an error.
meteorApp.js
var myValue = 1;
check(myValue, String);

Match Test
The Match.test is similar to check, the difference being when the test fails instead of a console error, we will get a value without breaking the server. The following example shows how to test an object with multiple keys.
meteorApp.js
var myObject = {
   key1 : "Value 1...",
   key2 : "Value 2..."
}

var myTest = Match.test(myObject, {
   key1: String,
   key2: String
});

if ( myTest ) {
   console.log("Test is TRUE...");
} else {
   console.log("Test is FALSE...");
}
Since the both keys are strings, the test is true. The console will log the first option.

If we change the key2 to number, the test will fail and the console will log the second option.
meteorApp.js
var myObject = {
   key1 : "Value 1...",
   key2 : 1
}

var myValue = 1;

var myTest = Match.test(myObject, {
   key1: String,
   key2: String
});

if ( myTest ) {
   console.log("Test is TRUE...");
} else {
   console.log("Test is FALSE...");
}

Meteor - Blaze
Blaze is a Meteor package for building live reactive templates.
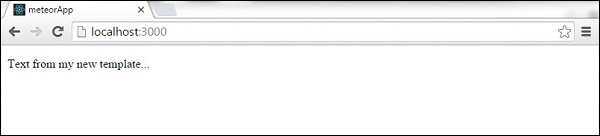
Render Method
This method is used for rendering templates into the DOM. First, we will create myNewTemplate that will be rendered. We will also add myContainer, which will be used as a parent element, so the render method knows where to render our template.
meteorApp.html
<head>
   <title>meteorApp</title>
</head>

<body>
   <div id = "myContainer">
   </div>
</body>

<template name = "myNewTemplate">
   <p>Text from my new template...</p>
</template>
Next, we will create a render function that will take two arguments. The first one is a template that will be rendered and the second one is a parent element that we mentioned above.
meteorApp.js
Meteor.startup(function () {

   if(Meteor.isClient) {
      var myNewTemplate = Template.myNewTemplate;
      var myContainer = document.getElementById('myContainer');
      Blaze.render(myNewTemplate, myContainer);
   }
});
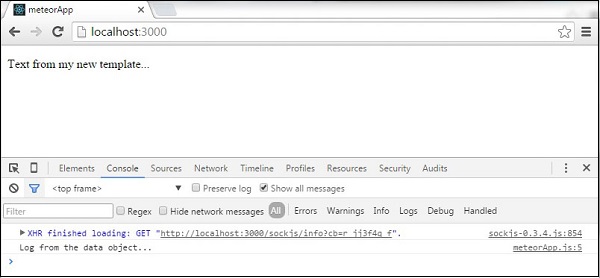
Render with Data
If you need to pass some data reactively, you can use renderWithData method. The HTML will be exactly the same as in the previous example.
meteorApp.html
<head>
   <title>meteorApp</title>
</head>

<body>
   <div id = "myContainer">
   </div>
</body>

<template name = "myNewTemplate">
   <p>Text from my new template...</p>
</template>
We can add our data as a second argument in Meteor.renderWithData method. The other two arguments are the same as in the previous example. In this example, our data is a function that will log some text.
meteorApp.js
Meteor.startup(function () {

   if(Meteor.isClient) {
      var myNewTemplate = Template.myNewTemplate;

      var myData = function() {
         console.log('Log from the data object...')
      }

      var myContainer = document.getElementById('myContainer');
      Blaze.renderWithData(myNewTemplate, myData, myContainer);
   }
});
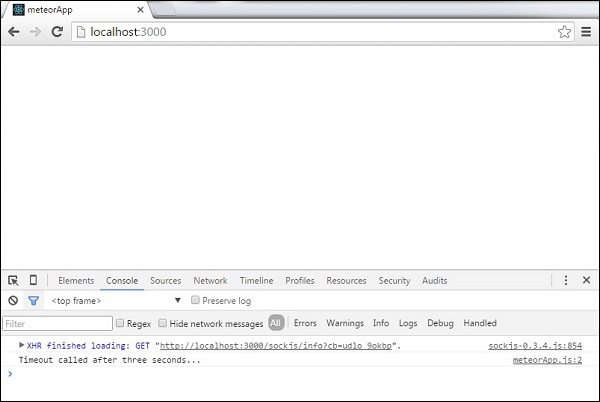
Remove Method
We can add remove method.
meteorApp.html
<head>
   <title>meteorApp</title>
</head>

<body>
   <div id = "myContainer">
   </div>
</body>

<template name = "myNewTemplate">
   <p>Text from my new template...</p>
</template>
In this example, we are rendering the template that will be removed after three seconds. Notice the Blaze.Remove method that we are using to remove the template.
meteorApp.js
Meteor.startup(function () {

   if(Meteor.isClient) {
      var myNewTemplate = Template.myNewTemplate;
      var myContainer = document.getElementById('myContainer');
      var myRenderedTemplate = Blaze.render(myNewTemplate, myContainer);

      Meteor.setTimeout(function() {
         Blaze.remove(myRenderedTemplate);
      }, 3000);
   }
});
The following table shows the other methods that can be used.
| Sr.No. | Method & Details |
|---|---|
| 1 | Blaze.getData([elementOrView]) Used for retrieving data from the rendering element. |
| 2 | Blaze.toHTML(templateOrView) Used for rendering templates or views to the string. |
| 3 | Blaze.toHTMLWithData(templateOrView, data) Used for rendering templates or views to the string with additional data. |
| 4 | new Blaze.View([name], renderFunction) Used for creating a new Blaze reactive part of the DOM. |
| 5 | Blaze.currentView Used for getting the current view. |
| 6 | Blaze.getView([element]) Used for getting the current view. |
| 7 | Blaze.With(data, contentFunc) Used for constructing a view that renders some content with context. |
| 8 | Blaze.If(conditionFunc, contentFunc, [elseFunc]) Used for constructing a view that renders some conditional content. |
| 9 | Blaze.Unless(conditionFunc, contentFunc, [elseFunc]) Used for constructing a view that renders some conditional content (inverted Blaze.if). |
| 10 | Blaze.Each(argFunc, contentFunc, [elseFunc]) Used for constructing a view that renders contentFunct for every item. |
| 11 | new Blaze.Template([viewName], renderFunction) Used for constructing a new Blaze view with name and content. |
| 12 | Blaze.isTemplate(value) Used for returning true, if the value is a template object. |
Meteor - Timers
Meteor offers its own setTimeout and setInterval methods. These methods are used to make sure that all global variables have correct values. They work like regular JavaScript setTimout and setInterval.
Timeout
This is Meteor.setTimeout example.
Meteor.setTimeout(function() {
   console.log("Timeout called after three seconds...");
}, 3000);
We can see in the console that the timeout function is called once the app has started.
Interval
Following example shows how to set and clear an interval.
meteorApp.html
<head>
   <title>meteorApp</title>
</head>

<body>
   <div>
      {{> myTemplate}}
   </div>
</body>

<template name = "myTemplate">
   <button>CLEAR</button>
</template>
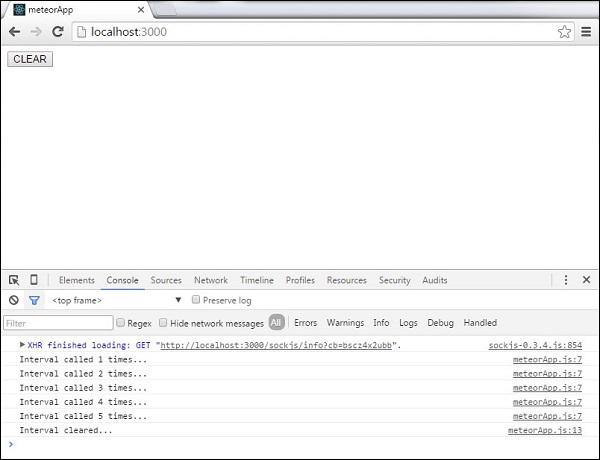
We will set the initial counter variable that will be updated after every interval call.
meteorApp.js
if (Meteor.isClient) {

   var counter = 0;

   var myInterval = Meteor.setInterval(function() {
      counter ++
      console.log("Interval called " + counter + " times...");
   }, 3000);

   Template.myTemplate.events({

      'click button': function() {
         Meteor.clearInterval(myInterval);
         console.log('Interval cleared...')
      }
   });
}
The console will log the updated counter variable every three seconds. We can stop this by clicking the CLEAR button. This will call the clearInterval method.
Meteor - EJSON
EJSON is an extension of JSON syntax that supports Date and Binary types.
Install EJSON
To install EJSON package, we need to add it from the command prompt window.
C:\Users\username\Desktop\meteorApp>meteor add ejson
Date Example
We can deserialize the date using the parse method.
if (Meteor.isClient) {
   var myEjsonDate = '{"$date": 1455029631493}';
   var myDate = EJSON.parse(myEjsonDate);
   console.log(myDate);
}
The console will log the correct date value.

Binary Example
The same can be applied to binary types.
if (Meteor.isClient) {
   var myEjsonBinary = '{"$binary": "c3VyZS4="}';
   var myBinary = EJSON.parse(myEjsonBinary);
   console.log(myBinary);
}
You can see that the console is logging new deserialized value.

Stringify
We can serialize an object using the stringify method. This is the reversed process from the example above.
if (Meteor.isClient) {

   var myObject = {
      myDate : new Date(),
      myBinary : new Uint8Array([115, 117, 114, 101, 46])
   }

   var myEjosnData = EJSON.stringify(myObject);
   console.log(myEjosnData);
}
We can see our new values in the console.

| Sr.No. | Method & Details |
|---|---|
| 1 | EJSON.parse(string) Used for parsing a string into EJSON value. |
| 2 | EJSON.stringify(value) Used for serializing a value to the string. |
| 3 | EJSON.fromJSONValue(value) Used for deserializing an EJSON value from JSON. |
| 4 | EJSON.toJSONValue(value) Used for serializing an EJSON value into JSON. |
| 5 | EJSON.equals(value1, value2) Used for comparing if two values are equal. |
| 6 | EJSON.clone(value) Used for returning a deep copy of the value. |
| 7 | EJSON.newBinary Used for assigning a binary data that EJSON can serialize. |
| 8 | EJSON.isBinary(x) Used for checking if the value is a binary data. |
| 9 | EJSON.addType(name, factory) Used for creating a custom EJSON type. |
| 10 | customType.typeName() Used for returning a name of the custom type. |
| 11 | customType.toJSONValue() Used for serializing custom types. |
| 12 | customType.clone() Used for returning a deep copy of the custom type. |
| 13 | customType.equals(otherValue) Used for comparison between the custom type value and other value. |
Meteor - HTTP
This package provides HTTP request API with get, post, put and delete methods.
Install Package
We will install this package by running the following code in the command prompt window.
C:\Users\username\Desktop\meteorApp>meteor add http
CALL Method
This is universal method that can use GET, POST, PUT and DELETE arguments. The following example demonstrates how to use GET argument. The examples in this chapter will use fake REST API from this website.
You can see that this method is using four arguments. We already mentioned the first argument GET. The second one is API URL. The third argument is an empty object, where we can set some optional parameters. The last method is an asynchronous callback, where we can handle errors and work with a response.
HTTP.call( 'GET', 'http://jsonplaceholder.typicode.com/posts/1', {},
   function( error, response ) {

   if (error) {
      console.log(error);
   } else {
      console.log(response);
   }
});
GET Method
The same request can be sent using GET instead of CALL method. You can see that the first argument now is API URL.
HTTP.get('http://jsonplaceholder.typicode.com/posts/1', {}, function( error, response ) {

   if ( error ) {
      console.log( error );
   } else {
      console.log( response );
   }
});
Both of the previous examples will log the same output.

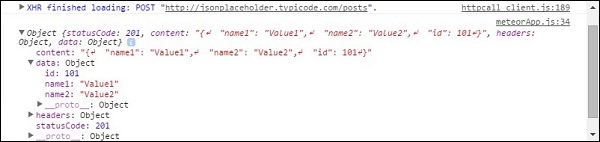
POST Method
In this method, we are setting data that needs to be sent to the server (postData) as the second argument. Everything else is the same as in our GET request.
var postData = {

   data: {
      "name1": "Value1",
      "name2": "Value2",
   }
}

HTTP.post( 'http://jsonplaceholder.typicode.com/posts', postData,
   function( error, response ) {

   if ( error ) {
      console.log( error );
   } else {
      console.log( response);
   }
});
The console will log our postData object.
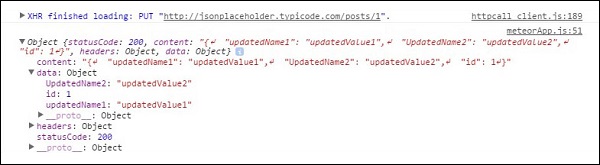
PUT Method
We can update our data using the PUT method. The concept is the same as in our last example.
var updateData = {

   data: {
      "updatedName1": "updatedValue1",
      "UpdatedName2": "updatedValue2",
   }
}

HTTP.put( 'http://jsonplaceholder.typicode.com/posts/1', updateData,
   function( error, response ) {

   if ( error ) {
      console.log( error );
   } else {
      console.log( response );
   }
});
Now, we can see our updated object in the console.
DEL Method
We can send a delete request to the server using the DEL method. We will delete everything inside the data object.
var deleteData = {
   data: {}
}

HTTP.del( 'http://jsonplaceholder.typicode.com/posts/1', deleteData,
   function( error, response ) {

   if ( error ) {
      console.log( error );
   } else {
      console.log( response );
   }
});
The console will show that the deleting process is successful.

Meteor - Email
This package is used when you need to send an email from Meteor App.
Step 1 - Add Package
Open the command prompt window and run the following command −
C:\Users\username\Desktop\meteorApp>meteor add email
Step 2 - Mailgun Account
We need to create an account here. This is the default email provider for Meteor apps.
After you are logged in, open the Domains tab and click the sandbox URL below the Domain Name. It will open a new page where we can find Default SMTP Login and Default Password. We will need these two for creating the MAIL_URL environment variable.
Send Email
To create a valid MAIL_URL just insert your Mailgun credentials in place of YOUR_DEFAULT_SMTP_LOGIN and YOUR_DEFAULT_PASSWORD.
if (Meteor.isServer) {

   Meteor.startup( function() {
      process.env.MAIL_URL =
         "smtp://YOUR_DEFAULT_SMTP_LOGIN:YOUR_DEFAULT_PASSWORD@smtp.mailgun.org:587";

      Email.send({
         to: "toemailadress@email.com",
         from: "fromemailadress@email.com",
         subject: "Meteor Email",
         text: "The email content..."
      });
   });
}
When you run the app, the email will be sent to your address.

Meteor - Assets
Static server assets are located in a private subfolder inside the app. In the following example, we will learn how to use data from a simple JSON file.
Step 1 - Create Files and Folders
Let's create a private folder and my-json.json file inside that folder. We will do this using the following command in the command prompt window, however, you can also create it manually.
C:\Users\username\Desktop\meteorApp>mkdir private

C:\Users\username\Desktop\meteorApp\private>touch my-json.json
Step 2 - Get Text
To be able to read data from our file, we will use Asssets.getText method. Note, this can only be done from the server side. Since we are using JSON, we need to parse it.
if (Meteor.isServer) {
   var myFile = JSON.parse(Assets.getText('my-json.json'));
   console.log(myFile.data.text)
}
Following will be the output in the command prompt window.

Step 3 - Create EJSON File
We will create this file inside the private folder. This file will contain binary data "myBinary": {"$binary": "c3VyZS4="}
C:\Users\username\Desktop\meteorApp\private>touch my-ejson.ejson
Step 4 - Get Binary
To read EJSON files, we can use the Assets.getBinary method.
if (Meteor.isServer) {
   var myFile = Assets.getBinary('my-ejson.ejson');
   console.log(EJSON.stringify(myFile));
}
The command prompt will log EJSON value.

Meteor - Security
In this chapter, we will learn how to secure our app and what should be taken into consideration while developing an app.
Autopublish and Autosecure
Autopublish is a package that automatically publishes all data from the database to the client. This is a convenience that should be disabled when in production. It can be disabled from the command prompt.
C:\Users\username\Desktop\meteorApp>meteor remove autopublish
You can publish some data to the client by using Meteor.publish() and Meteor.subscribe() methods that we will cover in the Publish and Subscribe chapter.
Insecure is a package that allows MongoDB commands to be written in developers console, so that every user of the app is able to access the database. The package can be removed by running the following command in the command prompt.
C:\Users\username\Desktop\meteorApp>meteor remove insecure
Good practice is to remove both of the packages as soon as you start developing your app, so you don't have to change and update your code later.
Use Server Side Methods
You should always create your methods on the server. You can do it by using the Meteor.methods() on the server and Meteor.call() on the client. We will learn more about this in the Methods chapter.
Additional Security
If you want to add additional layers of security to your app, you should consider using some other Meteor packages such as −
Browser Policy can be used to control the external resources that should be loaded to your app.
Check package can be used to check the user input types before they are processed.
Audit Arguments Check is a package that will ensure all parameters are correctly checked before processed. If you missed some parameters, this package will inform you.
Mylar packages can add some additional layers of security. You can check them out if you need that kind of protection.
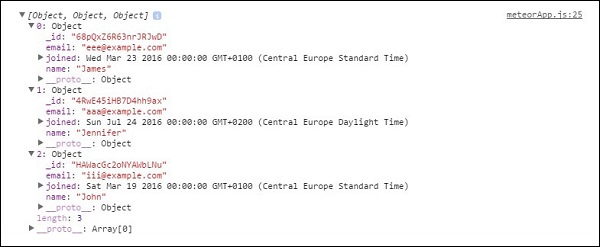
Meteor - Sorting
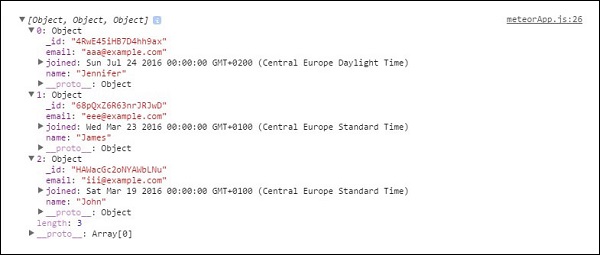
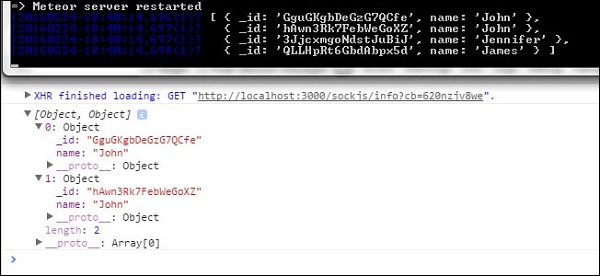
We can sort the data once we get it from the database. In the following example, we will create Users collection. We will use a sort argument ({sort: {name: 1}}) for sorting the collection data by name. The number 1 is used to set the ascending order. If we want to use the descending order, we would use -1 instead.
Users = new Mongo.Collection('users');

Users.insert({
   name: 'James',
   email: 'eee@example.com',
   joined: new Date(2016, 2, 23)
});

Users.insert({
   name: 'John',
   email: 'iii@example.com',
   joined: new Date(2016, 2, 19)
});

Users.insert({
   name: 'Jennifer',
   email: 'aaa@example.com',
   joined: new Date(2016, 6, 24)
});

var sortByName = Users.find({}, {sort: {name: 1}}).fetch();

var sortByEmail = Users.find({}, {sort: {email: 1}}).fetch();

var sortByJoined = Users.find({}, {sort: {joined: 1}}).fetch();

console.log(sortByName);
console.log(sortByEmail);
console.log(sortByJoined);
We can sort the data by email the same way.
Users = new Mongo.Collection('users');

Users.insert({
   name: 'James',
   email: 'eee@example.com',
   joined: new Date(2016, 2, 23)
});

Users.insert({
   name: 'John',
   email: 'iii@example.com',
   joined: new Date(2016, 2, 19)
});

Users.insert({
   name: 'Jennifer',
   email: 'aaa@example.com',
   joined: new Date(2016, 6, 24)
});

var sortByEmail = Users.find({}, {sort: {email: 1}}).fetch();

console.log(sortByEmail);
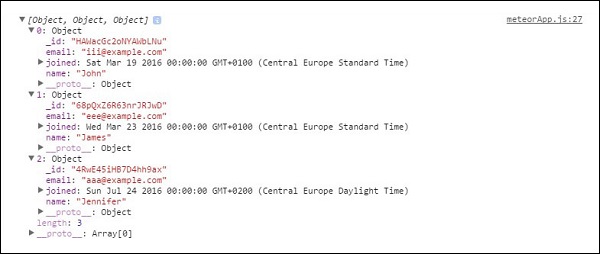
Finally, we can sort it by the joining date.
Users = new Mongo.Collection('users');

Users.insert({
   name: 'James',
   email: 'eee@example.com',
   joined: new Date(2016, 2, 23)
});

Users.insert({
   name: 'John',
   email: 'iii@example.com',
   joined: new Date(2016, 2, 19)
});

Users.insert({
   name: 'Jennifer',
   email: 'aaa@example.com',
   joined: new Date(2016, 6, 24)
});

var sortByJoined = Users.find({}, {sort: {joined: 1}}).fetch();

console.log(sortByJoined);
Meteor - Accounts
This package allows complete user authentication functionality. You can add it by running the following code in the command prompt window.
C:\Users\username\Desktop\meteorApp>meteor add accounts-password
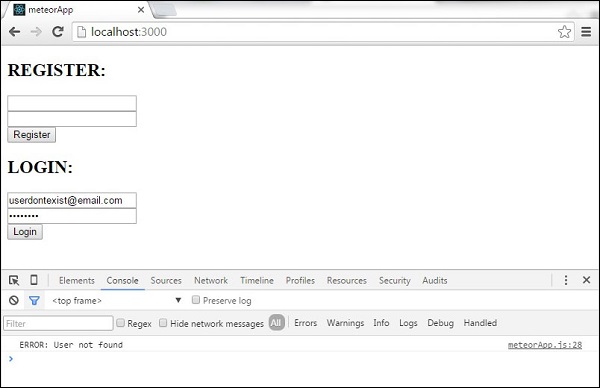
Authentication Example
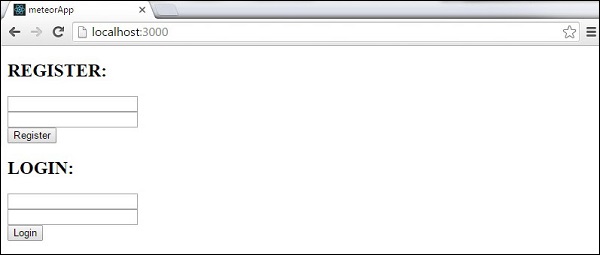
This example will show basic authentication. We will create register, login, and home templates. If there is a currentUser (if the user is successfully registered or logged in), the home template will be shown. If there is no currentUser, the register and login templates will be visible.
meteorApp.html
<head>
   <title>meteorApp</title>
</head>

<body>
   {{#if currentUser}}
      {{> home}}
      {{else}}
      {{> register}}
      {{> login}}
   {{/if}}
</body>

<template name = "register">
   <h2>REGISTER:</h2>
   <form>
      <input type = "email" name = "registerEmail"><br>
      <input type = "password" name = "registerPassword"><br>
      <input type = "submit" value = "Register"><br>
   </form>
</template>

<template name = "login">
   <h2>LOGIN:</h2>
   <form>
      <input type = "email" name = "loginEmail"><br>
      <input type = "password" name="loginPassword"><br>
      <input type = "submit" value = "Login"><br>
   </form>
</template>

<template name = "home">
   <p>You're logged in.</p>
   <button class = "logout">Logout</button>
</template>
First, we need to create a register event. This function will read register inputs, create a new user, and store it to the database.
The second event is login. This time the function will read inputs from the login template, log in the user if the email and password are valid or return an error if they aren't.
And finally the logout event will be used for logging out the user, once the button is clicked.
meteorApp.js
if (Meteor.isClient) {

   Template.register.events({
      'submit form': function(event) {
         event.preventDefault();

         var registerData = {
            email: event.target.registerEmail.value,
            password: event.target.registerPassword.value
         }

         Accounts.createUser(registerData, function(error) {

            if (Meteor.user()) {
               console.log(Meteor.userId());
            } else {
               console.log("ERROR: " + error.reason);
            }
         });
      }
   });

   Template.login.events({

      'submit form': function(event) {
         event.preventDefault();
         var myEmail = event.target.loginEmail.value;
         var myPassword = event.target.loginPassword.value;

         Meteor.loginWithPassword(myEmail, myPassword, function(error) {

            if (Meteor.user()) {
               console.log(Meteor.userId());
            } else {
               console.log("ERROR: " + error.reason);
            }
         });
      }
   });

   Template.home.events({

      'click .logout': function(event) {
         event.preventDefault();

         Meteor.logout(function(error) {

            if(error) {
               console.log("ERROR: " + error.reason);
            }
         });
      }
   });
}
Once the app starts, we will get the following page.
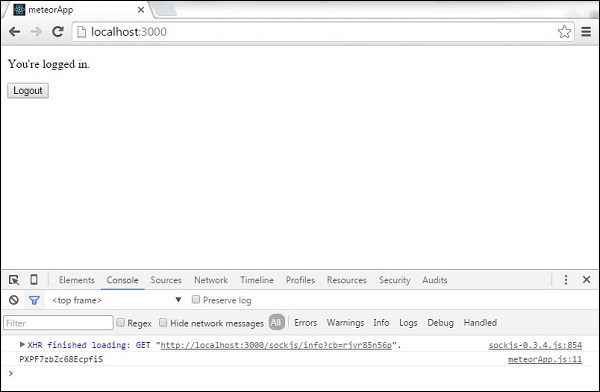
On entering the email and password in the register form, we can register and login the new user. We will see that the console logs the users id and the home template is rendered.
The login event will check the database and log in the user, if the email and password are correct. If not, the console will log an error.
If the user clicks the LOGOUT button, the app will log the user out and show the register and login templates.
Meteor - Methods
Meteor methods are functions that are written on the server side, but can be called from the client side.
On the server side, we will create two simple methods. The first one will add 5 to our argument, while the second one will add 10.
Using Methods
meteorApp.js
if(Meteor.isServer) {

   Meteor.methods({

      method1: function (arg) {
         var result = arg + 5;
         return result;
      },

      method2: function (arg) {
         var result = arg + 10;
         return result;
      }
   });
}

if(Meteor.isClient) {
   var aaa = 'aaa'
   Meteor.call('method1', aaa, function (error, result) {

      if (error) {
         console.log(error);
         else {
            console.log('Method 1 result is: ' + result);
         }
      }
   );

   Meteor.call('method2', 5, function (error, result) {

      if (error) {
         console.log(error);
      } else {
         console.log('Method 2 result is: ' + result);
      }
   });
}
Once we start the app, we will see the calculated values in console.

Handling Errors
For handling errors, you can use the Meteor.Error method. The following example shows how to handle error for users that aren't logged in.
if(Meteor.isServer) {

   Meteor.methods({

      method1: function (param) {

         if (! this.userId) {
            throw new Meteor.Error("logged-out",
               "The user must be logged in to post a comment.");
         }
         return result;
      }
   });
}

if(Meteor.isClient) {  Meteor.call('method1', 1, function (error, result) {

   if (error && error.error === "logged-out") {
      console.log("errorMessage:", "Please log in to post a comment.");
   } else {
      console.log('Method 1 result is: ' + result);
   }});

}
The console will show our customized error message.

Meteor - Package.js
In this chapter, we will learn how to create our own meteor package.
Creating a Package
Let's add a new folder on the desktop, where the package will be created. We will use the command prompt window.
C:\Users\username\Desktop\meteorApp> mkdir packages
Now, we can create the package in the folder we have created above. Run the following command from the command prompt. Username is the Meteor Developer username and package-name is the name of the package.
C:\Users\username\Desktop\meteorApp\packages>meteor create --package username:package-name
Adding a Package
To be able to add a local package to our app, we need to set the ENVIRONMENT VARIABLE that will tell Meteor to load the package from the local folder. Right-click the computer icon and choose properties/Advanced system settings/Environment Variables/NEW.
Variable Name should be PACKAGE_DIRS. Variable Value should be the path to the folder we created. In our case, C:\Users\username\Desktop\meteorApp\packages.
Don't forget to restart the command prompt after adding a new Environment Variable.
We can now add the package to our app by running the following code −
C:\Users\username\Desktop\meteorApp>meteor add username:package-name
Package Files
Following four files will be found in the package we created.
- package-name-test.js
- package-name.js
- package.js
- README.md
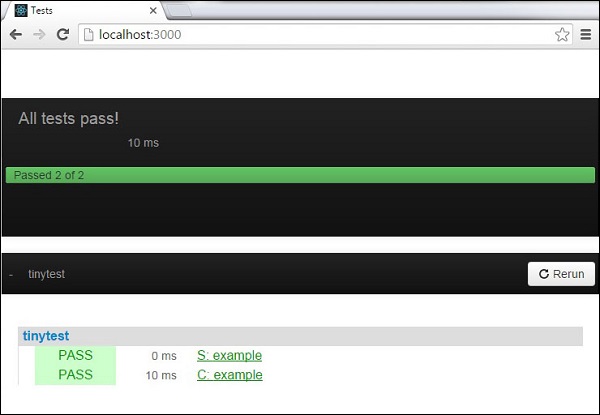
Testing Package (package-name-test.js)
Meteor offers tinytest package for testing. Let's install it first using the following command in the command prompt window.
C:\Users\username\Desktop\meteorApp>meteor add tinytest
If we open package-name-test.js, we will see the default test example. We will use this example to test the app. Note: It is always better to write our own tests when developing meteor packages.
To test the package, let us run this code in the command prompt.
C:\Users\username\Desktop>meteor test-packages packages/package-name
We will get the following result.
package.js File
This is the file where we can write the code. Let's create some simple functionality for our package. Our package will log some text in the console.
packages/package.js
myPackageFunction = function() {
   console.log('This is simple package...');
}
package-name.js File
This is the file where we can set some package configuration. We will get back to it later, but for now we need to export myPackageFunction so we can use it in our app. We need to add this inside Package.onUse function. The file will look something like this.
packages/package-name.js
Package.describe({
   name: 'username:package-name',
   version: '0.0.1',

   // Brief, one-line summary of the package.
   summary: '',

   // URL to the Git repository containing the source code for this package.
   git: '',

   // By default, Meteor will default to using README.md for documentation.

   // To avoid submitting documentation, set this field to null.
   documentation: 'README.md'
});

Package.onUse(function(api) {
   api.versionsFrom('1.2.1');
   api.use('ecmascript');
   api.addFiles('mypackage.js');
   api.export('myPackageFunction'); // We are exporting the function we created above...
});

Package.onTest(function(api) {
   api.use('ecmascript');
   api.use('tinytest');
   api.use('username:package-name');
   api.addFiles('package-name-tests.js');
});
Using a Package
Now we can finally call the myPackageFunction() from our meteorApp.js file.
packages/package.js
if(Meteor.isClient) {
   myPackageFunction();
}
The console will log the text from our package.

To better understand how the package.js file can be configured, we will use the example from Meteor official documentation.
This is an example file...
/* Information about this package */
Package.describe({

   // Short two-sentence summary.
   summary: "What this does",

   // Version number.
   version: "1.0.0",

   // Optional.  Default is package directory name.
   name: "username:package-name",

   // Optional github URL to your source repository.
   git: "https://github.com/something/something.git",
});

/* This defines your actual package */
Package.onUse(function (api) {

   // If no version is specified for an 'api.use' dependency, use the
   // one defined in Meteor 0.9.0.
   api.versionsFrom('0.9.0');

   // Use Underscore package, but only on the server.
   // Version not specified, so it will be as of Meteor 0.9.0.
   api.use('underscore', 'server');

   // Use iron:router package, version 1.0.0 or newer.
   api.use('iron:router@1.0.0');

   // Give users of this package access to the Templating package.
   api.imply('templating')

   // Export the object 'Email' to packages or apps that use this package.
   api.export('Email', 'server');

   // Specify the source code for the package.
   api.addFiles('email.js', 'server');
});

/* This defines the tests for the package */
Package.onTest(function (api) {

   // Sets up a dependency on this package
   api.use('username:package-name');

   // Allows you to use the 'tinytest' framework
   api.use('tinytest@1.0.0');

   // Specify the source code for the package tests
   api.addFiles('email_tests.js', 'server');
});

/* This lets you use npm packages in your package*/
Npm.depends({
   simplesmtp: "0.3.10",
   "stream-buffers": "0.2.5"
});
Meteor - Publish and Subscribe
As already discussed in the Collections chapter, all of our data is available on the client side. This is a security issue that can be handled with publish and subscribe methods.
Removing Autopublish
In this example, we will use PlayersCollection collection with the following data. We prepared this collection before to be able to concentrate on the chapter itself. If you are unsure how to create MongoDB collections in meteor app, check our collections chapter.
To secure our data, we need to remove autopublish package that was allowing us to use the data on the client side.
C:\Users\username\Desktop\meteorApp>meteor remove autopublish
After this step, we will not be able to get the database data from the client side. We will only be able to see it from the server side in the command prompt window. Checkout the following code −
meteorApp.js
var PlayersCollection = new Mongo.Collection('playersCollection');
var myLog = PlayersCollection.find().fetch();
console.log(myLog);
The command prompt window will show the entire collection with four objects, while the developers console will show an empty array. Now our app is more secure.

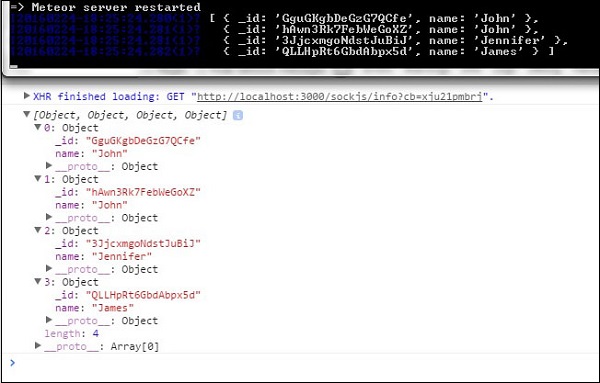
Using Publish and Subscribe
Let's say we want to allow the clients to use our data. For this, we need to create Meteor.publish() method on the server. This method will send the data to the client.
To be able to receive and use that data on the client side, we will create Meteor.subscribe() method. At the end of the example, we are searching the database. This code is running on both the client and the server side.
var PlayersCollection = new Mongo.Collection('playersCollection');

if(Meteor.isServer) {

   Meteor.publish('allowedData', function() {
      return PlayersCollection.find();
   })
}

if (Meteor.isClient) {
   Meteor.subscribe('allowedData');
};

Meteor.setTimeout(function() {
   var myLog = PlayersCollection.find().fetch();
   console.log(myLog);
}, 1000);
We can see that our data is logged in both the developers console and the command prompt window.
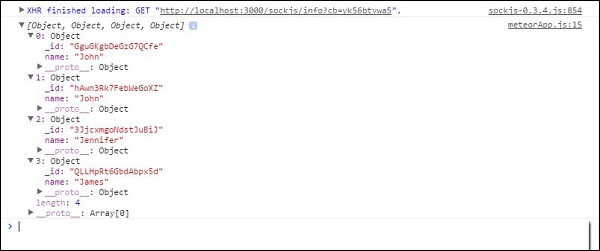
Filtering Client Data
We can also publish part of the data. In this example, we are publishing data with name = "John".
var PlayersCollection = new Mongo.Collection('playersCollection');

if(Meteor.isServer) {

   Meteor.publish('allowedData', function() {
      return PlayersCollection.find({name: "John"});
   })
}

if (Meteor.isClient) {
   Meteor.subscribe('allowedData');
};

Meteor.setTimeout(function() {
   myLog = PlayersCollection.find().fetch();
   console.log(myLog);
}, 1000);
Once we run this code, the command prompt will log all of the data, while the client side console will just log two objects with the name John.
Meteor - Structure
Meteor offers some special folders that can help the developers in structuring their apps.
client
If you create a client folder, everything inside this folder will be run on the client side. This is the folder where you can place your HTML, CSS, and client side JavaScript. You should place Meteor.subscribe functions, templates, helpers, and events inside this folder. Note, you don't need to run the Meteor.isClient function in the files that are placed inside the client folder.
server
Files from this folder will only be run on the server side. This is the place where methods, Meteor.Publish() functions, and other sensitive data should be held. All of the authentication data should be held here. You don't need to use Meteor.isServer() for the files inside this folder.
public
This is the place where you should place your images, favicons, and all the other data that is served to the client.
private
Files from this folder can be accessed only from the server. They will be hidden from the client. You can put JSON or EJSON files that only the server will use inside this folder.
client/compatibility
Some JavaScript libraries export variables as globals. Use this folder for files that need to be executed without being wrapped in a new variable scope.
The rest
The rest of the folders can be structured the way you want. The code that is placed outside of the folders mentioned above will be executed on the client and the server side. This is a good place where you can define your models.
Load Order
It is always good to know load order of the files. The following list is taken from the Meteor Official Documentation.
HTML template files are always loaded before everything else
Files beginning with main. are loaded last
Files inside any lib/ directory are loaded next
Files with deeper paths are loaded next
Files are then loaded in an alphabetical order of the entire path
Meteor - Deployment
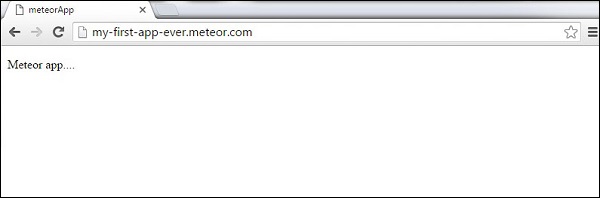
One of the great things about Meteor is how easy is to deploy the app. Once your app is completed, there is an easy way to share it with the world. All you have to do is run the following code in the command prompt window.
C:\Users\username\Desktop\meteorApp>meteor deploy my-first-app-ever.meteor.com
You will be asked to enter Meteor developers account username and password.
Now, you will be able to access the app from the browser on the following link having the name of your app.
http://my-first-app-ever.meteor.com/
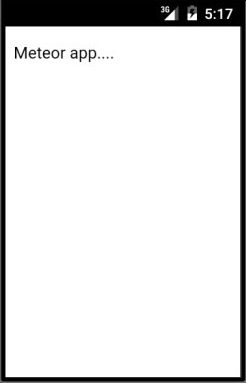
Meteor - Running on Mobile
In this chapter, we will learn how to run the app on an android device. Meteor just recently added this functionality for windows operating system, so we will need to update our meteor app to 1.3 beta version.
Note − By the time of writing this tutorial, the 1.3 version of Meteor is in Beta. We will update this once the production version is released.
Since we want to use the newest Meteor version, we can update it by running the following code in the command prompt window.
C:\Users\username\Desktop\meteorApp>meteor update --release 1.3-beta.11
Step 1 - Install Android SDK
Use the link in the following table to install Android SDK.
| Sr.No. | Software & Description |
|---|---|
| 1 | Java Development Kit & Android SDK You will need Android SDK to be able to run Meteor apps on mobile environment. If you don't have it installed, you can checkout our Android Environment Setup tutorial. |
Step 2 - Add an Android Platform
Now, we need to add an Android platform to our project.
C:\Users\username\Desktop\meteorApp>meteor add-platform android
Step 3 - Run the App on an Android Emulator
To run the app on an Android emulator, we will use the verbose command at the end of the line to be able to identify the possible errors during the startup process.
C:\Users\username\Desktop\meteorApp>meteor run android --verbose
Run the App on an Android Device
Since Android emulators are slow, it is always a better option to run your app directly on your device. You can do it by connecting the device to your computer, enabling the developers mode and USB debugging.
This process is different for specific devices. You need to find Build Number in settings/About and tap seven times. You will get a notification that you are the developer and the Developer Options will be unlocked.
Search through your settings again and enable USB debugging.
You can run Meteor app on your mobile device using the following command in the command prompt.
C:\Users\username\Desktop\meteorApp>meteor run android-device
Meteor - ToDo App
In this chapter, we will learn how to create a simple todo app.
Step1 - Create an App
Open the command prompt and run the following command −
C:\Users\username\Desktop>meteor create todo-app
To see the app, you need to run the app with the meteor command and go to http://localhost:3000
C:\Users\username\Desktop\todo-app>meteor
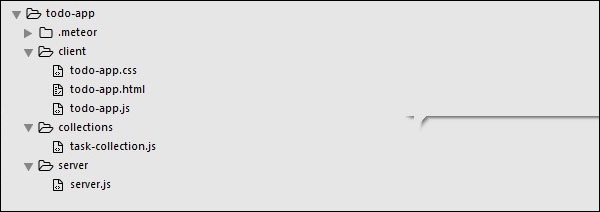
Step2 - Create Folders and Files
Instead of default file structure, we will refactor it. Let's create a client folder, where we will create todo-app.html, todo-app.css and todo-app.js.
C:\Users\username\Desktop\todo-app>mkdir client
C:\Users\username\Desktop\todo-app\client>touch todo-app.html
C:\Users\username\Desktop\todo-app\client>touch todo-app.js
We will also create a server folder with server.js inside.
C:\Users\username\Desktop\todo-app>mkdir server
C:\Users\username\Desktop\todo-app\server>touch server.js
Finally, let's create collections folder with task-collection.js file inside.
C:\Users\username\Desktop\todo-app>mkdir server
C:\Users\username\Desktop\todo-app\collections>touch task-collection.js
You can see the app structure on the following image −
Step 3 - client/todo-app.html
Our first development step is to create HTML for the app. We need an input field where we can add new tasks. The tasks will be in the form of a list with delete and check functionality. We will also have functionalities for showing or hiding completed tasks.
<head>
   <title>Todo App</title>
</head>

<body>
   <h1>Todo List ({{incompleteCount}})</h1>

   <label class = "hide-completed">
      <input type = "checkbox" checked = "{{hideCompleted}}" />
      Hide Completed Tasks
   </label>

   <form class = "new-task">
      <input type = "text" name = "text" placeholder = "Add new tasks" />
   </form>

   <ul>
      {{#each tasks}}
         {{> task}}
      {{/each}}
   </ul>
</body>

<template name = "task">
   <li class = "{{#if checked}}checked{{/if}}">
      <button class = "delete">x</button>
      <input type = "checkbox" checked = "{{checked}}" class = "toggle-checked" />
      <span>{{username}} - {{text}}</span>
   </li>
</template>
Step 4 - collections/task-collection.js
This is the place where we will just create a new MongoDB Collection, so we can use it on both the server and the client side.
Tasks = new Mongo.Collection("tasks");
Step 5 - server/server.js
We will define methods for our app on the server side. These methods will be called from the client. In this file, we will also publish the database query.
// Publishing tasks from the server...

Meteor.publish("tasks", function () {
   return Tasks.find({});
});

// Methods for handling MongoDb Tasks collection data...

Meteor.methods({

   addTask: function (text) {

      Tasks.insert({
         text: text,
         createdAt: new Date(),
      });
   },

   deleteTask: function (taskId) {
      var task = Tasks.findOne(taskId);
      Tasks.remove(taskId);
   },

   setChecked: function (taskId, setChecked) {
      var task = Tasks.findOne(taskId);
      Tasks.update(taskId, { $set: { checked: setChecked} });
   }
});
Step 6 - client/todo-app.js
This is the main client JavaScript file. This file can also be refactored but we will write all client side code here. First, we subscribe to the task collection that is published on the server. Then, we create helpers to be able to handle the app logic, and finally, we define the events that will call the methods from the server.
// Subscribing to the published tasks
Meteor.subscribe("tasks");

// Show/Hide functionality
Template.body.helpers({

   tasks: function () {

      if (Session.get("hideCompleted")) {

         // If hide completed is checked, filter tasks
         return Tasks.find({checked: {$ne: true}}, {sort: {createdAt: -1}});
      } else {

         // Otherwise, return all of the tasks
         return Tasks.find({}, {sort: {createdAt: -1}});
      }
   },

   hideCompleted: function () {
      return Session.get("hideCompleted");
   },

   incompleteCount: function () {
      return Tasks.find({checked: {$ne: true}}).count();
   }
});

// Events for creating new tasks and Show/Hide functionality.
// Calling methods from the server

Template.body.events({

   "submit .new-task": function (event) {
      event.preventDefault();
      var text = event.target.text.value;

      Meteor.call("addTask", text);
      event.target.text.value = "";
   },

   "change .hide-completed input": function (event) {
      Session.set("hideCompleted", event.target.checked);
   }
});

// Events for Deleting and Check/Uncheck functionality
Template.task.events({

   "click .toggle-checked": function () {

      // Set the checked property to the opposite of its current value
      Meteor.call("setChecked", this._id, ! this.checked);
   },

   "click .delete": function () {
      Meteor.call("deleteTask", this._id);
   }
});
Step 7 - Deploy
After we are done with the development, we can deploy the app from the command prompt window. The deployment name of our app will be my-first-todo-app.
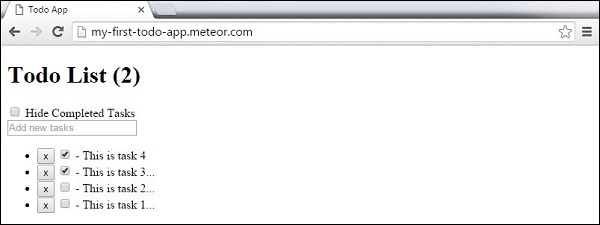
C:\Users\username\Desktop\todo-app>meteor deploy my-first-todo-app
We can open the http://my-first-todo-app.meteor.com/ to start using our app.
Meteor - Best Practices
We already covered some of the best practices of Meteor development in the previous chapters. Following are some of the best practices to be kept in mind while using Meteor.
Directory Structure
There are no strict rules about the directory structure in Meteor apps. For more info on guidelines, check out Meteor - Structure chapter.
Use Methods
You should always use Meteor - Methodswhen working with sensitive data instead of calling insert, update, and remove directly from the client.
Data Management
Protect your data using Publish and Subscribe methods. If you want your data to be available to all clients, you can use null as the publication name instead. Publishing small chunks of data will also improve the performance of the app.
Validate Data
You should validate all data that will be stored inside collection. One of the best options is collection2 package. This package makes it easy to set the server and client side validation.
Minimize Session
The session variables are global variables and using globals is against the JavaScript best practices.
Router
There are two most popular options for Meteor routing. For smaller apps, there is Iron Router. It is automatically rerun once the data changes. For larger apps, there is Flow Router. This router gives you more freedom to optimize re-rendering of the templates at the cost of a little more boilerplate code.
Packages
Always check if the package is updated regularly before you choose to use it inside your app.
