- Meteor - Home
- Meteor - Overview
- Meteor - Environment Setup
- Meteor - First Application
- Meteor - Templates
- Meteor - Collections
- Meteor - Forms
- Meteor - Events
- Meteor - Session
- Meteor - Tracker
- Meteor - Packages
- Meteor - Core API
- Meteor - Check
- Meteor - Blaze
- Meteor - Timers
- Meteor - EJSON
- Meteor - HTTP
- Meteor - Email
- Meteor - Assets
- Meteor - Security
- Meteor - Sorting
- Meteor - Accounts
- Meteor - Methods
- Meteor - Package.js
- Meteor - Publish & Subscribe
- Meteor - Structure
- Meteor - Deployment
- Meteor - Running on mobile
- Meteor - ToDo App
- Meteor - Best Practices
Meteor - Publish and Subscribe
As already discussed in the Collections chapter, all of our data is available on the client side. This is a security issue that can be handled with publish and subscribe methods.
Removing Autopublish
In this example, we will use PlayersCollection collection with the following data. We prepared this collection before to be able to concentrate on the chapter itself. If you are unsure how to create MongoDB collections in meteor app, check our collections chapter.
To secure our data, we need to remove autopublish package that was allowing us to use the data on the client side.
C:\Users\username\Desktop\meteorApp>meteor remove autopublish
After this step, we will not be able to get the database data from the client side. We will only be able to see it from the server side in the command prompt window. Checkout the following code −
meteorApp.js
var PlayersCollection = new Mongo.Collection('playersCollection');
var myLog = PlayersCollection.find().fetch();
console.log(myLog);
The command prompt window will show the entire collection with four objects, while the developers console will show an empty array. Now our app is more secure.

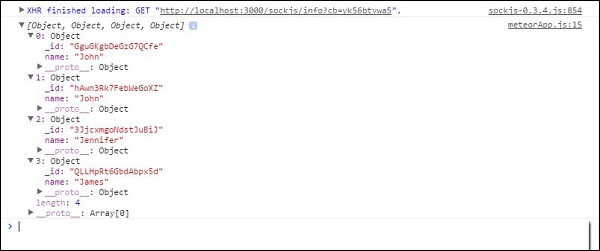
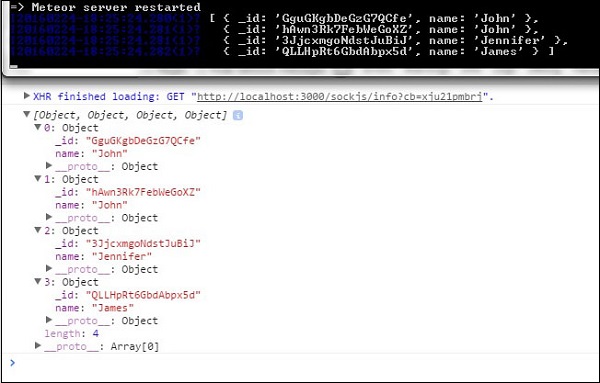
Using Publish and Subscribe
Let's say we want to allow the clients to use our data. For this, we need to create Meteor.publish() method on the server. This method will send the data to the client.
To be able to receive and use that data on the client side, we will create Meteor.subscribe() method. At the end of the example, we are searching the database. This code is running on both the client and the server side.
var PlayersCollection = new Mongo.Collection('playersCollection');

if(Meteor.isServer) {

   Meteor.publish('allowedData', function() {
      return PlayersCollection.find();
   })
}

if (Meteor.isClient) {
   Meteor.subscribe('allowedData');
};

Meteor.setTimeout(function() {
   var myLog = PlayersCollection.find().fetch();
   console.log(myLog);
}, 1000);
We can see that our data is logged in both the developers console and the command prompt window.
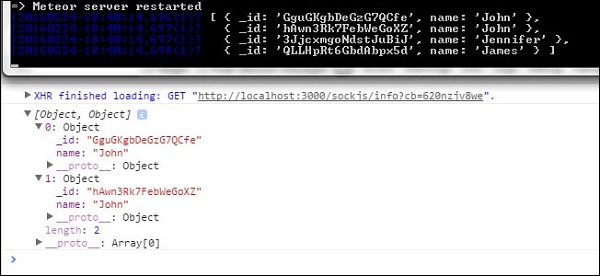
Filtering Client Data
We can also publish part of the data. In this example, we are publishing data with name = "John".
var PlayersCollection = new Mongo.Collection('playersCollection');

if(Meteor.isServer) {

   Meteor.publish('allowedData', function() {
      return PlayersCollection.find({name: "John"});
   })
}

if (Meteor.isClient) {
   Meteor.subscribe('allowedData');
};

Meteor.setTimeout(function() {
   myLog = PlayersCollection.find().fetch();
   console.log(myLog);
}, 1000);
Once we run this code, the command prompt will log all of the data, while the client side console will just log two objects with the name John.