- MERN Stack - Home
- MERN Stack - Installation
- MERN Stack - MongoDB Setup
- MERN Stack - Node Setup
- MERN Stack - Connect React with Node
- MERN Stack - Folder Structure
- MERN Stack Useful Resources
- MERN Stack - Useful Resources
- MERN Stack - Discussion
Connect React Frontend with Node.js API
In this chapter, we will learn how to connect the frontend with the backend (Node.js) using both Axios and Fetch step by step. We will also cover CORS configuration and the proxy setup option. Since you have already set up the frontend and backend directories and connected MongoDB with Node.js in the previous chapter, "MERN Stack Installation Guide", we will now proceed step by step to connect React.js with Node.js.
Backend (node.js)
As we have already set up the backend and installed Node.js and other required packages in the previous chapter, you now need to install CORS inside the backend directory using the command below −
npm install cors
CORS (Cross-Origin Resource Sharing) is used to enable secure communication between the frontend and backend while following to the browser's same-origin policy. This policy restricts a webpage from making requests to a different origin.
Now, implement the code in the server.js file that will display "Hello from the Node.js backend" in the browser. Also, import CORS to enable secure communication between the frontend and backend.
Run the backend −
node server.js
You will see in the terminal console −
Server is running on http://localhost:5000
When you will visit the http://localhost:5000/api/message, then you will see the below json.
{
  "message": "Hello from the node.js backend!"
}
You have successfully set up the NodeJS and created an API; now our task is to fetch this API using the frontend ReactJS.
Frontend (React.js)
Since you have already set up the frontend directory and created a React.js project, our next step is to install axios into the frontend directory.
Axios helps developers obtain API details on the frontend, enabling them to create the UI based on those details. Use the below command in the frontend directory to install axios. Later on you will see how to fetch an API using the JavaScript fetch method.
npm install axios
Now, you can see a file named "App.jsx" inside the src folder of the frontend directory. In this file, you will implement the logic to fetch the API data.
App.jsx
import React, { useEffect, useState } from "react";
import "./App.css";
import axios from "axios";
function App() {
const backendUrl = "http://localhost:5000/api/message";
const [message, setMessage] = useState("");
useEffect(() => {
axios
.get(backendUrl)
.then((res) => setMessage(res.data.message))
.catch((err) => console.error(err));
}, []);
return (
<div className="App">
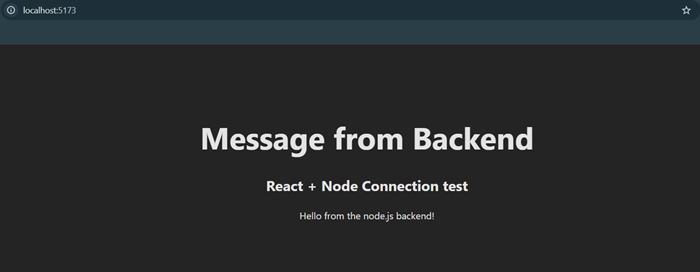
<h1>Message from Backend</h1>
<h2>React + Node Connection test</h2>
<p>{message}</p>
</div>
);
}
export default App;
Before running the frontend, start the backend first. After that, start the frontend using the command below if you are using Vite −
npm run dev
If you created your project using "npx create-react-app myAppName", then use the command below to start the frontend −
npm start
Now, fetch the API using the JavaScript fetch() method in React.js. Create the fetch logic inside the App.js file.
import React, { useEffect, useState } from "react";
import "./App.css";

function App() {
  const backendUrl = "http://localhost:5000/api/message";

  const [message, setMessage] = useState("");

  useEffect(() => {
    fetch(backendUrl)
      .then((res) => res.json())
      .then((data) => setMessage(data.message))
      .catch((err) => console.error(err));
  }, []);

  return (
     <div className="App">
       <h1>Message from Backend</h1>
       <h2>React + Node Connection test</h2>
       <p>{message}</p>
     </div>
  );
}

export default App;
Once you start the frontend, you will get the same output as shown in the above image.
Conclusion
In this chapter, we learned how to connect React.js with Node.js and how to fetch API data using both Axios and the JavaScript fetch method.
