- KNIME - Home
- KNIME - Introduction
- KNIME - Installation
- KNIME - First Run
- KNIME - Workbench
- KNIME - Running Your First Workflow
- KNIME - Exploring Workflow
- KNIME - Building Your Own Model
- KNIME - Testing the Model
- KNIME - Summary and Future Work
- KNIME Useful Resources
- KNIME - Quick Guide
- KNIME - Useful Resources
- KNIME - Discussion
KNIME - Running Your First Workflow
KNIME has provided several good workflows for ease of learning. In this chapter, we shall pick up one of the workflows provided in the installation to explain the various features and the power of analytics platform. We will use a simple classifier based on a Decision Tree for our study.
Loading Decision Tree Classifier
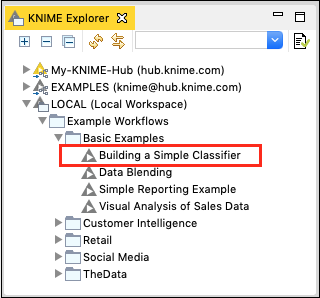
In the KNIME Explorer locate the following workflow −
LOCAL / Example Workflows / Basic Examples / Building a Simple Classifier
This is also shown in the screenshot below for your quick reference −
Double click on the selected item to open the workflow. Observe the Workspace view. You will see the workflow containing several nodes. The purpose of this workflow is to predict the income group from the democratic attributes of the adult data set taken from UCI Machine Learning Repository. The task of this ML model is to classify the people in a specific region as having income greater or lesser than 50K.
The Workspace view along with its outline is shown in the screenshot below −
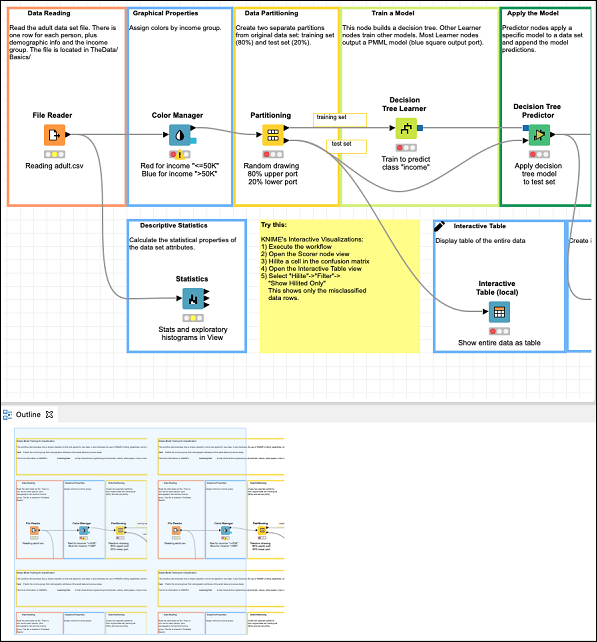
Notice the presence of several nodes picked up from the Nodes repository and connected in a workflow by arrows. The connection indicates that the output of one node is fed to the input of the next node. Before we learn the functionality of each of the nodes in the workflow, let us first execute the entire workflow.
Executing Workflow
Before we look into the execution of the workflow, it is important to understand the status report of each node. Examine any node in the workflow. At the bottom of each node you would find a status indicator containing three circles. The Decision Tree Learner node is shown in the screenshot below −
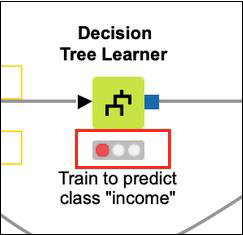
The status indicator is red indicating that this node has not been executed so far. During the execution, the center circle which is yellow in color would light up. On successful execution, the last circle turns green. There are more indicators to give you the status information in case of errors. You will learn them when an error occurs in the processing.
Note that currently the indicators on all nodes are red indicating that no node is executed so far. To run all nodes, click on the following menu item −
Node → Execute All
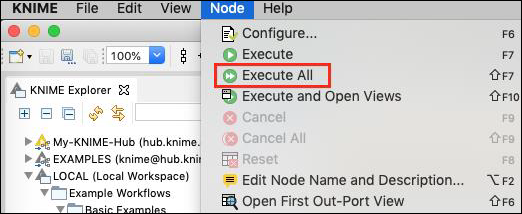
After a while, you will find that each node status indicator has now turned green indicating that there are no errors.
In the next chapter, we will explore the functionality of the various nodes in the workflow.