
 Data Structure
 Networking
 RDBMS
RDBMS Operating System
 Java
Java MS Excel
 iOS
iOS HTML
HTML CSS
CSS Android
 Python
 C Programming
 C++
C++ C#
C# MongoDB
 MySQL
MySQL Javascript
 PHP
PHP
- Selected Reading
- UPSC IAS Exams Notes
- Developer's Best Practices
- Questions and Answers
- Effective Resume Writing
- HR Interview Questions
- Computer Glossary
- Who is Who
Install wordpress on localhost with xampp server
WordPress is a free content management system (CMS) and well-known across the globe. It is an open source CMS based on MySQL and PHP. Beginners generally begin with WordPress on localhost. Here’s how we start with WordPress on localhost using XAMPP.
Terminology
Content Management System (CMS) − A CMS has a central interface that is used to publish, edit, modify, and maintain content. Some well know CMS include, WordPress, Drupal, and Joomla.
WordPress− It is an open source content management system founded by Matt Mullenweg and Mike Little. It was initially released in the year 2003 and its current version is WordPress 4.4.
Xampp− It was created by Apache Friends and is an open source cross-platform web server solution stack. XAMPP stands for Cross-Platform (X), Apache (A), MariaDB (M), PHP (P) and Perl (P).
PhpMyAdmin− It is an open source tool to handle MySQL administration on a web browser. PhpMyAdmin perform useful tasks like creating a new database, modifying or deleting it, adding tables, executing SQL statements, managing permissions, etc.
Steps to Install WordPress on localhost
Before starting, let us first install XAMPP server.
Step 1
Go to XAMPP official website (Apache Friends) and download XAMPP.
Here’s the screenshot showing the download link −
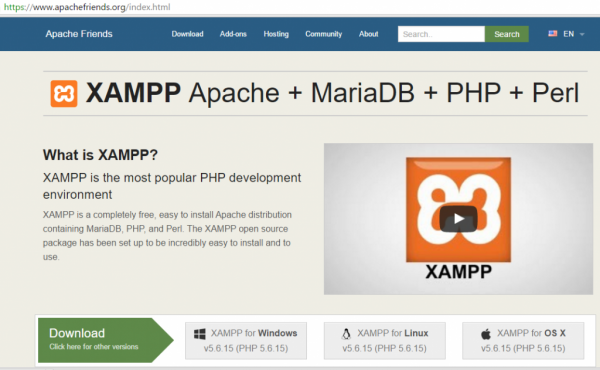
Figure 1- Download XAMPP server
Step 2
As in the above step, download XAMPP and install it in the directory. We have installed it in the following directory −
C:\xampp
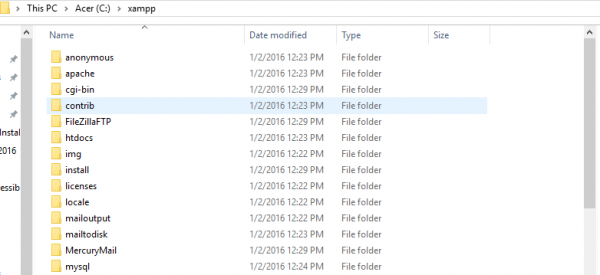
Figure 2: XAMPP Directory
Now we can see the following in the directory after the installation. Here you can locate htdocs −
Open htdocs and create a folder name which would be your project name. Here we have considered the name “AmitDemoWebsite”.
Step 3
Now download WordPress, the current version is 4.4.2. Here’s the screenshot from the WordPress official website where we can see the download link for wordpress-4.4.2.zip −
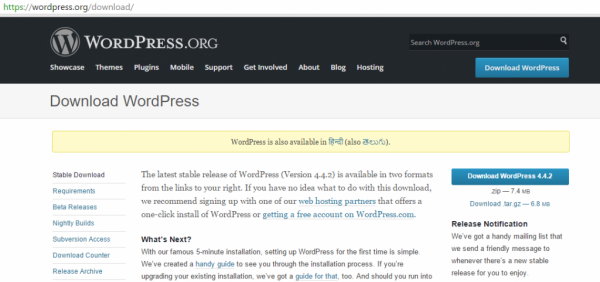
Figure 3- Download WordPress
Step 4
So, after downloading wordpress-4.4.2.zip, just copy and paste it to Xampp->htdocs->AmitDemoWebsite folder −
C:\xampp\htdocs\AmitDemoWebsite
Step 5
Now unzip the wordpress-4.4.2.zip to the AmitDemoWebsite folder.
Here’s the screenshot after unzip at C:\xampp\htdocs\AmitDemoWebsite\
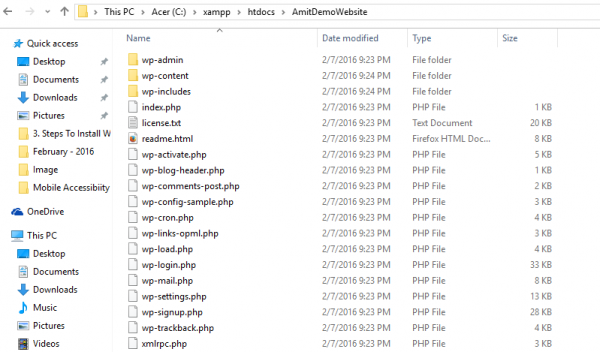
Figure 4- Unzip WordPress
Step 6
Now open XAMPP and start APACHE and MySQL. Here, we are using the Windows 10 OS. Go to start and type “XAMPP”.
Click “XAMPP Control Panel”.
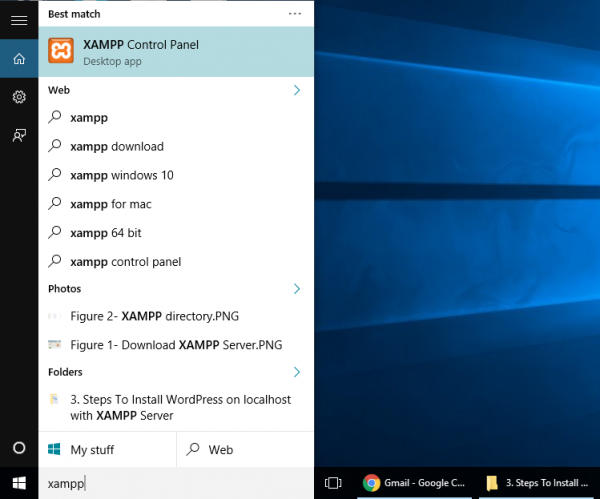
Figure 5- Start XAMPP
Now, we can see the following window
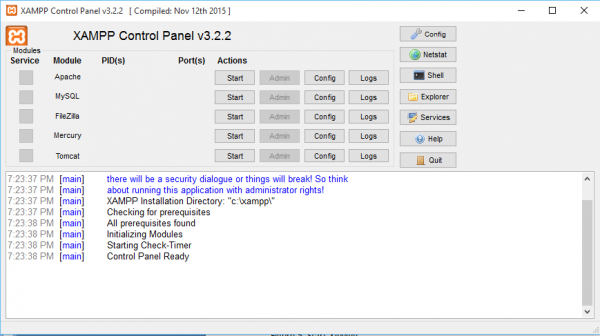
Figure 6 – Start Apache and MySQL
After clicking Start, we can see the successful running status −
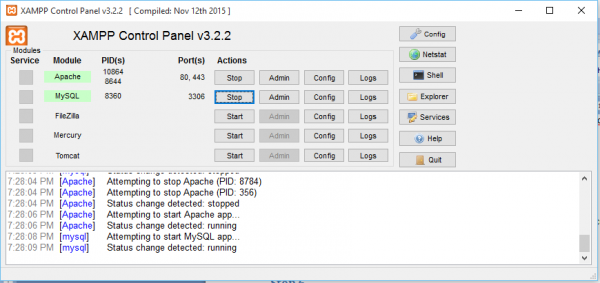
Figure 7- Running status of Apache and MySQL
Step 7
Open the web browser, type localhost and press enter. Now we can see the XAMPP dashboard. If the dashboard is visible, it means everything is working fine.
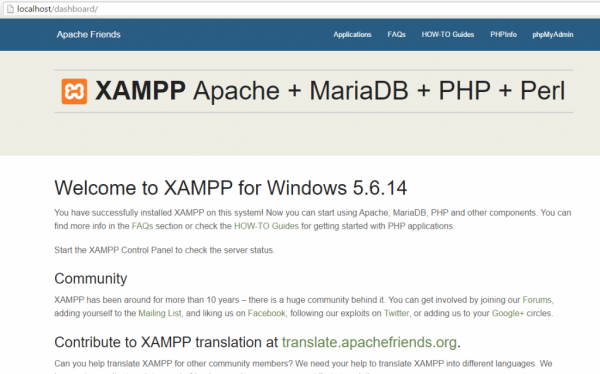
Figure 8- XAMPP Dashboard
Step 8
Now we will enter the project folder from the browser. For that, type localhost/AmitDemoWebsite/ on the address bar and press enter. After pressing enter we will be redirected to WordPress installation as in the following screenshot −
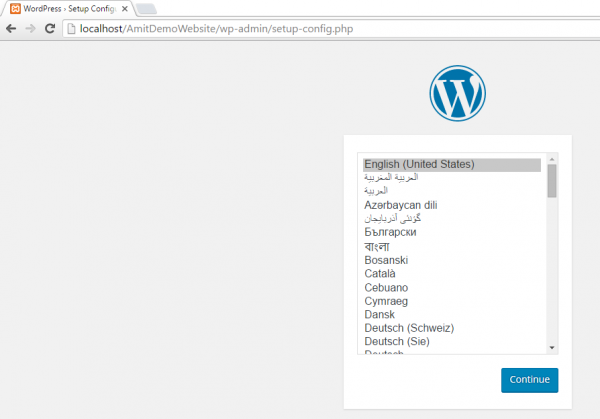
Figure 9: WordPress Setup initiated
Selecting the language English (United States), clicking Continue will redirect us to the following step for database.
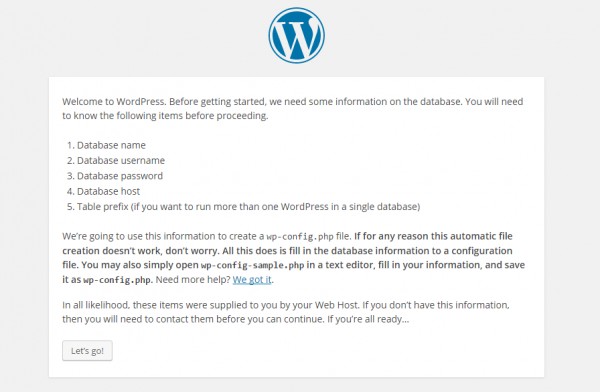
Figure 10: Database Information
The above step is notifying us to create a database before moving further, since it will ask for database information after clicking “Let’s go!”. So, follow the below given step for creating a database using PhyMyAdmin.
Step 9
Open another browser tab and type http://localhost/phpmyadmin and press enter. Now we will reach the PhpMyAdmin page. Here’s the screenshot −

Figure 11: PhpMyAdmin
Above you can see more than five databases already created on the left side. Now, create a new database as in the following step 10.
Step 10
Click “New” from the left and we can see a place to add the name of a new database. Here, we have added the name “DemoDB” as in the following screenshot. After entering the name, click “Create”.
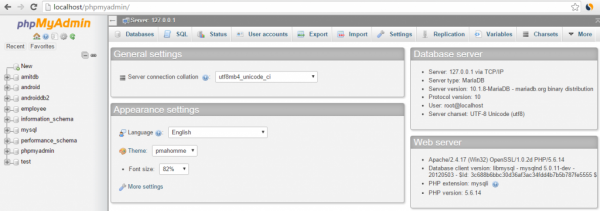
Figure 12: New Database DemoDB
Now we can see the Database successfully created and is present in the list on the left as well.
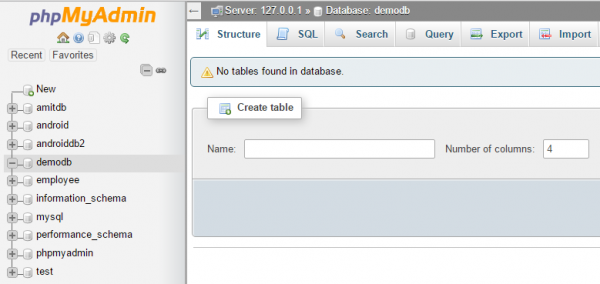
Figure 13: DemoDB created
Step 11
Continue with step 8-9 now and click “Let’s Go!”.
After clicking, we need to add our database connection details. We have added the following information with database name DemoDB. You can leave the Password field empty right now as shown below. You can also add the table prefix, but we would suggest to keep it as it is to avoid confusion since you have just started with WordPress.
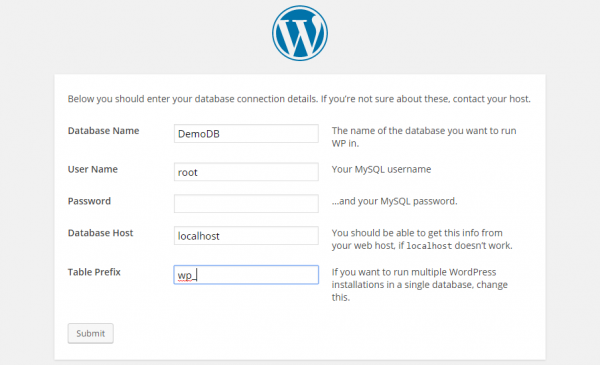
Figure 14: Database Connection details
Now we can see the following is visible, that means WordPress is ready to install on localhost. Click “Run the Install” −
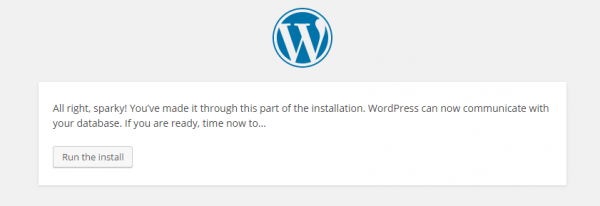
Figure 15: Run the Install
Step 12
Now, get ready to enter the site details. We have added the following, the password is already provided, you can also change it. The Username and Password will help you to login to your own website −
Site Title− Amit New Website
Username− WebEditorialStaff
Password− (enter password)
You Email− (enter email)
Search Engine Visibility: Keep it as it is
Here’s the screenshot −
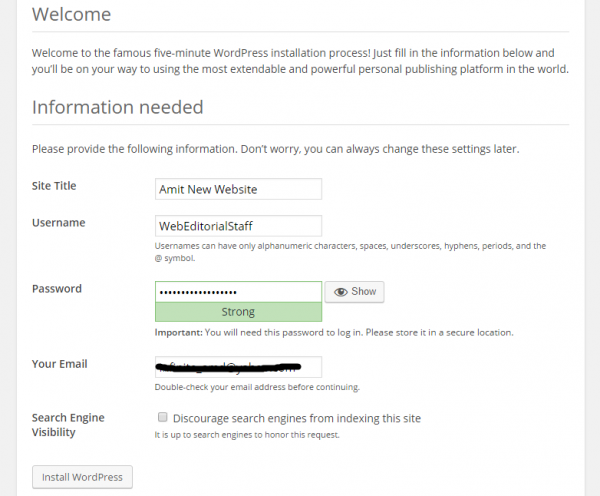
Figure 16: Add Site Details
Click “Install WordPress”
Step 13
Success! Congratulations, now we can see the following screenshot on successful installation of WordPress.
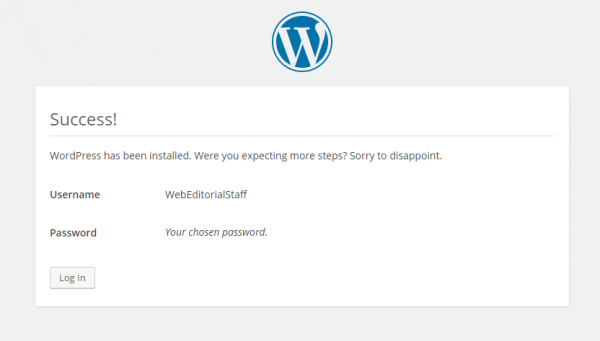
Figure 17- WordPress successfully installed
Step 14
Click “Login In” as visible in the above Figure 17. Enter the same Username: WebEditorialStaff mentioned above with the chosen password. Here’s the screenshot −
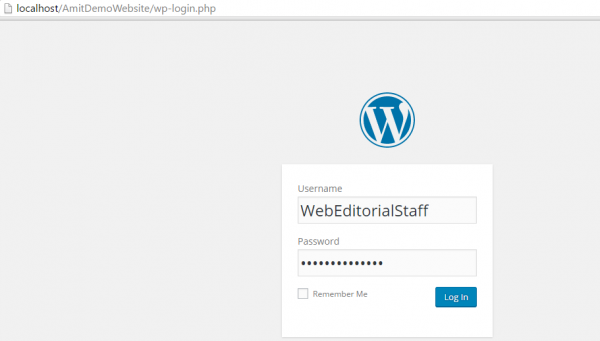
Figure 18 – Log In to your WordPress Website
Step 15
Great! We just entered the website admin and WordPress Dashboard. Here’s the screenshot −
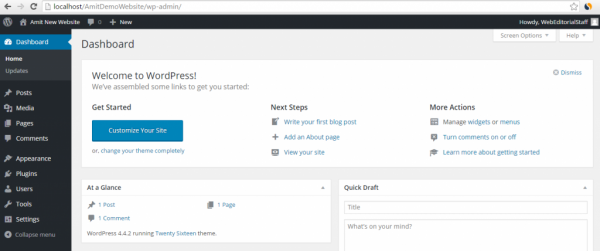
Figure 19 – AmitDemoWebsite WordPress Dashboard
For viewing the homepage of your demo website, just type (sample – http://localhost/AmitDemoWebsite) on the address bar and press enter. Here we can see our demo website with the same site name −
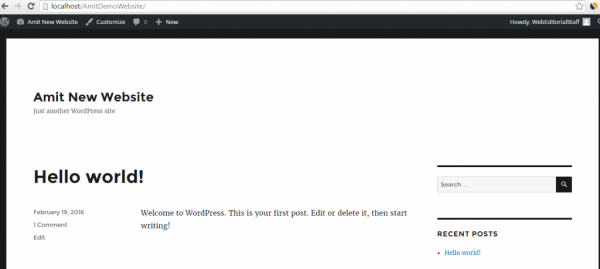
Figure 20- AmitDemoWebsite home page
Conclusion
So, this was a tutorial to start with WordPress on localhost using XAMPP. Through this tutorial you learned −
- How to start with Xampp
- How to create a new database using Xampp
- How to start with WordPress
- How to connect new database with WordPress
- How to run your first demo WordPress website on localhost.
If you have any questions, then please mention in the comments section.

1K+ Views
