
Article Categories
- All Categories
-
 Data Structure
-
 Networking
-
 RDBMS
RDBMS
-
 Operating System
-
 Java
Java
-
 MS Excel
-
 iOS
iOS
-
 HTML
HTML
-
 CSS
CSS
-
 Android
-
 Python
-
 C Programming
-
 C++
C++
-
 C#
C#
-
 MongoDB
-
 MySQL
MySQL
-
 Javascript
-
 PHP
PHP
-
 Economics & Finance
PHP program to Fetch Data from Localhost Server Database using XAMPP
To fetch data from a localhost server database using XAMPP, you need to set up a local web server environment and create a PHP script that connects to your MySQL database. This tutorial will guide you through the complete process.
Prerequisites: Install XAMPP from https://www.apachefriends.org/download.html before proceeding.
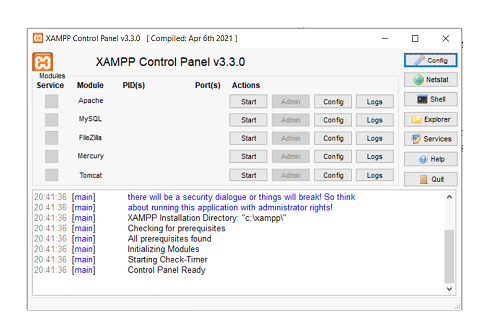
Setting Up XAMPP Server
Step 1: Start the XAMPP Server
Launch the XAMPP control panel
Start the Apache and MySQL services by clicking "Start" next to each service
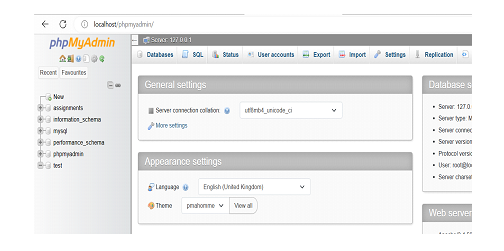
Step 2: Access phpMyAdmin
Open your web browser and navigate to
http://localhost/phpmyadminphpMyAdmin is a web-based application used to manage MySQL databases
Creating Database and Table
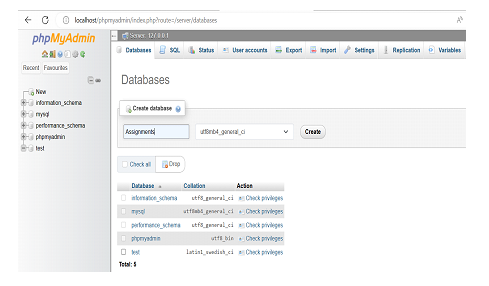
Step 1: Create a Database
In phpMyAdmin, click on the "Databases" tab
Enter "assignments" as the database name
Click "Create" to create the database
Step 2: Create a Table
Select the "assignments" database from the left sidebar
Click on the "SQL" tab and execute the following query ?
CREATE TABLE StudentInfo (
   id INT PRIMARY KEY AUTO_INCREMENT,
   name VARCHAR(50),
   email VARCHAR(50),
   fathername VARCHAR(50),
   mobileno VARCHAR(10)
);
Step 3: Insert Sample Data
Execute the following SQL queries to insert test data ?
INSERT INTO `studentinfo`(`name`, `email`, `fathername`, `mobileno`)
VALUES ('Kishore','kish@gmail.com','Ranga','9347342900'),
       ('Haveesh','havi@gmail.com','Kishore','8341748800'),
       ('Hasvitha','hasvi@gmail.com','Kishore','8466906072'),
       ('Santh','San@gmail.com','Suresh','8466906072');
Creating PHP Script to Fetch Data
Create a PHP file named fetch.php in your XAMPP htdocs directory and add the following code ?
<?php
// Database connection settings
$servername = "localhost";
$username = "root";
$password = "";
$database = "assignments";

// Create connection
$conn = new mysqli($servername, $username, $password, $database);

// Check connection
if ($conn->connect_error) {
   die("Connection failed: " . $conn->connect_error);
}

// SQL query to fetch data from the table
$sql = "SELECT * FROM StudentInfo";
$result = $conn->query($sql);

if ($result->num_rows > 0) {
   // Output data of each row
   while ($row = $result->fetch_assoc()) {
      echo "ID: " . $row["id"] . " - Name: " . $row["name"] . " - Email: " . $row["email"]
           . " - Father Name: " . $row["fathername"] . " - Mobile: " . $row["mobileno"] . "<br>";
   }
} else {
   echo "No results found";
}

// Close the database connection
$conn->close();
?>
Testing the Application
Save the file and access it through your web browser at http://localhost/fetch.php to see the fetched data displayed ?
ID: 1 - Name: Kishore - Email: kish@gmail.com - Father Name: Ranga - Mobile: 9347342900
ID: 2 - Name: Haveesh - Email: havi@gmail.com - Father Name: Kishore - Mobile: 8341748800
ID: 3 - Name: Hasvitha - Email: hasvi@gmail.com - Father Name: Kishore - Mobile: 8466906072
ID: 4 - Name: Santh - Email: San@gmail.com - Father Name: Suresh - Mobile: 8466906072
Key Points
Always check database connection before executing queries
Use
mysqliextension for secure database operationsPlace PHP files in the
htdocsdirectory for XAMPP accessClose database connections after use to free up resources
Conclusion
This tutorial demonstrated how to fetch data from a localhost MySQL database using XAMPP and PHP. The process involves setting up XAMPP services, creating a database with sample data, and writing a PHP script that connects to the database and displays the retrieved records in a web browser.

2K+ Views
