 Data Structure
 Networking
 RDBMS
RDBMS Operating System
 Java
Java MS Excel
 iOS
iOS HTML
HTML CSS
CSS Android
 Python
 C Programming
 C++
C++ C#
C# MongoDB
 MySQL
MySQL Javascript
 PHP
PHP
- Selected Reading
- UPSC IAS Exams Notes
- Developer's Best Practices
- Questions and Answers
- Effective Resume Writing
- HR Interview Questions
- Computer Glossary
- Who is Who
How to run Specific function automatically or infinite times in Python Tkinter?
Introduction
When it comes to creating graphical user interfaces (GUIs), Python provides the Tkinter library, which is a popular choice for building user-friendly applications. However, you may encounter situations where you need to run a specific function automatically, either infinitely or at predetermined intervals, to perform tasks such as updating information, handling events, or refreshing the GUI. This article will show you how to achieve this in Python using the Tkinter library.
Understanding the Tkinter Event Loop
To run a function automatically in a Tkinter application, we must first understand the concept of the Tkinter event loop. Tkinter applications are event-driven, meaning they wait for and respond to events such as button clicks, mouse movements, or keyboard inputs. The event loop is a continuous process that listens for these events and calls the associated event handlers to respond to them.
When you create a Tkinter application, you start the main event loop using the mainloop() method. This method runs indefinitely until you explicitly exit the application. During this loop, Tkinter constantly checks for events and executes event handlers.
To run a specific function automatically or infinitely within the Tkinter event loop, we have several methods, depending on the desired behavior
Method 1 Using the after() method
Method 2 Running a function in a separate thread
Method 3 Creating a custom event-driven approach
In this article, we'll explore each of these method in detail.
Method 1: Using the after() Method
The after() method is a convenient way to schedule the execution of a function after a specified delay. It allows you to run a function automatically after a certain period of time and even set up recurring executions. Here's how you can use it in a Tkinter application
Example
import tkinter as tk
def my_function():
   # Your code here
   print("Function executed")

def schedule_function():
   my_function()  # Call the function
   root.after(1000, schedule_function)  # Schedule it to run again in 1000 milliseconds (1 second)

root = tk.Tk()
root.geometry("720x250")
root.title("Using the after() method")
schedule_function()  # Start the scheduled function
root.mainloop()  # Start the Tkinter event loop
In the code above, we define a function my_function() that we want to run automatically. Then, we create another function schedule_function() that calls my_function() and schedules itself to run again after a 1000 millisecond (1-second) delay. This effectively runs my_function() infinitely at 1-second intervals.
You can adjust the delay (in milliseconds) by modifying the argument passed to the after() method. In this example, it runs every second (1000 milliseconds). Keep in mind that using after() doesn't create a separate thread; the function runs within the main Tkinter event loop.
Output

Method 2: Running a Function in a Separate Thread
Running a function in a separate thread is another way to perform tasks concurrently in a Tkinter application. This approach is suitable when you need to run a long-running or potentially blocking function without freezing the GUI. Here's how you can do it
Example
import tkinter as tk
import threading
def my_function():
   # Your code here
   print("Function executed")

def run_function_in_thread():
   thread = threading.Thread(target=my_function)
   thread.start()

root = tk.Tk()
root.geometry("720x250")
root.title("Running a function in a separate Thread")
button = tk.Button(root, text="Run Function", command=run_function_in_thread)
button.pack()
root.mainloop()
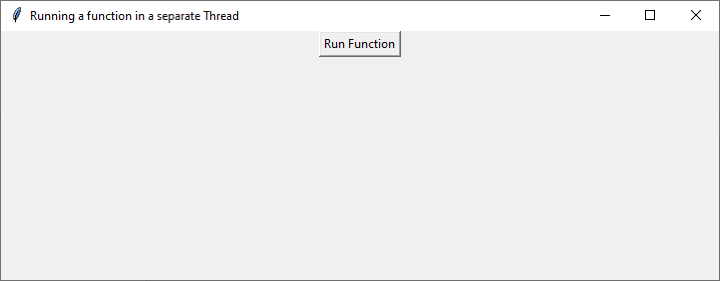
In this code, we define the my_function() we want to run. We create another function, run_function_in_thread(), which starts a new thread that runs my_function(). We use the threading module to manage the thread. When you click the "Run Function" button, it initiates the execution of my_function() in a separate thread without blocking the GUI.
It's essential to note that you should be cautious when working with threads in a Tkinter application. Tkinter is not thread-safe, so make sure your threaded function doesn't directly manipulate the GUI elements. If you need to update the GUI from a separate thread, consider using the tkinter's after() method to schedule GUI updates on the main thread.
Output

Method 3: Creating a Custom Event-Driven Approach
For more advanced scenarios, you can create a custom event-driven approach to run a function automatically.
Here's an example of how you can create a custom event-driven mechanism to run a function periodically
Example
import tkinter as tk
class CustomEventDrivenApp:
   def __init__(self, root):
      self.root = root
      self.interval = 1000  # Set the interval in milliseconds (1 second)
      self.running = False
      self.my_function()

   def my_function(self):
      if self.running:
         # Your code here
         print("Function executed")
         self.root.after(self.interval, self.my_function)

   def start(self):
      if not self.running:
         self.running = True
         self.my_function()

   def stop(self):
      self.running = False

root = tk.Tk()
root.geometry("720x250")
root.title("Creating a custom Event-Driven Approach")
app = CustomEventDrivenApp(root)
start_button = tk.Button(root, text="Start", command=app.start)
start_button.pack()
stop_button = tk.Button(root, text="Stop", command=app.stop)
stop_button.pack()
root.mainloop()
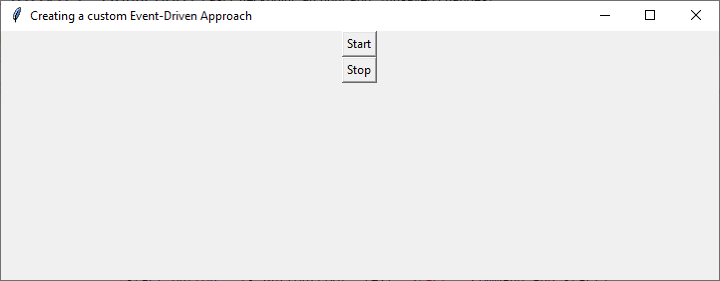
In this example, we define a class CustomEventDrivenApp that encapsulates the custom event-driven approach. The class has a method my_function() that runs the desired function and schedules itself to run again at a specified interval using after(). You can control the execution by calling the start() and stop() methods. When you click the "Start" button, it starts the execution, and the "Stop" button halts it.
Output

Conclusion
Running a specific function automatically or infinitely in a Python Tkinter application can be achieved using different techniques. You can use the after() method to schedule the function to run at specific intervals, run the function in a separate thread to avoid freezing the GUI, or create a custom event-driven approach for more flexibility.
Choose the method that best suits your application's requirements. If you want a simple and straightforward solution, the after() method is a great choice. If you need to perform more complex operations or require concurrency, using threads may be the way to go. For advanced scenarios, the custom event-driven approach offers the most control over function execution.

