 Data Structure
 Networking
 RDBMS
RDBMS Operating System
 Java
Java MS Excel
 iOS
iOS HTML
HTML CSS
CSS Android
 Python
 C Programming
 C++
C++ C#
C# MongoDB
 MySQL
MySQL Javascript
 PHP
PHP
- Selected Reading
- UPSC IAS Exams Notes
- Developer's Best Practices
- Questions and Answers
- Effective Resume Writing
- HR Interview Questions
- Computer Glossary
- Who is Who
How to insert new rows in Tkinter grid?
Tkinter, the widely-used GUI (Graphical User Interface) toolkit for Python, provides a robust grid geometry manager that facilitates the organization of widgets in a tabular structure. In the realm of developing graphical applications, the ability to seamlessly insert new rows into a Tkinter grid emerges as an invaluable skill.
This article aims to offer a comprehensive guide on the effective incorporation of new rows in Tkinter grids, empowering developers to craft dynamic and adaptive user interfaces. Understanding the fundamentals of the Tkinter grid system is pivotal before delving into the intricacies of dynamic row insertion. Let's embark on this journey to enhance our proficiency in creating flexible and responsive layouts in Tkinter.
The Tkinter Grid
The grid, employed as a geometry manager, orchestrates the arrangement of widgets in rows and columns within a graphical user interface. Widgets are systematically positioned within cells, delineated by specific row and column indices.
Let's start with a basic Tkinter grid layout that contains a few widgets.
Example
# Importing the necessary libraries
import tkinter as tk

# Create the main window
root = tk.Tk()
root.title("Basic Tkinter Grid Layout")

# Set window dimensions
root.geometry("720x250")

label1 = tk.Label(root, text="Widget 1")
label2 = tk.Label(root, text="Widget 2")

label1.grid(row=0, column=0)
label2.grid(row=1, column=0)

# Run the Tkinter event loop
root.mainloop()
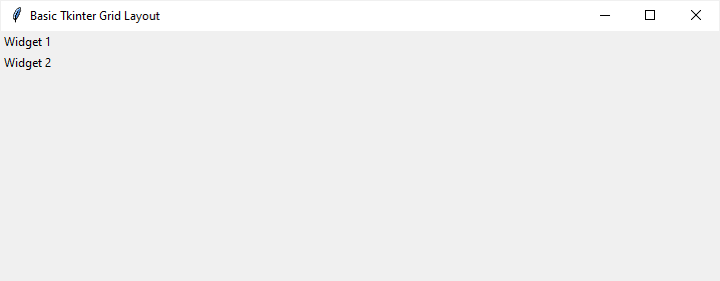
In this example, two labels are placed in the first and second rows. We will build upon this to demonstrate row insertion dynamically.
Output

Inserting New Rows
To insert new rows into the Tkinter grid, we need to follow a systematic approach. Let's break it down step by step.
Step 1: Define a Function for Row Insertion
Create a function that handles the insertion of new rows. This function should create the widgets you want to insert and place them in the appropriate row.
def insert_new_row():
   new_label = tk.Label(root, text="New Widget")
   last_row = root.grid_size()[1]
   new_label.grid(row=last_row, column=0)
Here, the insert_new_row function creates a new label and places it in the next available row.
Step 2: Call the Function Trigger
Create a trigger for calling the function. This trigger can be a button click or any other event depending on your application.
insert_button = tk.Button(root, text="Insert New Row", command=insert_new_row)
insert_button.grid(row=2, column=0)
In this case, a button labeled "Insert New Row" is created, and the insert_new_row function is assigned to its command parameter. Clicking the button will execute the function.
Example
Putting it all together, the complete code looks like this
# Importing the necessary libraries
import tkinter as tk
# Defining the function to insert new rows
def insert_new_row():
   new_label = tk.Label(root, text="New Widget")
   last_row = root.grid_size()[1]
   new_label.grid(row=last_row, column=0)

# Create the main window
root = tk.Tk()
root.title("Inserting new rows")

# Set window dimensions
root.geometry("720x250")

label1 = tk.Label(root, text="Widget 1")
label2 = tk.Label(root, text="Widget 2")

label1.grid(row=0, column=0)
label2.grid(row=1, column=0)

# Creating the insert button

insert_button = tk.Button(root, text="Insert New Row", command=insert_new_row)
insert_button.grid(row=2, column=0)

root.mainloop()
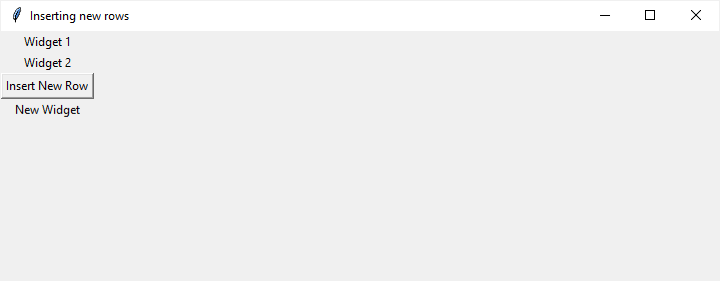
Click on the Insert New Row button and it will insert the new row in the Tkinter grid. Let's check out this below in the output
Output

Example
Let's enhance the example by inserting Entry widgets in a new row. This showcases the flexibility of the approach.
# Importing the necessary libraries
import tkinter as tk
# Defining the function to insert new rows
def insert_new_row():
   entry1 = tk.Entry(root)
   entry2 = tk.Entry(root)

   last_row = root.grid_size()[1]

   entry1.grid(row=last_row, column=0)
   entry2.grid(row=last_row, column=1)

# Create the main window
root = tk.Tk()
root.title("Inserting new rows")

# Set window dimensions
root.geometry("720x250")

entry1 = tk.Entry(root)
entry2 = tk.Entry(root)

entry1.grid(row=0, column=0)
entry2.grid(row=0, column=1)

# Creating the insert button
insert_button = tk.Button(root, text="Insert New Row", command=insert_new_row)
insert_button.grid(row=1, column=0, columnspan=2)

# Run the Tkinter event loop
root.mainloop()
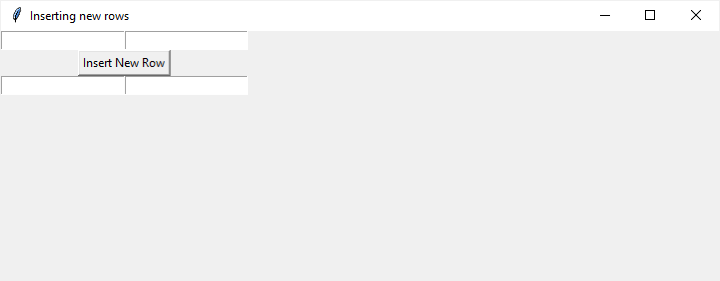
In this example, clicking the button inserts two new Entry widgets into the next row, expanding the grid dynamically.
Output

Conclusion
Mastering the art of dynamically inserting new rows into a Tkinter grid bestows developers with a powerful tool for crafting user interfaces that are both adaptable and engaging. By navigating through the intricacies of the Tkinter grid geometry manager and following a systematic approach, developers can seamlessly integrate new elements into their layouts, fostering flexibility and dynamism.
This comprehensive guide, accompanied by illustrative examples, serves as a roadmap for developers venturing into the realm of Tkinter. As you continue to explore the vast capabilities of Tkinter, remember that the key to constructing compelling and user-friendly interfaces lies in combining technical proficiency with creativity.

