
Article Categories
- All Categories
-
 Data Structure
-
 Networking
-
 RDBMS
RDBMS
-
 Operating System
-
 Java
Java
-
 MS Excel
-
 iOS
iOS
-
 HTML
HTML
-
 CSS
CSS
-
 Android
-
 Python
-
 C Programming
-
 C++
C++
-
 C#
C#
-
 MongoDB
-
 MySQL
MySQL
-
 Javascript
-
 PHP
PHP
-
 Economics & Finance
How to Automatically Insert Rows in Excel?
If we need to enter new data into the sheet and want to add it in the middle, we must insert a new row. We can also use this insert when we delete the existing row and try to add a new row. This tutorial will help you understand how we can automatically insert rows in Excel.
Inserting a row in Excel is one of the more time-consuming processes, so we need to use shortcuts to save time. In general, we insert a row by clicking right on a cell, selecting "Insert," and then dragging the existing rows up, down, left, or right before clicking "OK" to insert the row. In this article, we will insert a row using the shortcut keys supported by Excel.
Automatically Insert Rows in Excel
Here we will use the shortcut key to insert the new row. Let us see a straightforward process to understand how we can automatically insert rows in Excel using the shortcut keys.
Step 1
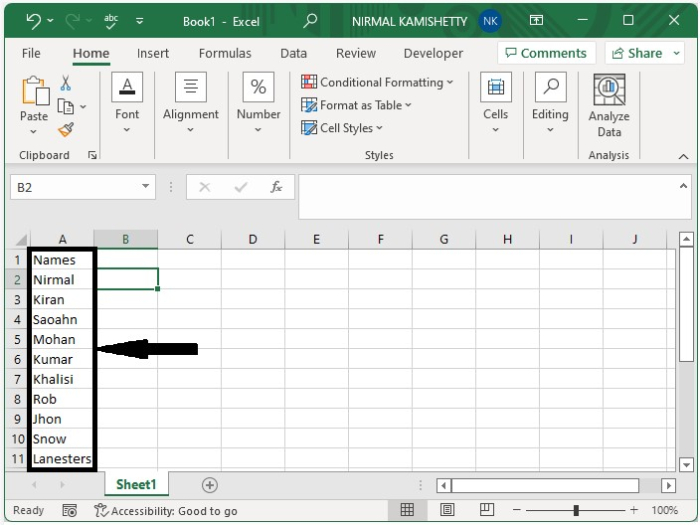
Let us consider an Excel sheet that has a list of data, as shown in the below image.
Now to insert a new row in the general method, right-click on the row you want to insert, select Insert and Shift Cells, and then click on OK to insert the row as shown in the below image.

Step 2
To insert the row automatically, use the command CTRL + SHIFT + + to open the pop-up shown below.
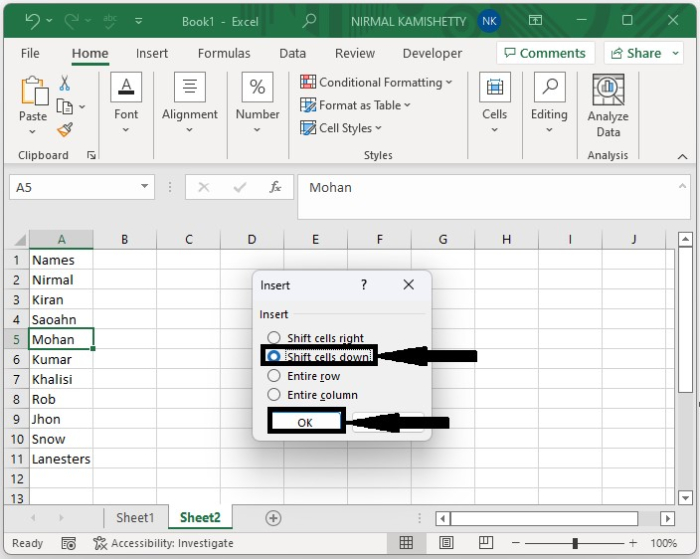
Step 3
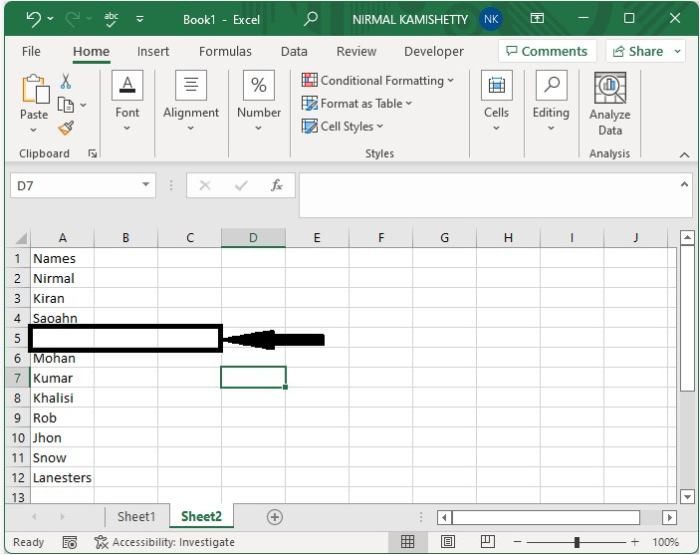
Now in the new pop up click on shift cells down the click on ok insert the row and our final output will like the below image.
Conclusion
In this tutorial, we used a simple example to demonstrate how we can automatically insert a row using the shortcut key in Excel.

11K+ Views
