 Data Structure
 Networking
 RDBMS
RDBMS Operating System
 Java
Java MS Excel
 iOS
iOS HTML
HTML CSS
CSS Android
 Python
 C Programming
 C++
C++ C#
C# MongoDB
 MySQL
MySQL Javascript
 PHP
PHP
- Selected Reading
- UPSC IAS Exams Notes
- Developer's Best Practices
- Questions and Answers
- Effective Resume Writing
- HR Interview Questions
- Computer Glossary
- Who is Who
How to set a certain number of rows and columns of a Tkinter grid?
In Tkinter, you can set the GUI of the application by using a different geometry manager. The grid geometry manager is one of the most useful geometry managers in tkinter that is used to set the widgets location in the application using the 2D geometry form.
With a grid geometry manager, you can set a certain number of rows and columns and place the widget in any location of the application. To set a certain number of rows and columns, you’ll need to specify the size value of the row and column configuration that helps to set the location of a particular widget.
Example
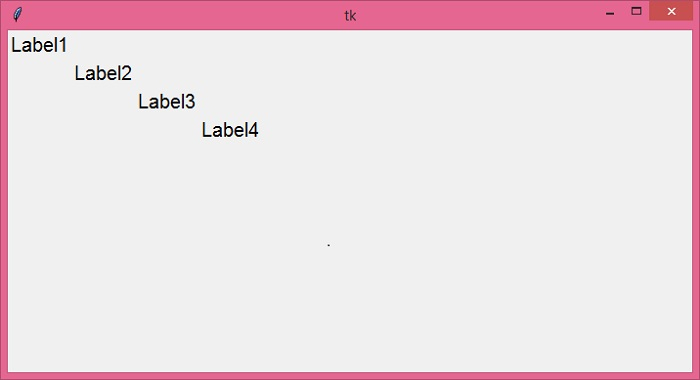
In the following example, we have created a label widget and used the grid geometry manager to set the location along the row and column of the window.
# Import the required library
from tkinter import*

# Create an instance of tkinter frame or window
win = Tk()

# Set the size of the window
win.geometry("700x350")

# Add a label widget
label1 = Label(win, text='Label1', font=("Calibri, 15"))
label1.grid(column=1, row=2)

label2 = Label(win, text='Label2', font=("Calibri, 15"))
label2.grid(column=3, row=5)

label3 = Label(win, text='Label3', font=("Calibri, 15"))
label3.grid(column=5, row=8)

label4 = Label(win, text='Label4', font=("Calibri, 15"))
label4.grid(column=7, row=11)

# set size of the window and add row and column
win.rowconfigure(9)
win.columnconfigure(9)

win.mainloop()
Output
Running the above code will display a window with label widgets set along the row and column of the window.


