
Article Categories
- All Categories
-
 Data Structure
-
 Networking
-
 RDBMS
RDBMS
-
 Operating System
-
 Java
Java
-
 MS Excel
-
 iOS
iOS
-
 HTML
HTML
-
 CSS
CSS
-
 Android
-
 Python
-
 C Programming
-
 C++
C++
-
 C#
C#
-
 MongoDB
-
 MySQL
MySQL
-
 Javascript
-
 PHP
PHP
-
 Economics & Finance
How to Expand or Close All Group Rows and Columns in Excel?
The ability to group rows and columns in Excel is one of the tool's robust capabilities for handling and organising massive data sets. By using groups, you may easily navigate and analyse your data by collapsing or expanding worksheet portions.
In this article, we'll look at Excel's group rows and columns and how to open and close them. Having a firm grasp of these strategies will enable you to easily browse through your data and concentrate on the particular areas you need, whether you're working with a challenging financial model, a comprehensive project plan, or any other spreadsheet that requires a lot of data. You will have a firm grasp on the various methods for handling grouped data in Excel by the end of this course and be able to use them in your own projects. In order to learn how to expand and shut group rows and columns in Excel, let's get started.
Expand or Close All Group Rows and Columns
Here, we will first create a VBA module and then run it to complete the task. So let us see a simple process to know how you can expand or close all group rows and columns in Excel.
Step 1
Consider an Excel sheet where you have grouped rows and columns as shown in the below image.
Right-click > View Code.
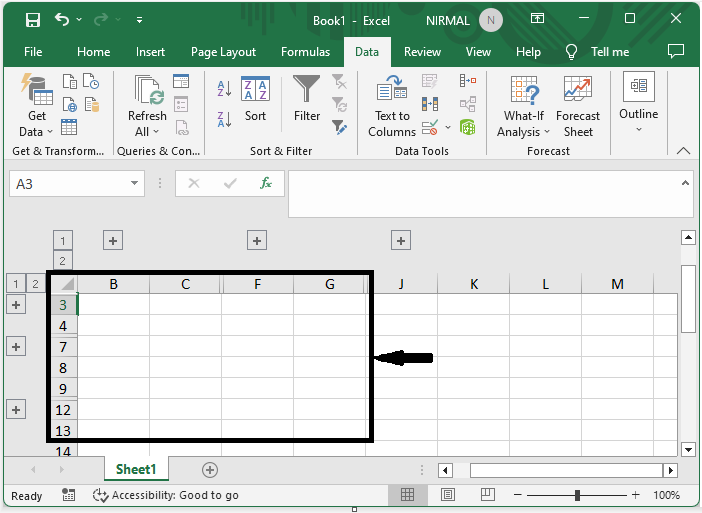
First, right-click on the sheet name and select View code to open the VBA application.
Step 2
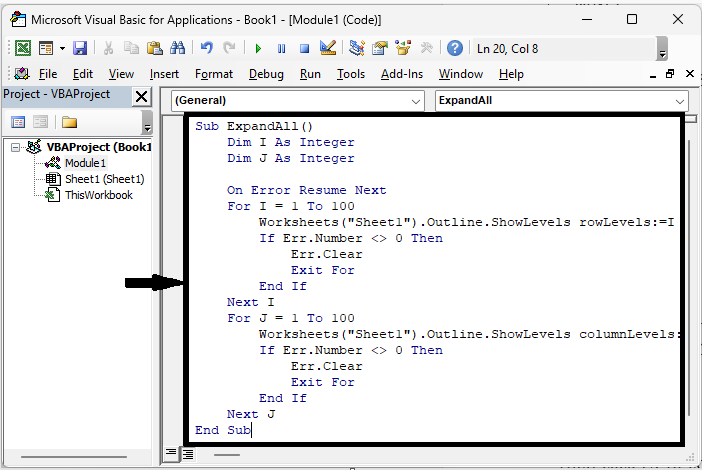
Then click on Insert and select Module, then copy the below code into the text box.
Insert > Module > Copy.
Code
Sub ExpandAll()
   Dim I As Integer
   Dim J As Integer

   On Error Resume Next
   For I = 1 To 100
      Worksheets("Sheet1").Outline.ShowLevels rowLevels:=I
      If Err.Number <> 0 Then
         Err.Clear
         Exit For
      End If
   Next I
   For J = 1 To 100
      Worksheets("Sheet1").Outline.ShowLevels columnLevels:=J
      If Err.Number <> 0 Then
         Err.Clear
         Exit For
      End If
   Next J
End Sub
In the code, Sheet1 is the sheet name.
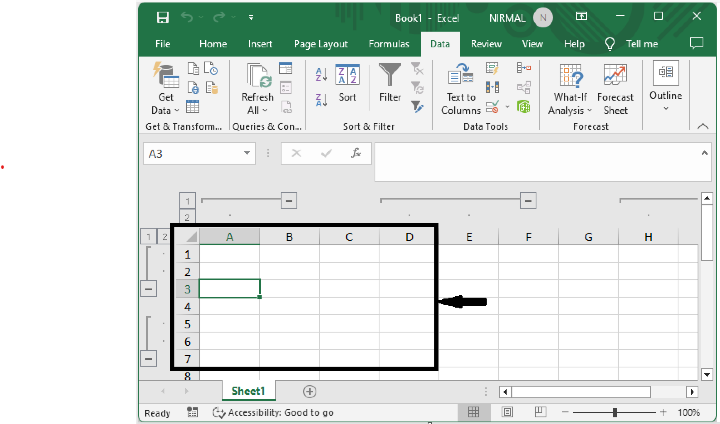
Step 3
Then click F5 to complete the task. Then you can see that all the groups in Sheet 1 will be ungrouped.
Note
If you want to group all the cells using the below code,
Sub CollapseAll()
   Worksheets("sheet1").Outline.ShowLevels 1, 1
End Sub
Conclusion
In this tutorial, we have used a simple example to demonstrate how you can expand or close all group rows and columns in Excel to highlight a particular set of data.

578 Views
