
Article Categories
- All Categories
-
 Data Structure
-
 Networking
-
 RDBMS
RDBMS
-
 Operating System
-
 Java
Java
-
 MS Excel
-
 iOS
iOS
-
 HTML
HTML
-
 CSS
CSS
-
 Android
-
 Python
-
 C Programming
-
 C++
C++
-
 C#
C#
-
 MongoDB
-
 MySQL
MySQL
-
 Javascript
-
 PHP
PHP
-
 Economics & Finance
Get ASCII table in Arduino
In this article, we will walkthrough the example code in Arduino, which helps generate the ASCII table in the Serial Monitor output. For your reference, this is what the ASCII table looks like − http://www.asciitable.com/
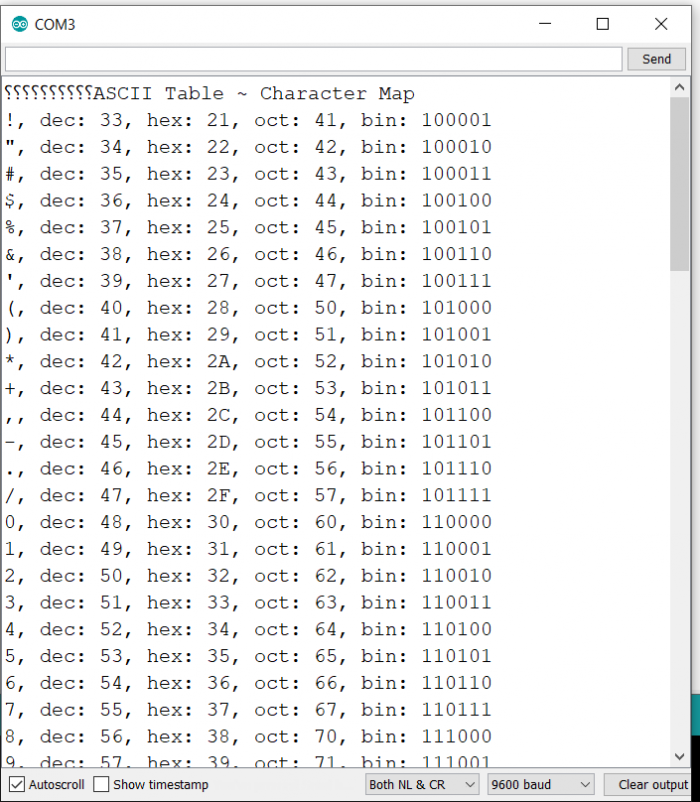
It contains the character, followed by its ASCII code in decimal, hexadecimal, and sometimes, even octal and binary representations. In this example, we will print out all these representations for printable ASCII characters. Remember that the first printable ASCII character starts from number 33, and the printable characters go on up to number 126. Since we will print out the ASCII table on the Serial Monitor, we will concern ourselves with only printable characters.
In order to access this example, go to File → Examples → 04 Communication → ASCII Table.

Let us begin the walkthrough of this code. As you can see, we begin with the initialization of Serial in the setup and then wait for the Serial port to connect. After that, we just print the title of the sketch.
void setup() {
   //Initialize serial and wait for port to open:
   Serial.begin(9600);
   while (!Serial) {
      ; // wait for serial port to connect. Needed for native USB port only
   }
   // prints title with ending line break
   Serial.println("ASCII Table ~ Character Map");
}
Next, there is the definition of the global variable thisByte. It is initialized to 33. Remember that 33 is equal to the first printable ASCII character.
int thisByte = 33;
Within the loop, we print the value of thisByte as a character (using Serial.write()), then we print its decimal value (using Serial.print()), and then we print its hexadecimal, octal and binary representations, using format specifiers in Serial.print().
We later increment the value of thisByte, until we reach the value of 126, after which we enter an infinite loop, and essentially do nothing.
Example
void loop() {
   // prints value unaltered, i.e. the raw binary version of the byte.
   // The Serial Monitor interprets all bytes as ASCII, so 33, the first number will show up as '!'
   Serial.write(thisByte);

   Serial.print(", dec: ");
   // prints value as string as an ASCII-encoded decimal (base 10).
   // Decimal is the default format for Serial.print() and Serial.println(),
   // so no modifier is needed:
   Serial.print(thisByte);
   // But you can declare the modifier for decimal if you want to.
   // this also works if you uncomment it:
   // Serial.print(thisByte, DEC);

   Serial.print(", hex: ");
   // prints value as string in hexadecimal (base 16):
   Serial.print(thisByte, HEX);

   Serial.print(", oct: ");
   // prints value as string in octal (base 8);
   Serial.print(thisByte, OCT);
   Serial.print(", bin: ");
   // prints value as string in binary (base 2) also prints ending line break:
   Serial.println(thisByte, BIN);

   // if printed last visible character '~' or 126, stop:
   if (thisByte == 126) { // you could also use if (thisByte == '~')
   {
      // This loop loops forever and does nothing
      while (true) {
         continue;
      }
   }
   // go on to the next character
   thisByte++;
}
Output
The Serial Monitor Output is shown below −

2K+ Views
