
- Drupal - Home
- Drupal - Overview
- Drupal - Installation
- Drupal - Architecture
- Drupal - Main Menu
- Drupal - Blocks & Regions
- Drupal - Themes & Layouts
- Drupal - Front Page
- Drupal - Static Pages
- Drupal - Create Blog
- Drupal - Create Articles
- Drupal - Create Pages
- Drupal - Create Content
- Drupal - Modify Content
- Drupal - Delete Content
- Drupal - Publish Content
- Drupal - Menu Management
- Drupal - Taxonomies
- Drupal - Comments
- Drupal - User Management
- Drupal - Optimization
- Drupal - Site Backup
- Drupal - Site Upgrade
- Drupal - Announcements
- Drupal - URL Alias
- Drupal - Site Search
- Drupal - Error Handling
- Drupal - Multilingual Content
- Drupal - Triggers & Actions
- Drupal - Social Networking
- Drupal - Internationalization
- Drupal - Extensions
- Drupal - Default Modules
- Drupal - Pane Module
- Drupal - Book Module
- Drupal - Aggregator Module
- Drupal - Contact Module
- Drupal - Form Module
- Drupal - Poll Module
- Drupal - Site Security
- Drupal E-Commerce
- Drupal - Setup Shopping Cart
- Drupal - Create Products
- Drupal - Create Categories
- Drupal - Setup Taxes
- Drupal - Setup Discounts
- Drupal - Receive Donations
- Drupal - Setup Shipping
- Drupal - Setup Payments
- Drupal - Invoice Generation
- Drupal - Email Notifications
- Drupal - Order History
- Drupal Useful Resources
- Drupal - Questions and Answers
- Drupal - Quick Guide
- Drupal - Useful Resources
- Drupal - Discussion
Drupal - Pane Module
In this chapter, we will learn about using Pane Module in Drupal. Pane module is used to translate the custom panel's pane with optional title that will be stored as variables and it can be translate or edit quickly.
Following are the steps to add Pane Module.
Step 1 − Download the latest file of Pane module from the link and install in your Drupal site.
Step 2 − Enable the one you want to use and click Save Configuration at the bottom of the page.

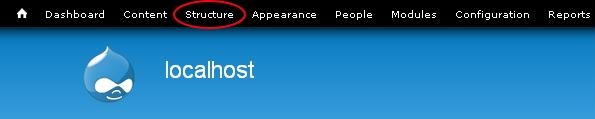
Step 3 − Click Structure from the menu bar.
Step 4 − Click on Panes.
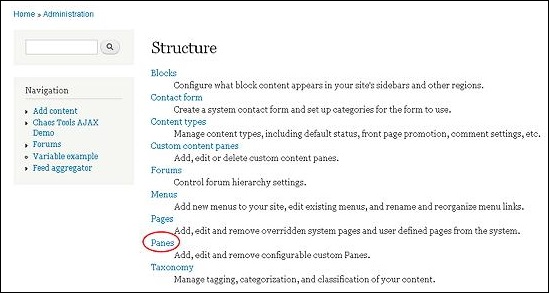
Step 5 − Then click Add pane to add a new pane.

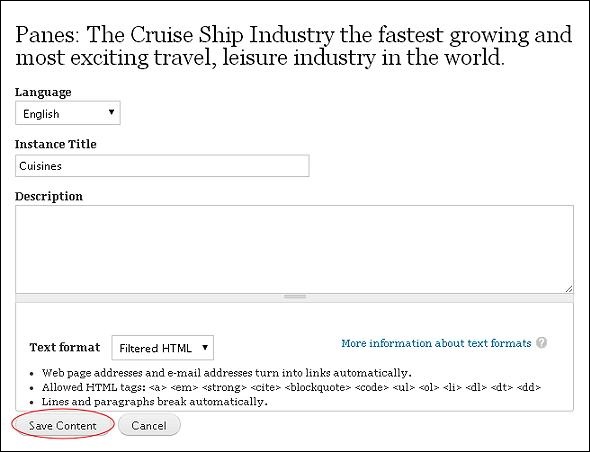
Step 6 − The Panes page gets displayed as shown in the following screen.
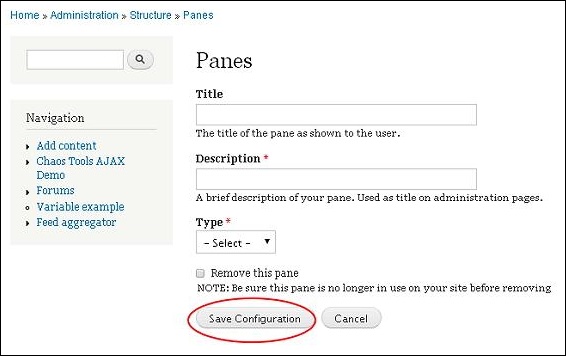
It contains the following fields.
Title − Enter your pane title in this box.
Description − Describe your pane in a line or a sentence.
Type − Select type accordingly, it may be either Text or Entity Host.
After filling the details, click Save Configuration.
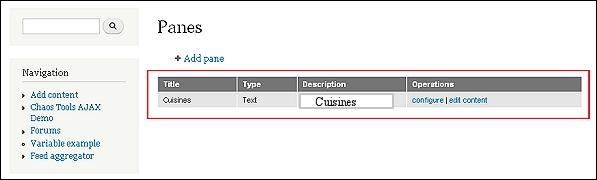
Step 7 − Your Pane module gets displayed as shown in the following image. If you want to make any changes in the pane, then click Edit.
Step 8 − The Pane page gets displayed.
Make the required changes and click Save Content.
