- .NET Core - Home
- .NET Core - Overview
- .NET Core - Prerequisites
- .NET Core - Environment Setup
- .NET Core - Getting Started
- .NET Core - Numerics
- .NET Core - Garbage Collection
- .NET Core - Code Execution
- .NET Core - Modularity
- .NET Core - Project Files
- .NET Core - Package References
- Create UWP App with .NET Core
- .NET Core - MSBuild
- .NET Core - Metapackage
- Windows Runtime & Extension SDKs
- Create .NET Standard Library
- .NET Core - Portable Class Library
- Adding References to Library
- Sharing .NET Core Libraries
- Creating a Xamarin.Forms Project
- .NET Core - PCL Troubleshooting
- .NET Core - Create a Testing Project
- Running Tests in Visual Studio
- .NET Core - Testing Library
- Managed Extensibility Framework
- .NET Core - SDK
- .NET Core - MSBuild & project.json
- Restoring and Building & MSBuild
- .NET Core - Migrations
.NET Core - Create UWP App
In this chapter, we will discuss how to create a UWP application using .NET Core. UWP is also known as Windows 10 UWP application. This application does not run on previous versions of Windows but will only run on future version of Windows.
Following are a few exceptions where UWP will run smoothly.
If you want to run it locally you must have Windows 10, you can also develop on Windows 8 and then you will need to run it on Emulator, but it is encouraged to use Windows 10.
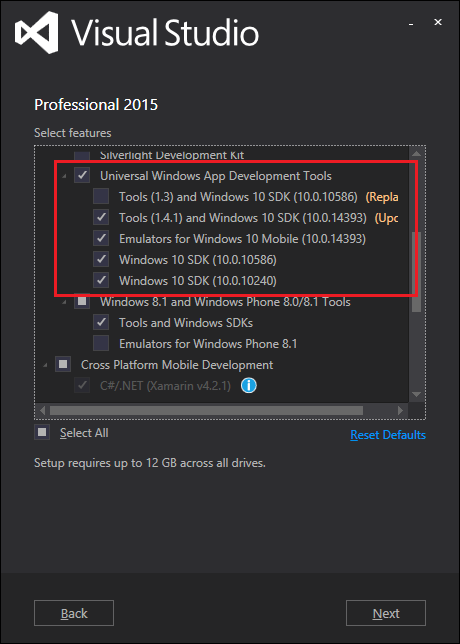
For UWP application you will also need Windows 10 SDK. Let us open Visual Studio 2015 setup and then modify Visual Studio.
On select features page, scroll down and you will see Universal Windows App Development Tools, check that option as shown below.
Here you can see the different versions of SDK and the latest update on Tools as well, click Next.
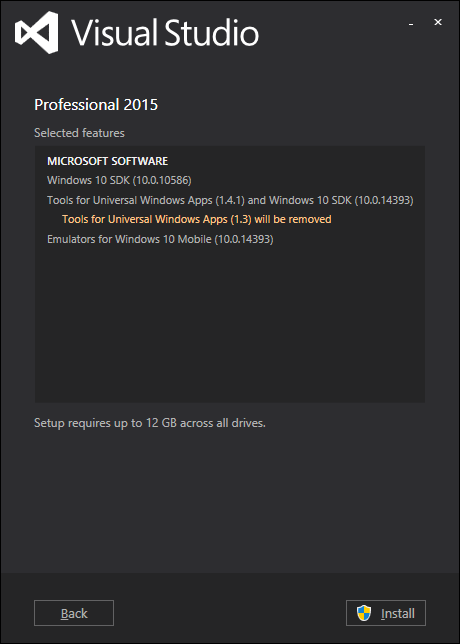
Now, click the Install button.
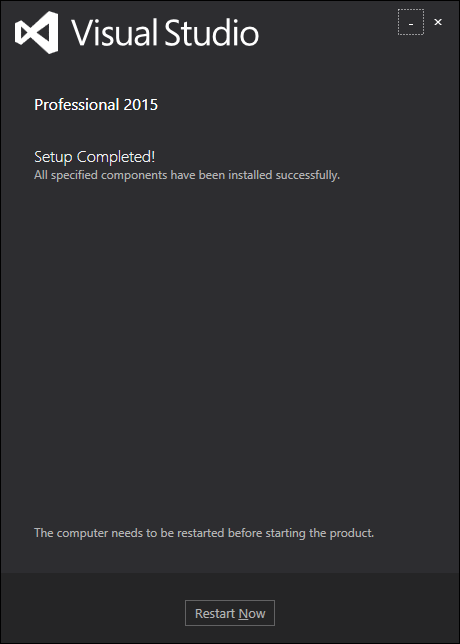
Once the installation is finished, you will need to restart your system.
Let us now implement the UWP by following these steps.
First, launch Visual Studio 2015.
Click on the File menu and select New → Project; a New Project dialog will show up. You can see the different types of templates on the left pane of the dialog box.
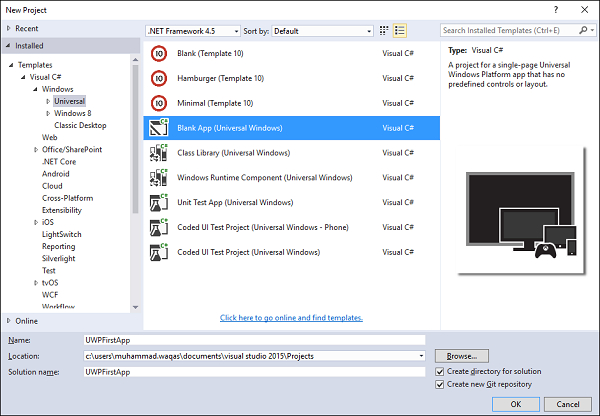
In the left pane, you can see the tree view, now select Universal template from Templates → Visual C# → Windows.
From the center pane, select the Blank App (Universal Windows) template.
Give a name to the project by typing UWPFirstApp in the Name field and click OK.

The target version/minimum version dialog appears. The default settings are fine for this tutorial, so select OK to create the project.
Here, we have a single project which can target all Windows 10 Devices, and you will notice that both .NET Core and UWP are simplification of multi-targeting.
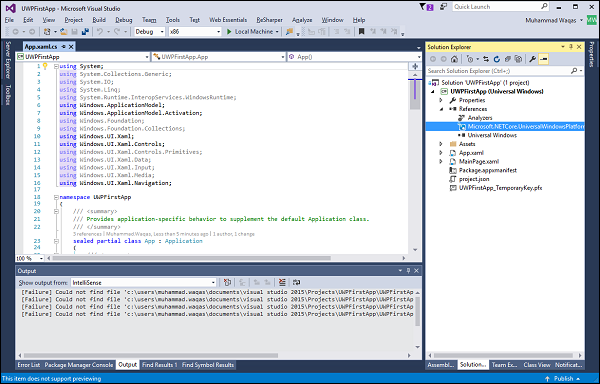
When a new project opens, its files are displayed on the right hand side of the Solution Explorer pane. You may need to choose the Solution Explorer tab instead of the Properties tab to see your files.
Although the Blank App (Universal Window) is a minimal template, it still contains a lot of files. These files are essential to all UWP apps using C#. Every project that you create in Visual Studio contains the files.
To see the running example, let us open MainPage.XAML and add the following code.
<Page
   x:Class = "UWPFirstApp.MainPage"
   xmlns = "http://schemas.microsoft.com/winfx/2006/xaml/presentation"
   xmlns:x = "http://schemas.microsoft.com/winfx/2006/xaml"
   xmlns:local = "using:UWPFirstApp"
   xmlns:d = "http://schemas.microsoft.com/expression/blend/2008"
   xmlns:mc = "http://schemas.openxmlformats.org/markup-compatibility/2006"
   mc:Ignorable = "d">

   <Grid Background = "{ThemeResource ApplicationPageBackgroundThemeBrush}">
      <StackPanel HorizontalAlignment = "Center">
         <TextBlock Text = "Hello, world!"
            Margin = "20"
            Width = "200"
            HorizontalAlignment = "Left"/>
         <TextBlock Text = "Write your name."
            Margin = "20"
            Width = "200"
            HorizontalAlignment = "Left"/>
         <TextBox x:Name = "txtbox"
            Width = "280"
            Margin = "20"
            HorizontalAlignment = "Left"/>
         <Button x:Name = "button" Content = "Click Me"
            Margin = "20"
            Click = "button_Click"/>
         <TextBlock x:Name = "txtblock"
            HorizontalAlignment = "Left"
            Margin = "20"/>
      </StackPanel>
   </Grid>

</Page>
Below is the click event of button in C#.
using System;
using System.Collections.Generic;
using System.IO;
using System.Linq;
using System.Runtime.InteropServices.WindowsRuntime;

using Windows.Foundation;
using Windows.Foundation.Collections;

using Windows.UI.Xaml;
using Windows.UI.Xaml.Controls;
using Windows.UI.Xaml.Controls.Primitives;
using Windows.UI.Xaml.Data;
using Windows.UI.Xaml.Input;
using Windows.UI.Xaml.Media;
using Windows.UI.Xaml.Navigation;

// The Blank Page item template is documented at
// http://go.microsoft.com/fwlink/?LinkId=402352&clcid=0x409

namespace UWPHellowWorld {
   /// <summary>
   /// An empty page that can be used on its own or navigated to within a Frame.
   /// </summary>
   public sealed partial class MainPage : Page {
      public MainPage() {
         this.InitializeComponent();
      }
      private void button_Click(object sender, RoutedEventArgs e) {
         if (txtbox.Text != "")
            txtblock.Text = "Hello: " + txtbox.Text;
         else
            txtblock.Text = "You have not write your name";
      }
   }
}
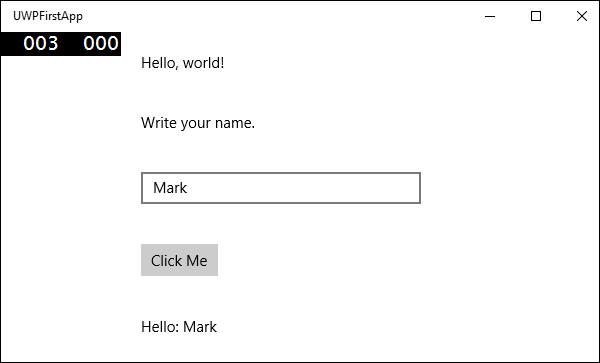
Let us now run the above code on the local machine and you will see the following window. Now type any name in the text box and press the Click Me button.