- RichFaces Tutorial
- RichFaces - Home
- RichFaces - Overview
- RichFaces - Environment Setup
- RichFaces - Architecture
- RichFaces - Basic Concepts
- RichFaces - Rich Skin
- RichFaces - Input Components
- RichFaces - Output Components
- RichFaces - Iteration Component
- RichFaces - Selection Components
- RichFaces - Menu Components
- RichFaces - Rich Tree
- RichFaces - Error Handling
- RichFaces Useful Resources
- RichFaces - Quick Guide
- RichFaces - Useful Resources
- RichFaces - Discussion
RichFaces - Input Components
Till now we have learned a lot about different AJAX components of RichFaces along with a new functionality called “Skin”. In this chapter, we will learn different “Rich” components that RichFaces offers in order to develop a modern web application. Following are the different input components provided by “RichFaces”.
<rich:inplaceInput>
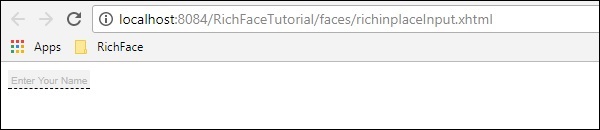
Rich inplaceInput provides an opportunity to create an editable text box instead of a normal input text box. In the following example, we will create an editable text box using this component. Create an xhtml file and name it as “richinplaceInput.xhtml”. Write the following code in that file.
<?xml version = "1.0" encoding = "UTF-8"?>
<!DOCTYPE html>
<html xmlns = "http://www.w3.org/1999/xhtml"
   xmlns:h = "http://java.sun.com/jsf/html"
   xmlns:f = "http://java.sun.com/jsf/core"
   xmlns:ui = "http://java.sun.com/jsf/facelets"
   xmlns:a4j = "http://richfaces.org/a4j"
   xmlns:rich = "http://richfaces.org/rich">

   <h:head>
      <title>TODO supply a title</title>
   </h:head>

   <h:body>
      <f:view></f:view>
      <h:form>
         <rich:inplaceInput  value = "#{managedBean.message}"
            defaultLabel = "Enter Your Name"/>
      </h:form>
   </h:body>

</html>
Save this file and run it. Following will be the output in the browser.
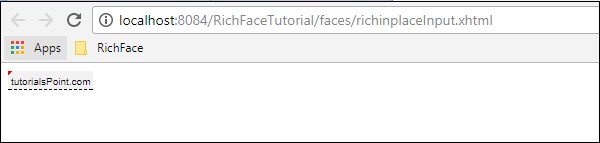
Go ahead and type anything of your choice in that text box and hit enter. This tag also provides inline edit option. Following will be output after editing.
<rich: inplaceSelect>
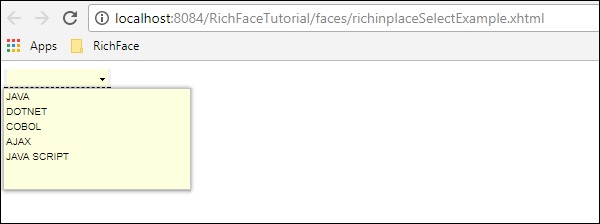
This is another input markup provide by RichFaces, where the user can select an input value from the dropdown list, which is also inline and editable in nature. We need to populate the dropdown from the internal bean class. Please create a “xhtml” file and name it as “richinplaceSelectExample.xhtml”. Place the following piece of code in that file.
<?xml version = "1.0" encoding = "UTF-8"?>
<!DOCTYPE html>
<html xmlns = "http://www.w3.org/1999/xhtml"
   xmlns:h = "http://java.sun.com/jsf/html"
   xmlns:f = "http://java.sun.com/jsf/core"
   xmlns:ui = "http://java.sun.com/jsf/facelets"
   xmlns:a4j = "http://richfaces.org/a4j"
   xmlns:rich = "http://richfaces.org/rich">

   <h:head>
      <title>TODO supply a title</title>
   </h:head>

   <h:body>
      <h:form>
         <rich:inplaceSelect value = "#{subject.subjectName}" defaultLabel = "Click to Select Country">
            <f:selectItems value = "#{subject.SubJectList()}"></f:selectItems>
         </rich:inplaceSelect>
      </h:form>
   </h:body>

</html>
In the above example, we will populate the dropdown options from the backend. Here is the bean class named ” subject.java”.
import java.util.ArrayList;
import java.util.List;
import javax.faces.bean.ManagedBean;
import javax.faces.bean.ManagedProperty;
import javax.faces.bean.RequestScoped;

@ManagedBean
@RequestScoped

public class Subject {
   String SubjectName;
   public Subject() {
   }
   public Subject(String SubjectName) {
      this.SubjectName = SubjectName;
   }
   public List<String> SubJectList() {
      //this list to be rendered
      ArrayList<String> list = new ArrayList<>();

      list.add("JAVA");
      list.add("DOTNET");
      list.add("COBOL");
      list.add("AJAX");
      list.add("JAVA SCRIPT");
      return list;
   }
   public String getSubjectName() {
      return SubjectName;
   }
   public void setSubjectName(String SubjectName) {
      this.SubjectName = SubjectName;
   }
}
All the subject name that we are passing through the list will be shown inside the dropdown menu. Following will be the output after running this application.
<rich:SuggestionBox>
<rich:SuggestionBox> is used to provide suggestions to the user depending on the input provided in the input text box. This tag creates a JS event internally and invokes the required istener class to provide the suggestion from the backend. Unfortunately, this suggestionBox and ComboBox both are combined into a separate tag called “<rich:autocomplete>” in RichFaces 4, however, if you are using RichFaces 3, you can use this tag as shown below.
<h:inputText id = "city" value = "#{capitalsBean.capital}" />
<rich:suggestionbox for = "city" var = "result"
   suggestionAction = "#{capitalsBean.autocomplete}">

   <h:column>
      <h:outputText value = "#{result.name}" />
   </h:column>
</rich:suggestionbox>
Where “capitalsBean” will be a Java class with different parameters and listener class named “autocomplete” will set the value of the “capital” instance variable at the runtime and provide the required output of choice. It is highly recommended to use RichFaces 4 “autocomplete” instead of using this tag as designers are not supporting this tag any more.
<rich:comboBox>
<rich:comboBox> works exactly similar to <rich:suggestionBox>, however, instead of calling the listener class, this tag pre-renders some suggestions into the client browser that interacts with each other and provides the desired output. Like <rich:sugegstionBox>, this feature is also depreciated in the new version with another tag called as “<rich:autocomplete>” described in the following code.
Create a separate file and name it as “richAutoComplete.xhtml”. Place the following code in that file.
<?xml version = "1.0" encoding = "UTF-8"?>
<!DOCTYPE html>
<html xmlns = "http://www.w3.org/1999/xhtml"
   xmlns:h = "http://java.sun.com/jsf/html"
   xmlns:f = "http://java.sun.com/jsf/core"
   xmlns:ui = "http://java.sun.com/jsf/facelets"
   xmlns:a4j = "http://richfaces.org/a4j"
   xmlns:rich = "http://richfaces.org/rich">

   <h:head></h:head>

   <h:body>
      <h:form id = "form">
         <h:form id = "form">
            <rich:autocomplete mode = "cachedAJAX" minChars = "2"
            autocompleteMethod = "#{autoComplete.SubJectList()}" />
         </h:form>
      </h:form>
   </h:body>

</html>
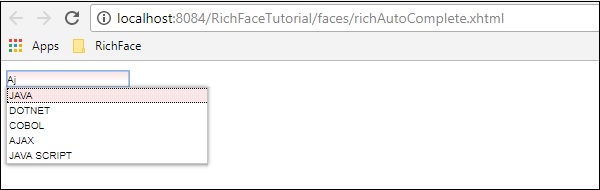
In the above example, we are populating the subject list through the autocomplete feature of RichFaces. Create another Java class and name it is as “autoComplete.java”.
import java.util.ArrayList;
import java.util.List;
import javax.faces.bean.ManagedBean;
import javax.faces.bean.RequestScoped;

@ManagedBean
@RequestScoped

public class autoComplete {
   public autoComplete(){}
   private List<String> autoCompleteList=new ArrayList<>();

   public List<String> SubJectList() {
      //ArrayList<String> list = new ArrayList<>();
      autoCompleteList.add("JAVA");
      autoCompleteList.add("DOTNET");
      autoCompleteList.add("COBOL");
      autoCompleteList.add("AJAX");
      autoCompleteList.add("JAVA SCRIPT");
      return autoCompleteList;
   }
   public List<String> getAutoCompleteList() {
      return autoCompleteList;
   }
   public void setAutoCompleteList(List<String> autoCompleteList) {
      this.autoCompleteList = autoCompleteList;
   }
}
The above file is acting as the bean class and SubjectList() is the method, which is actually rendering the response to the browser. In the <SuggestionBox>,<ComboBox> tag we need to implement the listener class, however, in case of <autocomplete> tag this creation of listener class has been automated, which is easier for the developer. The above piece of code will yield the following output in the browser.
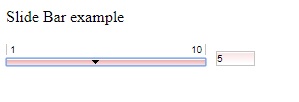
<rich:inputNumberSlider>
This is a very straightforward tag that helps the developer create a numeric slider bar depending on the numeric interval. Create “inputNumberSlider.xhtml” file and place the following code inside it.
<?xml version = "1.0" encoding = "UTF-8"?>
<!DOCTYPE html>
<html xmlns = "http://www.w3.org/1999/xhtml"
   xmlns:h = "http://java.sun.com/jsf/html"
   xmlns:f = "http://java.sun.com/jsf/core"
   xmlns:ui = "http://java.sun.com/jsf/facelets"
   xmlns:a4j = "http://richfaces.org/a4j"
   xmlns:rich = "http://richfaces.org/rich">

   <h:head></h:head>

   <h:body>
      <h:form>
         <h:outputText value = "Slide Bar example"></h:outputText>
         <rich:inputNumberSlider
            minValue = "1"
            maxValue = "10"
            showArrows = "false"
            showTooltip = "false"
            step = "1">
         </rich:inputNumberSlider>
      </h:form>
   </h:body>

</html>
In the above example, the attributes are pretty much descriptive. The above piece of code will yield the following output in the browser.
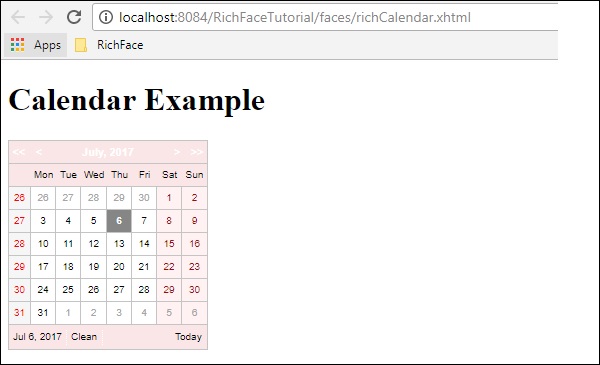
<rich:Calendar>
As the name suggests this tag will help create a calendar in the browser. Create a separate file and name it as “richCalendar.xhtml”. Place the following code inside it.
<?xml version = "1.0" encoding = "UTF-8"?>
<!DOCTYPE html>
<html xmlns = "http://www.w3.org/1999/xhtml"
   xmlns:h = "http://java.sun.com/jsf/html"
   xmlns:f = "http://java.sun.com/jsf/core"
   xmlns:ui = "http://java.sun.com/jsf/facelets"
   xmlns:a4j = "http://richfaces.org/a4j"
   xmlns:rich = "http://richfaces.org/rich">

   <h:head></h:head>

   <h:body>
      <h:form>
         <h1>Calendar</h1>
         <rich:calendar value = "#{calendarBean.selectedDate}"
            locale = "#{calendarBean.locale}"
            popup = "#{calendarBean.popup}"
            datePattern = "#{calendar.pattern}"
            style = "width:200px">
         </rich:calendar>
      </h:form>
   </h:body>

</html>
We need to create another class called “calendarBean.java” in order to hold all the calendar values such as Date, Locale, Date Pattern, etc. Following is the code for “calendarBean.java”.
import java.text.DateFormat;
import java.util.Date;
import java.util.Locale;

import javax.faces.event.ValueChangeEvent;

public class CalendarBean {
   private static final String[] WEEK_DAY_LABELS = new String[] {
      "Sun *", "Mon +", "Tue +", "Wed +", "Thu +", "Fri +", "Sat *" };

   private Locale locale;
   private boolean popup;
   private boolean readonly;
   private boolean showInput;
   private boolean enableManualInput;
   private String pattern;
   private Date currentDate;
   private Date selectedDate;
   private String jointPoint;
   private String direction;
   private String boundary;
   private boolean useCustomDayLabels;

   public Locale getLocale() {
      return locale;
   }
   public void setLocale(Locale locale) {
      this.locale = locale;
   }
   public boolean isPopup() {
      return popup;
   }
   public void setPopup(boolean popup) {
      this.popup = popup;
   }
   public String getPattern() {
      return pattern;
   }
   public void setPattern(String pattern) {
      this.pattern = pattern;
   }
   public CalendarBean() {
      locale = Locale.US;
      popup = true;
      pattern = "MMM d, yyyy";
      jointPoint = "bottomleft";
      direction = "bottomright";
      readonly = true;
      enableManualInput = false;
      showInput = true;
      boundary = "inactive";
   }
   public boolean isShowInput() {
      return showInput;
   }
   public void setShowInput(boolean showInput) {
      this.showInput = showInput;
   }
   public boolean isEnableManualInput() {
      return enableManualInput;
   }
   public void setEnableManualInput(boolean enableManualInput) {
      this.enableManualInput = enableManualInput;
   }
   public boolean isReadonly() {
      return readonly;
   }
   public void setReadonly(boolean readonly) {
      this.readonly = readonly;
   }
   public void selectLocale(ValueChangeEvent event) {
      String tLocale = (String) event.getNewValue();
      if (tLocale != null) {
         String lang = tLocale.substring(0, 2);
         String country = tLocale.substring(3);
         locale = new Locale(lang, country, "");
      }
   }
   public boolean isUseCustomDayLabels() {
      return useCustomDayLabels;
   }
   public void setUseCustomDayLabels(boolean useCustomDayLabels) {
      this.useCustomDayLabels = useCustomDayLabels;
   }
   public Object getWeekDayLabelsShort() {
      if (isUseCustomDayLabels()) {
         return WEEK_DAY_LABELS;
      } else {
         return null;
      }
   }
   public String getCurrentDateAsText() {
      Date currentDate = getCurrentDate();
      if (currentDate ! =  null) {
         return DateFormat.getDateInstance(DateFormat.FULL).format(currentDate);
      }
      return null;
   }
   public Date getCurrentDate() {
      return currentDate;
   }
   public void setCurrentDate(Date currentDate) {
      this.currentDate = currentDate;
   }
   public Date getSelectedDate() {
      return selectedDate;
   }
   public void setSelectedDate(Date selectedDate) {
      this.selectedDate = selectedDate;
   }
   public String getJointPoint() {
      return jointPoint;
   }
   public void setJointPoint(String jointPoint) {
      this.jointPoint = jointPoint;
   }
   public void selectJointPoint(ValueChangeEvent event) {
      jointPoint = (String) event.getNewValue();
   }
   public String getDirection() {
      return direction;
   }
   public void setDirection(String direction) {
      this.direction = direction;
   }
   public void selectDirection(ValueChangeEvent event) {
      direction = (String) event.getNewValue();
   }
   public String getBoundary() {
      return boundary;
   }
   public void setBoundary(String boundary) {
      this.boundary = boundary;
   }
}
The above piece of code will generate the following output in the browser.
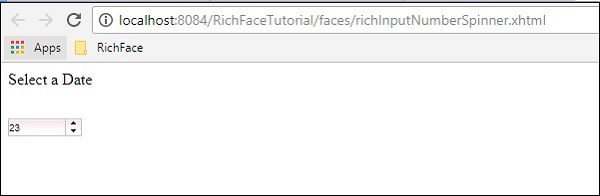
<rich:InputNumberSpinner>
This tag helps the developer to create a spinner to populate an instance of a bean. Following is an example that will help you understand the Spinner tag in detail. Please create a separate xhtml file and named it as “InputNumberSpinner.xhtml” and place the following code inside it.
<?xml version = "1.0" encoding = "UTF-8"?>
<!DOCTYPE html>
<html xmlns = "http://www.w3.org/1999/xhtml"
   xmlns:h = "http://java.sun.com/jsf/html"
   xmlns:f = "http://java.sun.com/jsf/core"
   xmlns:ui = "http://java.sun.com/jsf/facelets"
   xmlns:a4j = "http://richfaces.org/a4j"
   xmlns:rich = "http://richfaces.org/rich">

   <h:head>
      <title>Number Slider Example</title>
   </h:head>

   <h:body>
      <h:form>
         <h:outputText value = "Select a Date"></h:outputText>
         <br/>
         <br/>

         <rich:inputNumberSpinner
            minValue = "1"
            maxValue = "31"
            step = "1">
         </rich:inputNumberSpinner>
      </h:form>
   </h:body>

</html>
The above piece of code will yield the following output in the browser.
To Continue Learning Please Login