- RequireJS Tutorial
- RequireJS - Home
- RequireJS - Overview
- RequireJS - Environment Setup
- RequireJS - Configuration
- RequireJS - AMD Modules
- RequireJS - Defining Function
- RequireJS - Optimizer
- RequireJS - jQuery
- RequireJS - NodeJS
- RequireJS - Dojo
- RequireJS - CommonJS
- RequireJS - Plugins
- RequireJS Useful Resources
- RequireJS - Quick Guide
- RequireJS - Useful Resources
- RequireJS - Discussion
RequireJS - Quick Guide
RequireJS - Overview
RequireJS is a JavaScript library and file loader which manages the dependencies between JavaScript files and in modular programming. It also helps to improve the speed and quality of the code.
RequireJS was developed by David Mark and its initial version v1.0.0 was released in 2009. It is an open source and version 2.3.3 is its recent stable release.
Why use RequireJS?
It is an open source JavaScript library under the MIT license.
It provides asynchronous module loading.
It has the ability to load nested dependencies.
If you have many small files, then don't need to worry about keeping track of dependencies order.
It provides support for plugins and loads more than one JavaScript files.
Features of RequireJS
It manages the dependencies between JavaScript files and improves the speed and quality of the code.
It combines and minifies the modules into one script for an optimized experience.
It reduces code complexity in large applications.
It gathers different JavaScript files from different modules at the time of compilation.
It allows for easy debugging as it loads the files from plain script tags.
RequireJS - Environment Setup
In this chapter, we will understand how to set up the environment for RequireJS. For this, you need to download the latest version of RequireJS library. You can download either the minified version or detailed version.
After downloading, we need to include the require.js file in your libs folder and the structure of your project should be as shown below −
projectname/
|--index.html
|--libs/
   |---main.js
   |---require.js
   |---helper/
      |----util.js
We need to define an html file as index.html where RequireJS is loaded as shown below.
<html>
   <head>
      <script data-main = "libs/main" src = "libs/require.js"></script>
   </head>

   <body>
      <h1> RequireJS Sample Page </h1>
   </body>
</html>
Note that only require.js with a RequireJS call is included in the script tag to load the script.
RequireJS in Node
There are two ways to get the Node adapter.
npm − You can install the latest release of requirejs from the command prompt as shown below.
npm install requirejs
Download r.js − You can download the r.js file from the download page and source from r.js repository page.
RequireJS - Configuration
RequireJS can be initialized by passing the main configuration in the HTML template through the data-main attribute. It is used by RequireJS to know which module to load in your application.
For instance −
<script data-main = "scripts/main" src = "scripts/require.js"></script>
To include the Require.js file, you need to add the script tag in the html file. Within the script tag, add the data-main attribute to load the module. This can be taken as the main entry point to your application. The scripts/main is a main JavaScript file of an application that contains the RequireJS configuration.
Configuration Options
Following are the configuration options which can be set while loading the first application module −
baseUrl − It is a route path for all modules which are loaded through RequireJS. The baseUrl is indicated by a string starting with "slash (/)", containing a protocol and ending with ".js" extension. If there is no baseUrl specified, then RequireJS uses the data-main attribute path as baseUrl.
paths − It specifies the path mappings for modules which are relative to the baseUrl. It automatically adds the .js extension to a path when mapping the module name.
shim − It provides the usage of non AMD libraries with RequireJS by configuring their dependencies and exporting their global values.
map − For the given module, an application uses same module of different versions for different objectives by sharing their ids to make use of same code for different conditions.
config − It provides the configuration to a module by using the config option and this can be done by using the special dependency "module" and calling its module.config() function.
urlArgs − The query string arguments are used to fetch all resources that are loaded by using RequireJS. It is used for cache busting when there is improper configuration of browser or server.
waitSeconds − It specifies the number of seconds to wait before throwing up on script loading. The default is "7" seconds and "0" disables the timeout.
packages − It provides the CommonJS packages for configuring the loading modules.
context − It provides the name for context loading which allows the loading of different modules in a page.
deps − It is an array of dependencies that is required when Require is specified as config object before loading the RequireJS.
callback − It executes a function after loading the dependencies and is required when Require is specified as config object before loading RequireJS.
xhtml − It is used to create the script elements by using the document.createElementNS() method when this option is set to true.
scriptType − It defines the value for script type attribute used in the document. Default type is "text/javascript".
skipDataMain − It skips the data-main attribute scanning while loading the module, if this option is set to true.
RequireJS - AMD Modules
A module in RequireJS is a scoped object and is not available in the global namespace. Hence, global namespace will not be polluted. RequireJS syntax allows to load modules faster without worrying about keeping track of the order of dependencies. You can load multiple versions of the same module in the same page.
Defining Modules
Module is defined using the define() function; the same function is used for loading the module as well.
Simple Name/Value Pairs
If the module is just a collection of name and value pairs, then you can use the following syntax −
define({
   state: "karnataka",
   city: "bangalore"
});
Defining Functions
A module can also use a function for frameworks, without having dependencies. This can be done by using the following syntax −
define(function () {

   //Do setup work here
   return {
      state: "karnataka",
      city: "bangalore"
   }
});
Defining Functions with Dependencies
If the module is having dependencies, the placement of the first argument (array of dependency names), the second argument (defining function) and the return object that defines the module is shown in the following syntax −
define(["./mnc", "./startup"],
   function(mnc, startup) {

      return {
         state: "karnataka",
         city: "bangalore",

         addCompany: function() {
            mnc.decrement(this);
            startup.add(this);
         }

      }
   }
);
Defining a Module as a Function
It is not mandatory for a module to return only objects, any valid value from a function can also be returned. The following syntax is used to define a module as a function −
define(["./mnc", "./startup"],
   function(mnc, startup) {

      return function(title) {
         return title ? (window.title = title) :
         startup.storeName + ' ' + mnc.name;
      }

   }
);
Defining a Module with a Name
In some cases you may have to include a name for the module as the first argument to define(). This can be done by using the following syntax −
define("js2/title",
   ["js1/mnc", "js1/startup"],

   function(mnc, startup) {
      //Define js2/title object in here.
   }

);
RequireJS - Defining Function
The define() function can be used to load the modules (module can be an object, function, class or a code which is executed after loading a module). You can load different versions of the same module in the same page. The different versions can be analyzed in the same order, even if they are loaded in a different order.
Syntax
define(['module1', 'module2'], function (module1, module2) {
   //define the module value by returning a value
   return function () {};
});
You can pass a list of module names when you define a module and RequireJS can be used to retrieve these modules before executing the module. These modules can be passed as parameters of the definition function.
Example
The following example shows the usage of the define() function while loading the modules. Create an html file with the name index.html and place the following code in it −
<!DOCTYPE html>
<html>
   <head>
      <title>Define() Function</title>
      <script data-main = "main" src = "require.js"></script>
   </head>

   <body>
      <h2>RequireJS Define() Function Example</h2>
   </body>
</html>
Create a js file with the name main.js and add the following code in it −
define(function (require) {
   var myteam = require("./team");
   var mylogger = require("./player");
   alert("Player Name : " + myteam.player);
   mylogger.myfunc();
});
Now, create two more js files with the names team.js and player.js and place the following code respectively −
team.js
define({
   player: "Sachin Tendulkar",
   team : "India"
});
player.js
define(function (require) {
   var myteam = require("./team");

   return {
      myfunc: function () {
         document.write("Name: " + myteam.player + ", Country: " + myteam.team);
      }
   };
});
Output
Open the HTML file in a browser; you will receive an output as in the following screenshot −
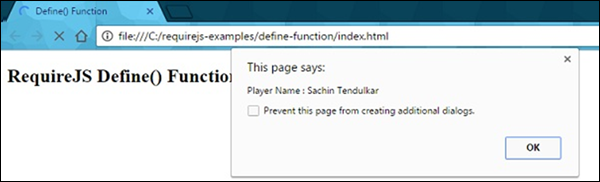
Click on the "OK" button, you will get another output from modules −

RequireJS - Optimizer
In this chapter, we will discuss optimization in RequireJS. The Optimizer in RequireJS has the following characteristics −
Combines script files together with the help of UglifyJS for default usage or Closure Compiler for Java usage
Combines CSS files together.
The optimizer is a component of the r.js adapter for Node and Nashorn. It is developed to be a part of a build process and not for the development process.
Example
After downloading the r.js in your project folder, the structure of the folder should look as given below −
projectfolder/
   |-->index.html
   |-->CSS/
      |--->main.css
      |--->other.css
   |-->libs
      |--->require.js
      |--->main.js
         |--->dependent1.js
         |--->dependent2.js
         |--->dependent3.js
Your HTML file will look as shown below −
<html>
   <head>
      <script data-main = "libs/main" src = "libs/require.js"></script>
   </head>

   <body>
      <h1> RequireJS Sample Page </h1>
   </body>
</html>
Your main.js file will look as shown below −
require(["dependent1", "dependent2", "dependent3"], function (dependent1, dependent2,
   dependent3) {
});
Your main.css file will look as shown below −
@import url("other.css");

.app {
   background: transparent url(../../img/app.png);
}
Basic Setup of Optimizer
You can use the command line arguments or profile building properties for setting the project, both are exchangeable with each other.
Following is the syntax for command line −
node r.js -o baseUrl = . paths.jquery = content/path/jquery
   name = main out = main-built.js
Following is the syntax for building profile −
({
   baseUrl: ".",

   paths: {
      jquery: "content/path/jquery"
   },

   name: "main",
   out: "main-built.js"
})
After this, you can pass on the build profile name to the optimizer in the command line, as shown below −
node r.js -o build.js
There are some shortcomings on the command line argument syntax. A combined use of both command line arguments or profile building properties can overcome these shortcomings.
Optimizing a Single JS File
To optimize a single JS file, you need to create a JS file that contains the content of all its dependencies. Your file should look as given below −
({
   baseUrl: "js/shop",
   paths: {
      "jquery": "jquery",
      "backbone": "backbone",
      "underscore": "underscore"
   },

   shim: {
      "backbone": {
         "department": ["underscore", "jquery"],
         "dependent": "Backbone"
      },

      "underscore": {
         exports: "_"
      }
   },

   name: "../main",
   out: "../built/js/main.js"
})
Now, you can create the main.js file which has all the dependencies for app. This file is used in HTML file to load all the JS files with one request. Note, that files created should not be there in the source code directory; the files should be in the copy of the project.
Usage of CDN Resources
The optimizer does not load scripts using the network resources/ CDN (Content Delivery Network). In case, the scripts need to be loaded using a CDN then you need to map these files to a module name and download the files to your local file path. You can use the special word “empty” in the build profile's path configuration as shown in the following syntax −
({
   baseUrl: "js",
   name: "mainCDN",
   out: "js/mainCDN-built.js",

   paths: {
      jquery: "empty:"
   }

})
The main file will look as shown below −
requirejs.config({
   paths: {
      'jquery': 'https://ajax.googleapis.com/ajax/libs/jquery/1.7.1/jquery.min'
   }
});

require(['jquery'], function ($) {
});
Optimizing Single CSS File
CSS files are optimized using the following parameters directly in the command line as shown below −
node ../../r.js -o cssIn = main.css out = main-built.css
CSS files can also be optimized in a build file using the same properties as shown below −
...
cssIn:"main.css",
out:"main-built.css"
...
Both of the above methods are allowed and will create a file called projectfolder/css/mainbuild.css. This file will have the contents of main.css, the url() paths properly adjusted, and comments removed.
Optimizing Whole Project
The optimizer uses build profile to optimize all the css and js files. In the following example, the build.js file is created.
({
   baseUrl: "js/shop",
   appDir: '.',
   paths: {
      "jquery": "jquery",
      "backbone": "backbone",
      "underscore": "underscore"
   },

   shim: {
      "backbone": {
         "deps": ["underscore", "jquery"],
         "exports": "Backbone"
      },

      "underscore": {
         exports: "_"
      }
   },

   optimizeCss: "standard.keepLines",
   modules: [
      {
         name: "app"
      }
   ],

   dir: "../built"
})
The build.js file instructs RequireJS to copy all the app folders (appDir parameter) to the output folder built (dir parameter) and apply all the optimizations to the files located in the output folder. Run the following command to build a profile in the app folder −
node r.js -o build.js
RequireJS - jQuery
RequireJS uses jQuery as another dependency and registers as named module jquery in lowercase and by default, also registers itself by using the global functions $ and jQuery while using the AMD/RequireJS.
Loading jQuery
require(['jquery'], function($) {
   //code here
}
You can load multiple and custom libraries along with the jQuery as shown below −
require(['custom_library_path','jquery'], function(load_library,$) {
   //related code of $ and load_library
});
The following table shows the use of jQuery with RequireJS for specifying their dependencies.
| Sr.No. | Types & Description |
|---|---|
| 1 | Using Shim Config
jQuery uses shim configuration to define the dependencies for jQuery plugins. |
| 2 | Loading jQuery from CDN
jQuery uses CDN to define the dependencies for jQuery plugins. |
RequireJS - NodeJS
The Node adapter can be used along with the implementation of Require and Node's search path. If there is no module configuration used by RequireJS, you can use the existing Node based modules without changing them. You can install the node packages in the node_modules directory of project by using the npm command.
Node will load modules only from the local disk and config options such as map, packages, paths, etc. will be applied only when module is loaded by RequireJS.
Installing Node
You can install the Node adapter by using the following command which will install the latest release files −
npm install requirejs
You can install the Node in the following ways as well −
You can download the r.js from this link and keep it in your project folder.
Obtain the source from r.js repository or install it through node dist.js.
Usage of Node
To use the node, you need to have require('requirejs') and move the require function in the configuration to the top level main.js file.
For instance −
var requirejs = require('requirejs');

requirejs.config({
   //load the mode modules to top level JS file
   //by passing the top level main.js require function to requirejs
   nodeRequire: require
});

requirejs(['name1', 'name2'],
   function (name1, name2) {
      //by using requirejs config, name1 and name2 are loaded
      //node's require loads the module, if they did not find these
   }
);
Building node modules with AMD or RequireJS
You can make code module work with RequireJS and Node, without requiring users of library, and then use the amdefine package to accomplish this work.
For instance −
if (typeof define !== 'function') {
   var define = require('amdefine')(module);
}

define(function(require) {
   var myval = require('dependency');

   //The returned value from the function can be used
   //as module which is visible to Node.
   return function () {};
});
Optimizer as a Node Module
Node module uses the RequireJS optimizer as an optimize method by using the function call instead of using the command line tool.
For instance −
var requirejs = require('requirejs');

var config = {
   baseUrl: '../directory/scripts',
   name: 'main',
   out: '../build/main-built.js'
};

requirejs.optimize(config, function (buildResponse) {

   //The text output of the modules specify by using buildResponse
   //and loads the built file for the contents
   //get the optimized file contents by using config.out
   var contents = fs.readFileSync(config.out, 'utf8');
}, function(err) {
   //code for optimization err callback
});
RequireJS - Dojo
Dojo is a JavaScript toolkit which is based on the AMD module architecture that provides additional modules to add extra functionality to the web application and also saves time and scale in the web application development process.
Example
The following example shows the usage of Dojo along with RequireJS. Create an html file with the name index.html and place the following code in it −
<!DOCTYPE html>
<html>
   <head>
      <title>RequireJS Dojo</title>
      <script data-main="app" src="lib/require.js"></script>
   </head>

   <body>
      <h2>RequireJS  Dojo</h2>
      <p>
         Hello... ...
      </p>
   </body>
</html>
Create a js file with the name app.js and add the following code in it −
require ({
//You can configure loading modules from the lib directory
baseUrl: 'lib',
paths: {
//mapping of package
dojo: 'http://sfoster.dojotoolkit.org/dojobox/1.7-branch/dojo'
}
}, [
//modules which we are using here
'dojo/dom'
], function(dom) {
//using the 'byId' method from dom module
var mydojo = dom.byId('dojo_val')
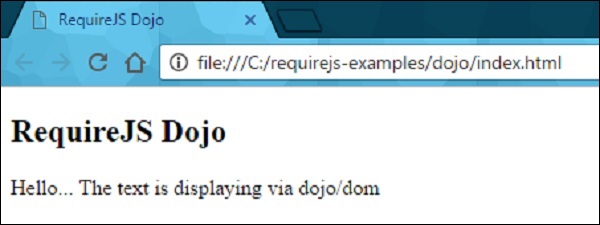
mydojo.innerHTML = "The text is displaying via dojo/dom";
}
);
Output
Open the HTML file in a browser; you will receive the following output −
RequireJS - CommonJS
Module format is defined by CommonJS. It is defined without providing an equal option of browsers to other JavaScript environments. Therefore, CommonJS specification recomends Transport formats and an asynchronous require. You can easily convert the traditional CommonJS module format to work with RequireJS. But, all modules will not convert to the new format. Some of the exceptions are listed below −
- Modules with conditional code to do a require call.
- Modules with circular dependencies.
Manual Conversion
CommonJS Modules can be converted manually to the RequireJS format by using the following syntax −
define(function(require, exports, module) {
   //place CommonJS module content here
});
Conversion Tool
CommonJS Modules can be converted to the RequireJS format by using the r.js project converter tool, which is built in r.js file. You should specify the path of the file to be converted and the output folder as shown below −
node r.js -convert path/to/commonjs/modules/ path/to/output
Setting Exported Value
Some of the systems in CommonJS, allow setting the exported value by assigning the exported value as module.exports But RequireJS, supports the easier way of returning the value from the function passed to define. The advantage of this is you do not need the exports and module function arguments, so you can leave them off the module definition as shown below −
define(function (require) {
   var name = require('name');

   //Define the module as exporting a function
   return function () {
      name.doSomething();
   };
});
Alternative Syntax
The alternative way to specify dependencies is via a dependency array argument define(). But, the order of the names in the dependency array should match the order of arguments passed to the definition function define() as shown below −
define(['name'], function (name) {

   return function () {
      name.doSomething();
   };
});
Loading Modules from CommonJS Packages
To know about the location and package attributes modules are loaded in CommonJS packages using RequireJS by setting up the RequireJS configuration.
Optimization Tool
Optimization tool is present in RequireJS which can combine the module definitions together into optimized bundles for browser delivery. It operates as a command-line tool so that you can use it as part of the code deployment.
RequireJS - Plugins
RequireJS contains a small set of plugins which allow loading various types of resources as dependencies. Following is a list of available plugins in RequireJS −
- text
- domReady
- i18n
- CSS loading
text
The text plug-in is used for loading text based resources asynchronously which is mainly used for inserting the HTML content in JavaScript files. It can be loaded when you use the text! prefix in any require or define module call and pass the file extension to the plug-in. Compare to normal module loading, the text plug-in loads modules using XHR and will not add the code to the header as a script tag.
The text file resource can be included as dependency in the code as −
require(["mymodule", "text!mymodule.html", "text!mymodule.css"],

   function(mymodule, html, css) {
      //the html and css variables will be the text
      //of the mymodule.html file and mymodule.css files respectively
   }
);
domReady
The RequireJS can be used to load scripts before DOM is ready and developers can interact with DOM, only when scripts load completely. Sometimes scripts can be loaded before DOM is ready. So, to overcome this problem, RequireJS provides modern approach called DOMContentLoaded event which calls the domReady function once DOM is ready.
require(['domReady'], function(domReady) {

   domReady(function() {
      //the domReady function is called when DOM is ready
      //which is safe to manipulate DOM nodes in this function
   });
});
i18n
It can be used with multiple locales that provide i18n bundle support which will be loaded automatically when a module or dependency specifies "i18n!" prefix. To make use of this, download it and put it in the same directory where your main JavaScript file is present. Place this plug-in in the directory called "nls" to locate your localization files.
For instance, assume that we have one js file called country.js with the following content and place it in the directory as mydirectory/nls/country.js −
define({

   "root": {
      "india": "india",
      "australia": "australia",
      "england": "england"
   }
});
You can add specific translation to a file by using fr-fr locale and the above code will change as −
define({

   "root": {
      "title": "title",
      "header": "header",
      "description": "description"
   },

   "es-es": true
});
Next, specify the file at mydirectory/nls/es-es/country.js with the following content −
define({

   "root": {
      "title": "título",
      "header": "cabecera",
      "description": "descripción"
   },

   "es-es": true
});
You can set the locale by passing it to the plugin with the help of module config in the main.js file as shown below −
requirejs.config({

   config: {
      //set the config for the i18n plugin

      i18n: {
         locale: 'es-es'
      }

   }
});
CSS loading using RequireJS
You can use some plug-ins to load the CSS file by just appending to the header link to load the CSS file.
The CSS can be loaded by using your own function as shown below −
function myCss(url) {
   var mylink = document.createElement("mylink");
   mylink.type = "text/css";
   mylink.rel = "stylesheet";
   mylink.href = url;
   document.getElementsByTagName("head")[0].appendChild(mylink);
}
To Continue Learning Please Login