- RabbitMQ Tutorial
- RabbitMQ - Home
- RabbitMQ - Overview
- RabbitMQ - Environment Setup
- RabbitMQ - Features
- RabbitMQ - Installation
- Queue Based Example
- RabbitMQ - Producer Application
- RabbitMQ - Consumer Application
- RabbitMQ - Test Application
- Topic Based Example
- RabbitMQ - Publisher Application
- RabbitMQ - Subscriber Application
- RabbitMQ - Test Application
- RabbitMQ Useful Resources
- RabbitMQ - Quick Guide
- RabbitMQ - Useful Resources
- RabbitMQ - Discussion
RabbitMQ - Installation
RabbitMQ is built on Erlang runtime so before installing RabbitMQ, we need to download Erlang and install it. Make sure, you are using administrative priviledge to install Erlang and RabbitMQ.
Erlang
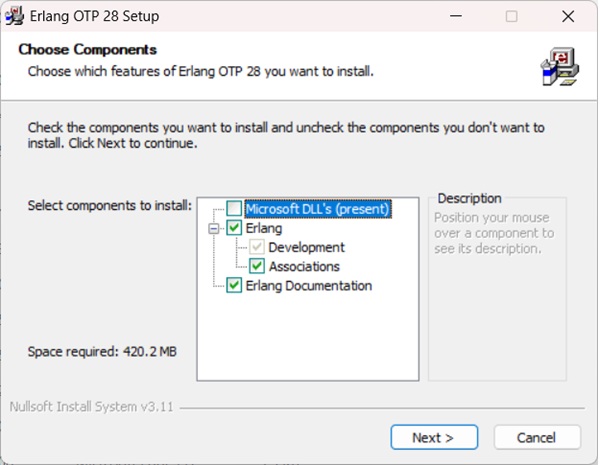
Erlang is a general-purpose programming language and runtime environment. You can download the latest version of Erlang from its home page − Download Erlang/OTP.. We are installing Erlang on Windows and downloaded Erlang/OTP 24.2.2 Installer - otp_win64_24.2.2.exe for windows.
Now install the Erlang using the installer by double clicking on it and follow the default selections and finish the setup.
RabbitMQ Installation
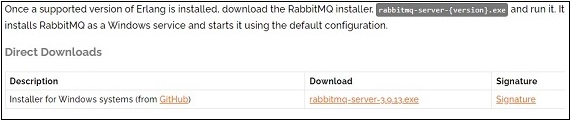
Download the RabbitMQ Latest binary from its official downloads page We've downloaded 3.9.13 as rabbitmq-server-3.9.13.exe for windows.
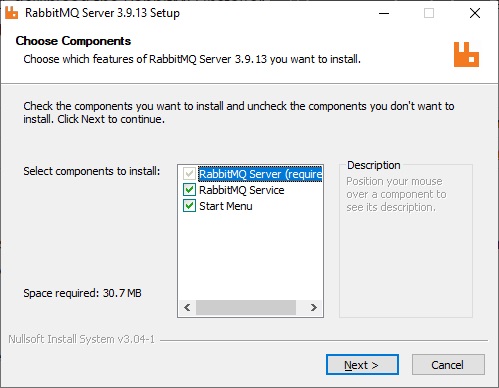
Now install the RabbitMQ using the installer by double clicking on it and follow the default selections and finish the setup.
By default, RabbitMQ works as windows service. To enable Web based Administration UI, following step are needed.
Go to RabbitMQ Installation directory and type the commands as shown below −
C:\Program Files\RabbitMQ Server\rabbitmq_server-3.9.13\sbin>rabbitmq-plugins.bat enable rabbitmq_management
Enabling plugins on node rabbit@DESKTOP-86KD9FC:
rabbitmq_management
The following plugins have been configured:
   rabbitmq_management
   rabbitmq_management_agent
   rabbitmq_web_dispatch
Applying plugin configuration to rabbit@DESKTOP-86KD9FC...
The following plugins have been enabled:
   rabbitmq_management
   rabbitmq_management_agent
   rabbitmq_web_dispatch

started 3 plugins.

C:\Program Files\RabbitMQ Server\rabbitmq_server-3.9.13\sbin>rabbitmq-plugins enable rabbitmq_shovel rabbitmq_shovel_management
Enabling plugins on node rabbit@DESKTOP-86KD9FC:
rabbitmq_shovel
rabbitmq_shovel_management
The following plugins have been configured:
   rabbitmq_management
   rabbitmq_management_agent
   rabbitmq_shovel
   rabbitmq_shovel_management
   rabbitmq_web_dispatch
Applying plugin configuration to rabbit@DESKTOP-86KD9FC...
The following plugins have been enabled:
   rabbitmq_shovel
   rabbitmq_shovel_management

started 2 plugins.

C:\Program Files\RabbitMQ Server\rabbitmq_server-3.9.13\sbin>
Edit C:\Windows\System32\drivers\etc\hosts file using administrative priviledge and add following line to it −
127.0.0.1 rabbitmq
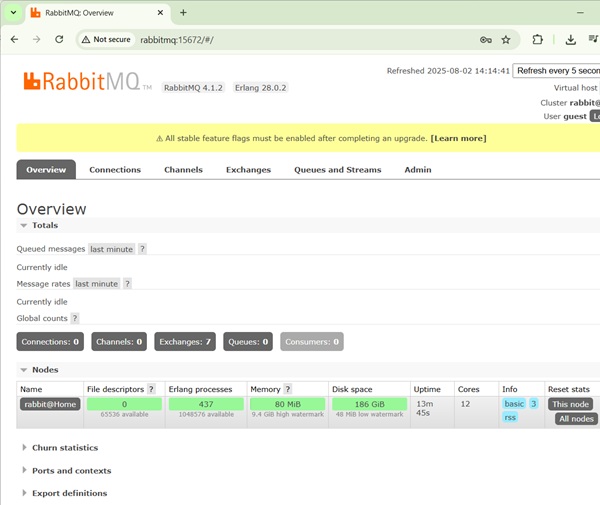
Verify the Installation
Now open http://rabbitmq:15672/ to open Management console. Login using guest/guest.
To Continue Learning Please Login