- Parallax Scrolling in Web Design
- Home
- Background and Introduction
- Concepts
- Web Design and Parallax Scroll
- CSS Techniques
- JavaScript Techniques
- jQuery Techniques
- Bootstrap Techniques
- Conclusion
- Useful Resources
- Quick Guide
- Useful Resources
- Discussion
jQuery Techniques
In the previous chapters, we have understood how using JavaScript libraries adds good effects to websites. JavaScript, when coupled with jQuery, provides phenomenal flexibility and ease to add parallax scrolling to your websites.
In this chapter, we are going to look at three jQuery plugins to add the parallax scrolling effect. Just like how we referenced in the previous chapter for JavaScript, we are going to use jQuery references in our HTML code to create powerful jQuery parallax scrolling.
An important point to note about jQuery plugins is that often the plugins are not updated, hence you would want to do some research before you start using any plugin for parallax scrolling.
Simple Parallax Scrolling using Parallax.js
Using Parallax.js jQuery plugin, we can create parallax scrolling effect without much hassles. Considering jQuery plugin requires a high-end inclusion of libraries such as bootstrap. Note that in this chapter will have HTML5 tags in the code.
Let us look at the HTML file shown below −
<!DOCTYPE html>
<html lang = "en">
   <head>
      <title>Parallax.js | Simple Parallax Scrolling Effect with jQuery</title>
      <meta charset = "utf-8">
      <meta http-equiv = "X-UA-Compatible" content = "IE = edge">
      <meta name = "viewport" content = "width = device-width, initial-scale = 1">

      <link href = "css/bootstrap.min.css" rel = "stylesheet">
      <link href = "css/style.css" rel = "stylesheet">

      <script src = "https://code.jquery.com/jquery-1.12.4.min.js"></script>
      <script src = "https://cdn.jsdelivr.net/parallax.js/1.4.2/parallax.min.js"></script>
   </head>

   <body>
      <section>
         <div class = "container">
            <h1>Example on Parallax.js</h1>
            <p data-pg-collapsed>
               This is an example of parallax scrolling using Parallax.js jQuery Plugin.
            </p>
            <br/>
         </div>
      </section>

      <div class = "parallax-container" data-parallax = "scroll"
         data-position = "top" data-bleed = "10"
         data-image-src = "https://pixabay.com/get/ea31b90a2af5093ed1534705fb0938c9bd22ffd41cb2114595f9c67dae/clematis-3485218_1920.jpg"
         data-natural-width = "1600" data-natural-height = "800" >
      </div>
      <section>
         <div class = "container">
            <h2 id = "sampleLorem">Sample Text Here</h2>
            <p>
               Lorem ipsum dolor sit amet, consectetur adipiscing elit. Integer nec
               odio. Praesent libero. Sed cursus ante dapibus diam. Sed nisi. Nulla
               quis sem at nibh elementum imperdiet. Duis sagittis ipsum. Praesent
               mauris. Fusce nec tellus sed augue semper porta. Mauris massa.
               Vestibulum lacinia arcu eget nulla. Class aptent taciti sociosqu ad
               litora torquent per conubia nostra, per inceptos himenaeos. Curabitur sodales ligula in libero.
               <br/>
               <br/>

               Sed dignissim lacinia nunc. Curabitur tortor. Pellentesque nibh. Aenean
               quam. In scelerisque sem at dolor. Maecenas mattis. Sed convallis
               tristique sem. Proin ut ligula vel nunc egestas porttitor. Morbi lectus
               risus, iaculis vel, suscipit quis, luctus non, massa. Fusce ac turpis
               quis ligula lacinia aliquet. Mauris ipsum.
               <br/>
               <br/>

               Nulla metus metus, ullamcorper vel, tincidunt sed, euismod in, nibh.
               Quisque volutpat condimentum velit. Class aptent taciti sociosqu ad
               litora torquent per conubia nostra, per inceptos himenaeos. Nam nec
               ante. Sed lacinia, urna non tincidunt mattis, tortor neque adipiscing
               diam, a cursus ipsum ante quis turpis. Nulla facilisi. Ut fringilla.
               Suspendisse potenti. Nunc feugiat mi a tellus consequat imperdiet.
               Vestibulum sapien. Proin quam. Etiam ultrices. Suspendisse in justo eu
               magna luctus suscipit.
               <br/>
               <br/>

               Sed lectus. Integer euismod lacus luctus magna. Quisque cursus, metus
               vitae pharetra auctor, sem massa mattis sem, at interdum magna augue
               eget diam. Vestibulum ante ipsum primis in faucibus orci luctus et
               ultrices posuere cubilia Curae; Morbi lacinia molestie dui. Praesent
               blandit dolor. Sed non quam. In vel mi sit amet augue congue elementum.
               Morbi in ipsum sit amet pede facilisis laoreet. Donec lacus nunc,
               viverra nec, blandit vel, egestas et, augue. Vestibulum tincidunt
               malesuada tellus. Ut ultrices ultrices enim. Curabitur sit amet mauris.
               Morbi in dui quis est pulvinar ullamcorper.
               <br/>
               <br/>

               Nulla facilisi. Integer lacinia sollicitudin massa. Cras metus. Sed
               aliquet risus a tortor. Integer id quam. Morbi mi. Quisque nisl felis,
               venenatis tristique, dignissim in, ultrices sit amet, augue. Proin
               sodales libero eget ante. Nulla quam. Aenean laoreet. Vestibulum nisi
               lectus, commodo ac, facilisis ac, ultricies eu, pede. Ut orci risus,
               accumsan porttitor, cursus quis, aliquet eget, justo. Sed pretium
               blandit orci.
               <br/>
               <br/>

               Ut eu diam at pede suscipit sodales. Aenean lectus elit, fermentum non,
               convallis id, sagittis at, neque. Nullam mauris orci, aliquet et,
               iaculis et, viverra vitae, ligula. Nulla ut felis in purus aliquam
               imperdiet. Maecenas aliquet mollis lectus. Vivamus consectetuer risus
               et tortor. Lorem ipsum dolor sit amet, consectetur adipiscing elit.
               Integer nec odio. Praesent libero. Sed cursus ante dapibus diam. Sed
               nisi. Nulla quis sem at nibh elementum imperdiet.
               <br/>
               <br/>
            </p>
         </div>
      </section>

      <div class = "parallax-container" data-parallax = "scroll"
         data-bleed = "10" data-speed = "0.2"
         data-image-src = "https://pixabay.com/get/ea31b90620f0063ed1534705fb0938c9bd22ffd41cb2114594f0c37cae/chamomile-3489847_1920.jpg"
         data-natural-width = "1600" data-natural-height = "801"
         data-pg-name = "PARALLAX IMAGE 002">
      </div>
   </body>
</html>
Analysis of Code
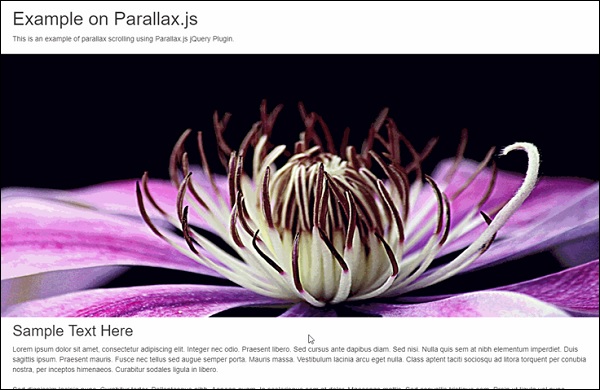
The above code snippets show the code for a page with two images and a sample text between them.
As you can see, the code starts with <!DOCTYPE html>, this is typical way of letting the browsers know that the code is HTML5 based.
The <meta> tags from line 4 to 6 shows the code which is for machine interpretation. You will not be able to see the impact of this code. Important thing to note here is – with meta tag, web developers get an enhanced control over the data being displayed.
Also, on line 8 and 9, we have included the CSS stylesheets along with Bootstrap. For a specific font face and typography, Bootstrap is the widely used library.
Lines 10 and 11 take care of the jQuery and Parallax.js libraries. It is important to include Parallax.js for having the control over parallax effect of images. You will be able to find data-parallax property with div on line 21, which is sufficient enough to call parallax.js library for the required parallax effect.
Parallax effect can be seen in code on lines 21 and line 40. Important properties which make this effect happen with parallax.js are – data-parallax, data-image-src, data-natural-width, data-natural-height.
With the CSS file, we have only one property to provide. It is as shown below −
.parallax-container {
   height: 500px;
   width: 100%;
}
In the HTML code above, we have created a specific structure for CSS files. We will have a folder called css, which will have CSS files – bootstrap.min.css and style.css.
Once everything is through with documents, you will be able to see the parallax effect as shown below −
Using Parallaxator jQuery Plugin
Parallaxator plugin provides best of jQuery parallax scrolling effects and is easy to use. You can download the Parallaxator plugin, its CSS and JS files from this link − Parallaxator GitHub.
Once the CSS and JS files are downloaded, you can use the code shown below to create the HTML code.
<!DOCTYPE html>
<html>
   <head>
      <title>Parallaxator Plugin</title>
      <meta http-equiv = "Content-Type" content = "text/html; charset = utf-8">
      <link rel = "stylesheet" href = "fm.parallaxator.jquery.css">

      <link rel = "stylesheet" href = "style.css">
      <script src = "https://code.jquery.com/jquery-1.12.4.min.js"></script>
      <script src = "fm.parallaxator.jquery.js"></script>
   </head>
   <body>
      <div class = "section1 parallaxator">
         <img class = "parallax_child" src = "img/landscape.jpg" width = "100%">
         <h1 class = "mega_text parallax_child">Nature</h1>
      </div>

      <div class = "section2 parallaxator">
         <img class = "parallax_child" src = "img/architecture.jpg" width = "100%">
         <h1 class = "mega_text parallax_child">
            Architecture<br>
         </h1>
      </div>

      <div class = "section3 parallaxator">
         <img class = "parallax_child" src = "img/architecture1.jpg" width = "100%">
         <h1 class = "mega_text parallax_child" data-parallaxator-reverse = "true" data-parallaxator-velocity = "0.35">
            Architecture again!
         </h1>
      </div>
   </body>

</html>
Analysis of Code
The parallax effect is provided by parallax_child class which is provided with each img tag. The parallax_child is hooked up with CSS and JS files which are provided below.
For the parallaxator plugin to work, we have included fm.parallaxator.jquery.css and fm.parallaxator.jquery.js. These files are required to be available in the same directory as the HTML file.
The code for CSS is as shown below −
body {
   font-family: sans-serif;
   margin: 0;
   padding: 0;
}

.section1,.section2, .section3 {
   border-bottom: 32px solid #fff;
   padding-top: 40%;
}

.section1 {
   background-color: #fdb;
}

.section2 {
   background-color: #bdf;
}

.section3 {
   background-color: #fbd;
}

.mega_text {
   font-weight: bold;
   font-size: 100px;
   margin: 0;
   text-shadow: 0 10px 100px #fff, 0 0 15px #fff;
   padding: 64px;
   display: block;
}
As a result of the above code, you will be able to see the parallax effect.

Stellar.js jQuery Plugin for Parallax Scrolling
Stellar.js is another addition to the list of parallax jQuery plugins. Though it is no longer maintained, developer who have used its stable build, are able to use parallax scrolling effect with ease. It is compatible with latest versions of jQuery and easy to implement.
You will need to download the latest jquery.stellar.js from the official website for Stellar.js plugin. Once downloaded, create this plugin file in the same folder as your HTML and CSS file.
Let us have a look at HTML code.
<!doctype html>
<html>
   <head>
      <title>Stellar.js Demo</title>
      <link href = "style.css" rel = "stylesheet">
      <script src = "https://code.jquery.com/jquery-1.12.4.min.js"></script>
      <script src = "jquery.stellar.js"></script>

      <script>
         $(function(){
            $.stellar({
               horizontalScrolling: false,
               verticalOffset: 40
            });
         });
      </script>
   </head>

   <body>
      <h1>Demo Site</h1>
      <div class = "image architecture" data-stellar-background-ratio = "0.5">
         <span>Architecture</span>
      </div>

      <div class = "image abstract" data-stellar-background-ratio = "0.5">
         <span>Abstract</span>
      </div>

      <div class = "image landscape" data-stellar-background-ratio = "0.5">
         <span>Landscape</span>
      </div>

      <div class = "image window" data-stellar-background-ratio = "0.5">
         <span>Window</span>
      </div>
   </body>

</html>
Analysis of Code
For Stellar.js to work, we have included the jquery.stellar.js library right after the jQuery plugin is referenced on line 6.
Function for Stellar parallax is called in the script tag from line 8 to line 15. With the property data-stellar-background-ratio, we are setting an offset for the images being displayed. This is done on lines 19,20,21 and 22.
The CSS code is given below −
body {
   font-family: helvetica, arial;
   padding-top: 40px;
}

h1 {
   background-color: black;
   color: white;
   height: 40px;
   font-size: 24px;
   font-weight: normal;
   left: 0;
   line-height: 40px;
   position: fixed;
   text-align: center;
   top: 0;
   width: 100%;
   z-index: 1;
}

h1 a {
   border-bottom: 1px solid white;
   color: white;
   display: inline-block;
   line-height: 30px;
   text-decoration: none;
}

.image {
   background-attachment: fixed;
   background-position: 50% 0;
   background-repeat: no-repeat;
   height: 450px;
   position: relative;
}

.image span {
   bottom: 0;
   color: white;
   display: block;
   left: 50%;
   margin-left: -640px;
   font-size: 38px;
   padding: 10px;
   position: absolute;
   text-shadow: 0 2px 0 black, 0 0 10px black;
   width: 1280px;
}

.architecture {
   background-image: url(img/architecture.jpg);
}

.abstract {
   background-image: url(img/ruin.jpg);
}

.landscape {
   background-image: url(img/landscape.jpg);
}

.window {
   background-image: url(img/window.jpg);
}
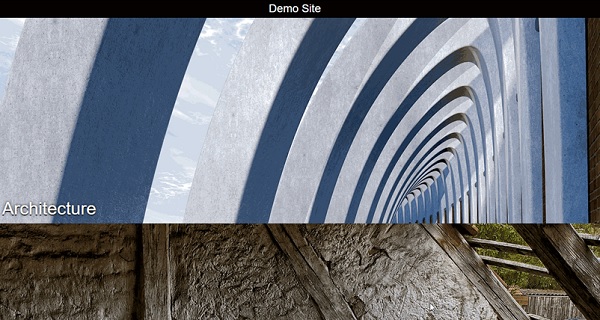
Once both the files are created and stellar.js plugin file is included in the same folder, you should be able to see the effect as shown in the screenshot given below −
To Continue Learning Please Login