- JSF Tutorial
- JSF - Home
- JSF - Overview
- JSF - Environment Setup
- JSF - Architecture
- JSF - Life Cycle
- JSF - First Application
- JSF - Managed Beans
- JSF - Page Navigation
- JSF - Basic Tags
- JSF - Facelet Tags
- JSF - Convertor Tags
- JSF - Validator Tags
- JSF - DataTable
- JSF - Composite Components
- JSF - Ajax
- JSF - Event Handling
- JSF - JDBC Integration
- JSF - Spring Integration
- JSF - Expression Language
- JSF - Internationalization
- JSF Useful Resources
- JSF - Quick Guide
- JSF - Useful Resources
- JSF - Discussion
JSF - Custom Tag
JSF provides the developer with a powerful capability to define own custom tags, which can be used to render custom contents.
Defining a custom tag in JSF is a three-step process.
| Step | Description |
|---|---|
| 1a | Create a xhtml file and define contents in it using ui:composition tag |
| 1b | Create a tag library descriptor (.taglib.xml file) and declares the above custom tag in it. |
| 1c | Register the tag libray descriptor in web.xml |
Step 1a: Define custom tag contents : buttonPanel.xhtml
<h:body>
   <ui:composition>
      <h:commandButton type = "submit" value = "#{okLabel}" />
      <h:commandButton type = "reset" value = "#{cancelLabel}" />
   </ui:composition>
</h:body>
Step 1b: Define a tag library : tutorialspoint.taglib.xml
As the name mentions a Tag library is a library of tags. Following table describes important attributes of a tag library.
| S.No | Node & Description |
|---|---|
| 1 | facelet-taglib Contains all the tags. |
| 2 | namespace Namespace of the tag library and should be unique. |
| 3 | tag Contains a single tag |
| 4 | tag-name Name of the tag |
| 5 | source Tag implementation |
<facelet-taglib>
   <namespace>http://tutorialspoint.com/facelets</namespace>
   <tag>
      <tag-name>buttonPanel</tag-name>
      <source>com/tutorialspoint/buttonPanel.xhtml</source>
   </tag>
</facelet-taglib>
Step 1c: Register the tag library :web.xml
<context-param>
   <param-name>javax.faces.FACELETS_LIBRARIES</param-name>
   <param-value>/WEB-INF/tutorialspoint.taglib.xml</param-value>
</context-param>
Using a custom tag in JSF is a two-step process.
| Step | Description |
|---|---|
| 2a | Create a xhtml file and use custom tag library's namespace |
| 2b | Use the custom tag as normal JSF tags |
Step 2a: Use Custom Namespace: home.xhtml
<html xmlns = "http://www.w3.org/1999/xhtml"
   xmlns:h = "http://java.sun.com/jsf/html"
   xmlns:ui = "http://java.sun.com/jsf/facelets">
   xmlns:tp = "http://tutorialspoint.com/facelets">
Step 2b: Use Custom Tag: home.xhtml
<h:body>
   <tp:buttonPanel okLabel = "Ok" cancelLabel = "Cancel" />
</h:body>
Example Application
Let us create a test JSF application to test the template tags in JSF.
| Step | Description |
|---|---|
| 1 | Create a project with a name helloworld under a package com.tutorialspoint.test as explained in the JSF - First Application chapter. |
| 2 | Create com folder under WEB-INF directory. |
| 3 | Create tutorialspoint folder under WEB-INF > com directory. |
| 4 | Create buttonPanel.xhtml file under WEB-INF > com > tutorialspoint folder. Modify it as explained below. |
| 5 | Create tutorialspoint.taglib.xml file under WEB-INF folder. Modify it as explained below. |
| 6 | Modify web.xml file under WEB-INF folder as explained below. |
| 7 | Modify home.xhtml as explained below. Keep rest of the files unchanged. |
| 8 | Compile and run the application to make sure business logic is working as per the requirements. |
| 9 | Finally, build the application in the form of war file and deploy it in Apache Tomcat Webserver. |
| 10 | Launch your web application using appropriate URL as explained below in the last step. |
buttonPanel.xhtml
<?xml version = "1.0" encoding = "UTF-8"?>
<!DOCTYPE html PUBLIC "-//W3C//DTD XHTML 1.0 Transitional//EN"
"http://www.w3.org/TR/xhtml1/DTD/xhtml1-transitional.dtd">

<html xmlns = "http://www.w3.org/1999/xhtml"
   xmlns:h = "http://java.sun.com/jsf/html"
   xmlns:ui = "http://java.sun.com/jsf/facelets">

   <h:body>
      <ui:composition>
         <h:commandButton type = "submit" value = "#{okLabel}" />
         <h:commandButton type = "reset" value = "#{cancelLabel}" />
      </ui:composition>
   </h:body>
</html>
tutorialspoint.taglib.xml
<?xml version = "1.0"?>
<!DOCTYPE facelet-taglib PUBLIC
"-//Sun Microsystems, Inc.//DTD Facelet Taglib 1.0//EN"
"http://java.sun.com/dtd/facelet-taglib_1_0.dtd">

<facelet-taglib>
   <namespace>http://tutorialspoint.com/facelets</namespace>

   <tag>
      <tag-name>buttonPanel</tag-name>
      <source>com/tutorialspoint/buttonPanel.xhtml</source>
   </tag>
</facelet-taglib>
web.xml
<!DOCTYPE web-app PUBLIC
"-//Sun Microsystems, Inc.//DTD Web Application 2.3//EN"
"http://java.sun.com/dtd/web-app_2_3.dtd" >

<web-app>
   <display-name>Archetype Created Web Application</display-name>
   <context-param>
      <param-name>javax.faces.PROJECT_STAGE</param-name>
      <param-value>Development</param-value>
   </context-param>

   <context-param>
      <param-name>javax.faces.FACELETS_LIBRARIES</param-name>
      <param-value>/WEB-INF/tutorialspoint.taglib.xml</param-value>
   </context-param>

   <servlet>
      <servlet-name>Faces Servlet</servlet-name>
      <servlet-class>javax.faces.webapp.FacesServlet</servlet-class>
   </servlet>

   <servlet-mapping>
      <servlet-name>Faces Servlet</servlet-name>
      <url-pattern>*.jsf</url-pattern>
   </servlet-mapping>
</web-app>
home.xhtml
<?xml version = "1.0" encoding = "UTF-8"?>
<!DOCTYPE html PUBLIC "-//W3C//DTD XHTML 1.0 Transitional//EN"
"http://www.w3.org/TR/xhtml1/DTD/xhtml1-transitional.dtd">

<html xmlns = "http://www.w3.org/1999/xhtml"
   xmlns:h = "http://java.sun.com/jsf/html"
   xmlns:ui = "http://java.sun.com/jsf/facelets"
   xmlns:tp = "http://tutorialspoint.com/facelets">

   <h:head>
      <title>JSF tutorial</title>
   </h:head>

   <h:body>
      <h1>Custom Tags Example</h1>
      <tp:buttonPanel okLabel = "Ok" cancelLabel = "Cancel" />
   </h:body>
</html>
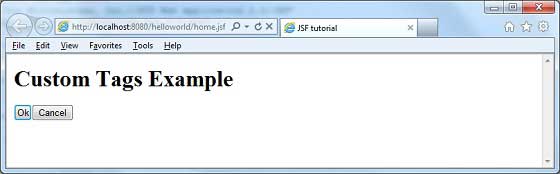
Once you are ready with all the changes done, let us compile and run the application as we did in JSF - First Application chapter. If everything is fine with your application, this will produce the following result.