- Computer Concepts Tutorial
- Computer Concepts - Home
- Introduction to Computer
- Introduction to GUI based OS
- Elements of Word Processing
- Spread Sheet
- Introduction to Internet, WWW, Browsers
- Communication & Collaboration
- Application of Presentations
- Application of Digital Financial Services
- Computer Concepts Resources
- Computer Concepts - Quick Guide
- Computer Concepts - Useful Resources
- Computer Concepts - Discussion
Computer Concepts - Table Manipulation
Manipulation of table includes drawing a table, changing cell width and height, alignment of text in the cell, deletion/insertion of rows and columns, and borders and shading.
Draw Table
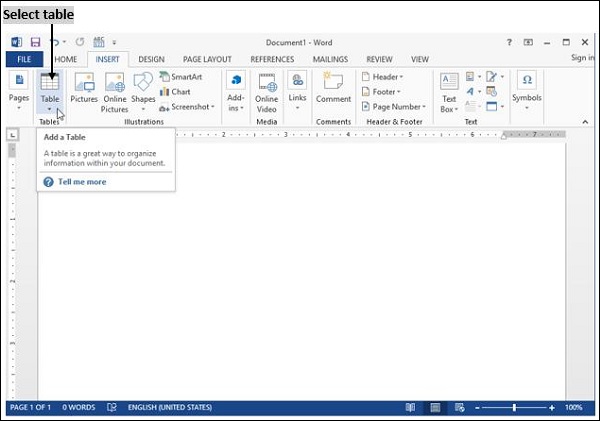
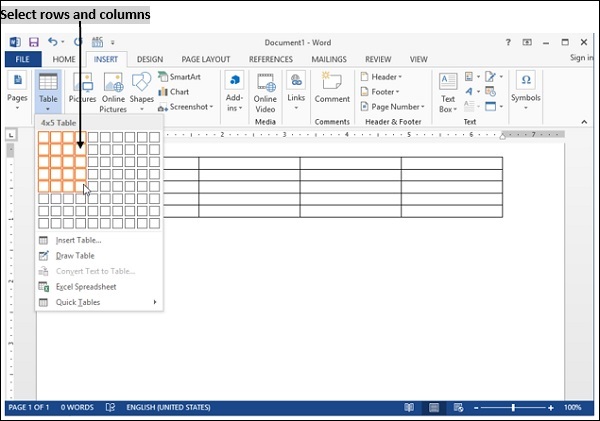
Tables can be easily inserted at any point of the document. A table is a simple way to arrange lengthy lists. You can use tables to format all parts of your documents into rows and columns. Rows and columns can be added or deleted either at the beginning, end or in the middle of table. For inserting a table, simply click on "Tables" icon on Insert menu. Tables can be formatted to any size, and number of rows and columns can be added as per requirement. Table formatting toolbar contains numerous icons which can be used for different functions related to tables. Spin arrows in the columns and rows help to select a row or a column.
Changing cell width and height
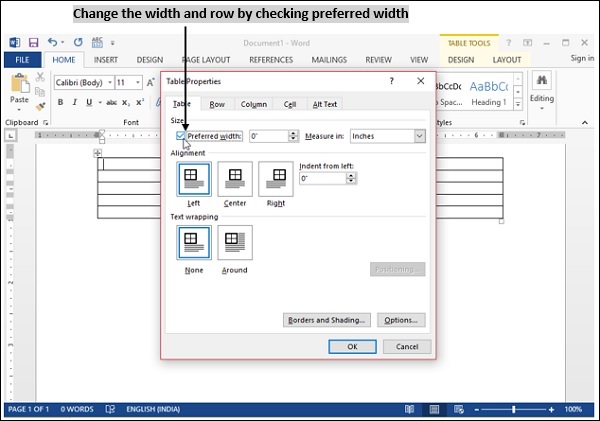
When we create a table, all columns may have equal width or may have different widths depending upon the usage.
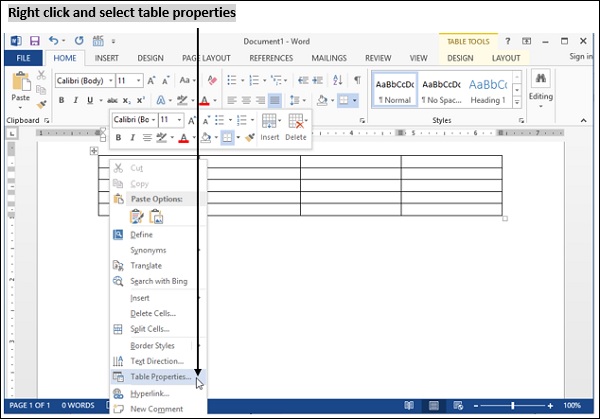
If you want to change column widths, "Ruler" or table properties from the table menu can be used.
By using "Ruler" you may change the row border and size.
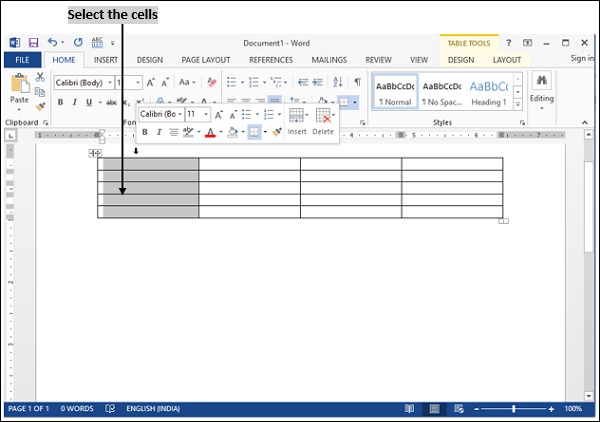
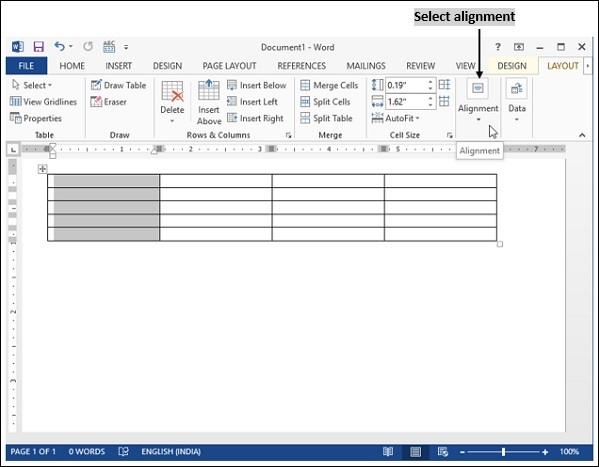
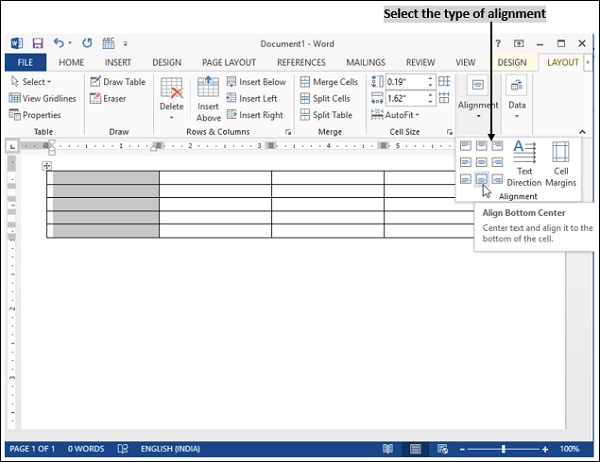
Alignment of Text in a cell
Select one or more cells in table, and click table layout menu.
Under Alignment, click Align, and then select corresponding option.
Delete/Insertion of Row and Column
For inserting rows and columns into an existing table, position cursor either before or after the spot where you want to insert.
Right-click mouse button to → Insert/Delete.
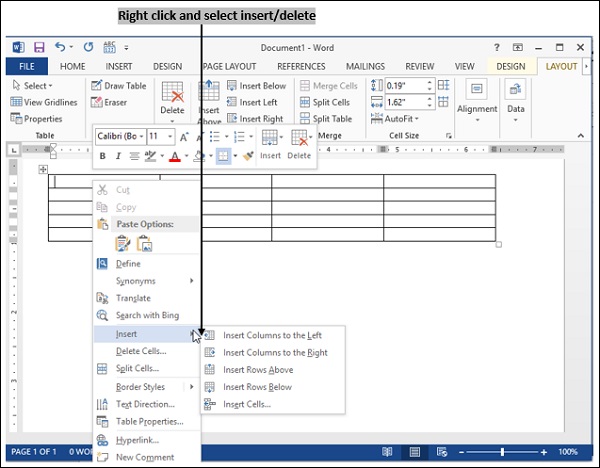
Inserting a column to the right
After finishing the table, in case you need to insert a column on the right-hand side of a particular column in the table, you may use the following steps −
Place cursor where you want to insert a column in the table.
Right-click on mouse button → Insert column to right.

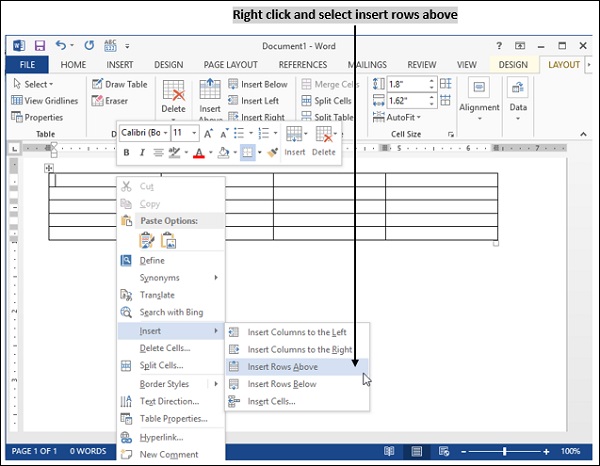
Insert rows above
After finishing the table, in case you want to insert a row in the top of a particular row in table you may use the following steps −
Place cursor where you want to insert a row in the table.
Right-click on the mouse button → Insert row above.
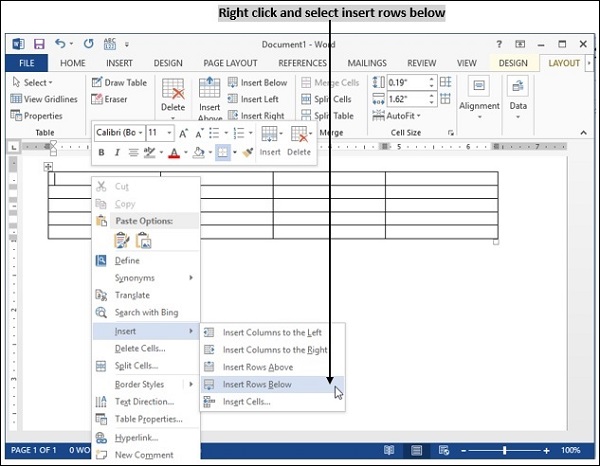
Insert rows below
After finishing the table, in case you want to insert a row in the bottom of a particular row in the table, you may use the following steps −
Place cursor where you want to insert a row in the table.
Right-click mouse button → Insert row below.
Delete Column
If you want to delete particular columns in a table, use the following steps −
Select the column which you want to delete.
Right-click mouse button → delete cells → delete column.
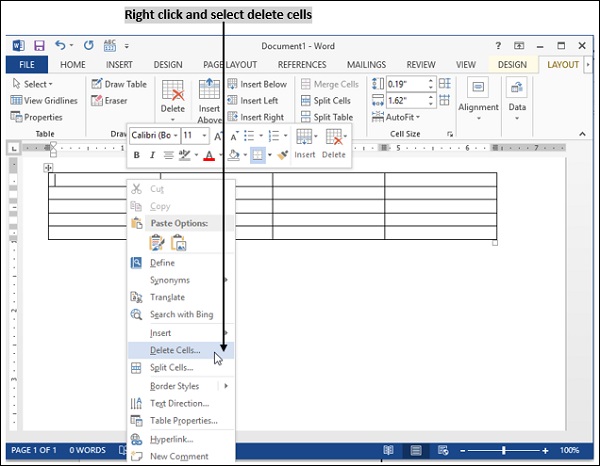
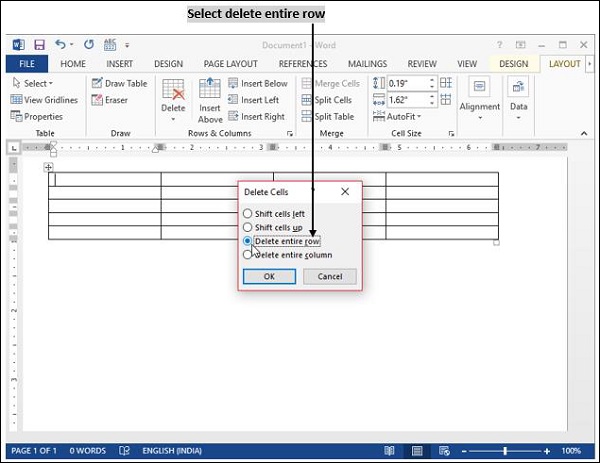
Delete Rows
If you want to delete particular rows in a table, use the following steps −
Select the row which you want to delete.
Right-click Mouse Button → Delete Cells → Delete Row.
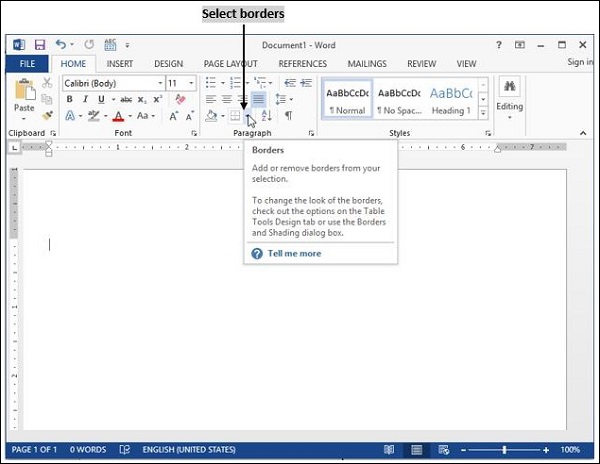
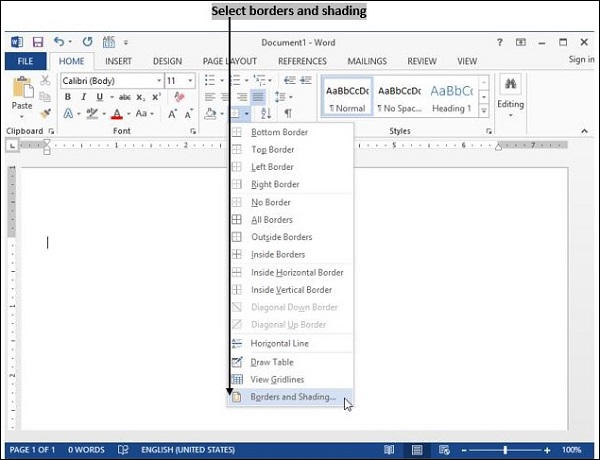
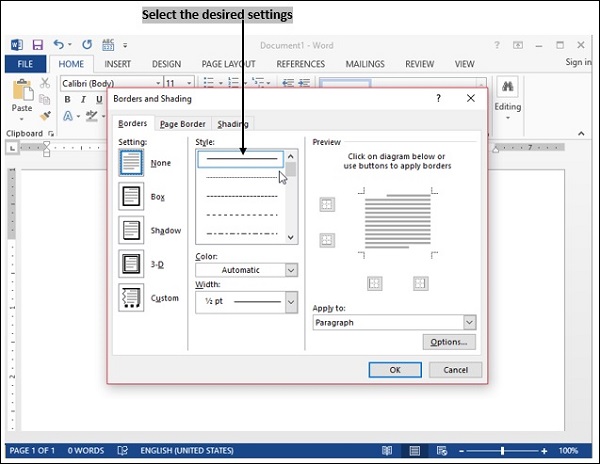
Border and Shading
Borders and shading is used to decorate a text.
Select the text for which you need to apply borders or shading.
Click home menu.
Move to borders and shading icon.
From the open window, select border style, width you want and click ok button.
To Continue Learning Please Login