- Vaadin - Home
- Vaadin – Overview
- Vaadin – Environment Setup
- Vaadin – Creating First Application
- Vaadin – Architecture
- User Interface Components
- Vaadin – Core Elements
- Vaadin – Layout Component
- Vaadin – Themes
Vaadin - Core Elements
Till now you have learnt about different components of Vaadin. In this chapter, you will learn about different core components that Vaadin provides as a part of its library. Vaadin core components are user friendly, easily understandable and compatible with any modern browsers.
Combo BOX
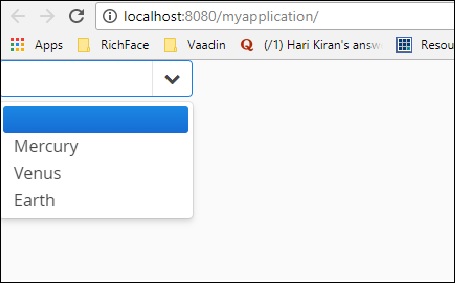
Combo box is a selection component that helps user to select from the drop down menu and it also helps the developer to create the drop down for a particular field. The example shown below explains how to create a combo box. Here we will be populating Planet history using Vaadin combo box.
package com.example.myapplication;

public class Planet {

   private int id;
   private String name;

   public Planet(){}
   public Planet(int i, String name){
      this.id = i;
      this.name = name;
   }
   public int getId() {
      return id;
   }
   public void setId(int id) {
      this.id = id;
   }
   public String getName() {
      return name;
   }
   public void setName(String name) {
      this.name = name; 6. Vaadin  Core Elements
   }
}
Observe the piece of code shown below and update MyUI.java class accordingly.
package com.example.myapplication;

import java.util.ArrayList;
import java.util.Arrays;
import java.util.List;

import javax.servlet.annotation.WebServlet;
import com.vaadin.annotations.Theme;
import com.vaadin.annotations.VaadinServletConfiguration;
import com.vaadin.data.TreeData;
import com.vaadin.server.VaadinRequest;
import com.vaadin.server.VaadinServlet;
import com.vaadin.ui.ComboBox;
import com.vaadin.ui.Component;
import com.vaadin.ui.Label;
import com.vaadin.ui.MenuBar;
import com.vaadin.ui.MenuBar.MenuItem;
import com.vaadin.ui.Tree;
import com.vaadin.ui.UI;
import com.vaadin.ui.VerticalLayout;

@Theme("mytheme")
public class MyUI extends UI {

   @Override
   protected void init(VaadinRequest vaadinRequest) {

      //VerticalLayout layout = new VerticalLayout();
      // List of planets
      List<Planet> planets = new ArrayList();
      planets.add(new Planet(1, "Mercury"));
      planets.add(new Planet(2, "Venus"));
      planets.add(new Planet(3, "Earth"));
      ComboBox<Planet> select =
      new ComboBox<>("Select or Add a Planet");
      select.setItems(planets);

      // Use the name property for item captions
      select.setItemCaptionGenerator(Planet::getName);

      //layout.addComponent(select);
      setContent(select);
   }
   @WebServlet(urlPatterns = "/*", name = "MyUIServlet", asyncSupported = true)
   @VaadinServletConfiguration(ui = MyUI.class, productionMode = false)
   public static class MyUIServlet extends VaadinServlet {}
}
The code given above will yield the following output in the browser.
Context Menu
Context menu is the feature that helps the developer to represent the depended list in the browser. However, this feature has been deprecated in the recent version of Vaadin 8. Note that you can do the same using the Menu bar option. If you want to use the same in your application, you can use the code as shown below. Note that you need to install the polymer using npm directory and use the same in your html code.
<vaadin-context-menu>
   <template>
      <vaadin-list-box>
         <vaadin-item>First menu item</vaadin-item>
         <vaadin-item>Second menu item</vaadin-item>
      </vaadin-list-box>
   </template>

   <p>This paragraph has the context menu provided in the above template.</p>
   <p>Another paragraph with the context menu that can be opened with <b>right click</b> or with <b>long touch.</b></p>
</vaadin-context-menu>
Since this is a Java based tutorial, we would recommend you to use Menu bar option in order to learn Vaadin Context menu.
Date Picker
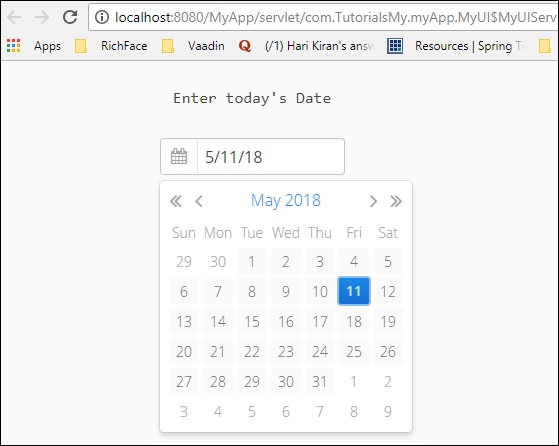
Date picker is another component that Vaadin supports, which helps the developer to create a website in an easy manner. The following code shows how to create a date picker in the Vaadin UI. Note that this has been deprecated in the recent version of Vaadin 8 and hence we need to use Java date object in order to populate the date field. But if you are using Vaadin web project, you can still use it.
package com.TutorialsMy.myApp;
import java.io.File;
import java.io.FileOutputStream;
import java.io.OutputStream;
import java.time.LocalDate;
import java.util.Arrays;
import java.util.List;
import java.util.Locale;

import javax.servlet.annotation.WebServlet;
import com.vaadin.annotations.Theme;
import com.vaadin.annotations.VaadinServletConfiguration;
import com.vaadin.data.TreeData;
import com.vaadin.icons.VaadinIcons;
import com.vaadin.server.UserError;
import com.vaadin.server.VaadinRequest;
import com.vaadin.server.VaadinServlet;
import com.vaadin.shared.ui.ContentMode;

import com.vaadin.ui.AbsoluteLayout;
import com.vaadin.ui.Alignment;
import com.vaadin.ui.Button;
import com.vaadin.ui.CustomLayout;
import com.vaadin.ui.DateField;
import com.vaadin.ui.FormLayout;
import com.vaadin.ui.Grid;
import com.vaadin.ui.HorizontalLayout;
import com.vaadin.ui.HorizontalSplitPanel;
import com.vaadin.ui.Label;

import com.vaadin.ui.Notification;
import com.vaadin.ui.Panel;
import com.vaadin.ui.TabSheet;
import com.vaadin.ui.TextField;
import com.vaadin.ui.Tree;
import com.vaadin.ui.UI;
import com.vaadin.ui.Upload;
import com.vaadin.ui.Upload.Receiver;
import com.vaadin.ui.VerticalLayout;
import com.vaadin.ui.VerticalSplitPanel;
import com.vaadin.ui.Window;

@Theme("mytheme")
public class MyUI extends UI {
   @Override
   protected void init(VaadinRequest vaadinRequest) {
      final VerticalLayout hLayout = new VerticalLayout();
      Label l1 = new Label("Enter today's Date\n",ContentMode.PREFORMATTED);
      DateField date = new DateField();
      date.setValue(LocalDate.now());
      date.setLocale(new Locale("en","IND"));
      hLayout.addComponents(l1,date);
      hLayout.setComponentAlignment(l1,Alignment.BOTTOM_CENTER);
      hLayout.setComponentAlignment(date,Alignment.BOTTOM_CENTER);
      setContent(hLayout);
   }
   @WebServlet(urlPatterns = "/*", name = "MyUIServlet", asyncSupported = true)
   @VaadinServletConfiguration(ui = MyUI.class, productionMode = false)
   public static class MyUIServlet extends VaadinServlet {}
}
When you run the code given above, you can find the following output as shown below −
You can also use Vaadin date picker class from Java directly as shown below which will also yield the same result in the browser.
DatePicker datePicker = new DatePicker();
Note that in order to use DatePicker class, you need to use Vaadin V 3.0 but we are using Vaadin 8.
Data Grid
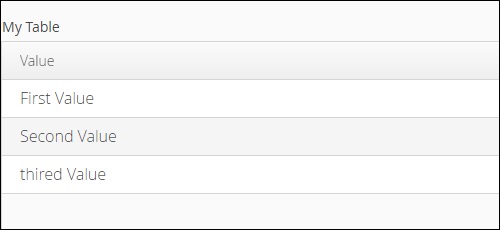
Data grid means passing a list of data. It acts similar to a tree in the browser. The following example shows how a grid works.
Create a class as shown below and name it MyCharArray.java.
package com.TutorialsMy.myApp;

public class MyCharArray {
   private String c;

   public String getC() {
      return c;
   }
   public void setC(String c) {
      this.c = c;
   }

   public MyCharArray(){}
   public MyCharArray(String ch){
      this.c = ch;
   }
}
Next, modify the MyUI.java class as shown below −
package com.TutorialsMy.myApp;

import java.io.File;
import java.io.FileOutputStream;
import java.io.OutputStream;
import java.util.Arrays;
import java.util.List;
import javax.servlet.annotation.WebServlet;
import com.vaadin.annotations.Theme;
import com.vaadin.annotations.VaadinServletConfiguration;
import com.vaadin.data.TreeData;

import com.vaadin.icons.VaadinIcons;
import com.vaadin.server.UserError;
import com.vaadin.server.VaadinRequest;
import com.vaadin.server.VaadinServlet;
import com.vaadin.shared.ui.ContentMode;
import com.vaadin.ui.AbsoluteLayout;
import com.vaadin.ui.Button;
import com.vaadin.ui.CustomLayout;
import com.vaadin.ui.FormLayout;
import com.vaadin.ui.Grid;

import com.vaadin.ui.HorizontalLayout;
import com.vaadin.ui.HorizontalSplitPanel;
import com.vaadin.ui.Label;
import com.vaadin.ui.Notification;
import com.vaadin.ui.Panel;
import com.vaadin.ui.TabSheet;
import com.vaadin.ui.TextField;
import com.vaadin.ui.Tree;
import com.vaadin.ui.UI;
import com.vaadin.ui.Upload;
import com.vaadin.ui.Upload.Receiver;
import com.vaadin.ui.VerticalLayout;
import com.vaadin.ui.VerticalSplitPanel;
import com.vaadin.ui.Window;

@Theme("mytheme")
public class MyUI extends UI {

   @Override
   protected void init(VaadinRequest vaadinRequest) {
      VerticalLayout layout = new VerticalLayout();

      List<MyCharArray> values = Arrays.asList(
      new MyCharArray("First Value"),
      new MyCharArray("Second Value"),
      new MyCharArray("thired Value"));

      final Grid<MyCharArray> grid = new Grid<>("My Table");
      grid.setItems(values);
      grid.addColumn(MyCharArray::getC).setCaption("Value");
      layout.addComponent(grid);
      setContent(layout);
   }
   @WebServlet(urlPatterns = "/*", name = "MyUIServlet", asyncSupported = true)
   @VaadinServletConfiguration(ui = MyUI.class, productionMode = false)
   public static class MyUIServlet extends VaadinServlet {}
}
Now, run the above piece of code and you can see the following output in the browser.
Split Layout
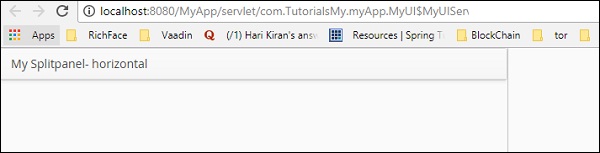
Vaadin provides many tools to design a web page according to the choice of the developer. Using split layout, we can customize the entire screen according to our choice. The following example shows you different options to split a layout using Vaadin core component.
Modify the MyUI.java as shown below −
package com.TutorialsMy.myApp;
import java.io.File;
import java.io.FileOutputStream;
import java.io.OutputStream;
import java.util.Arrays;
import java.util.List;

import javax.servlet.annotation.WebServlet;
import com.vaadin.annotations.Theme;
import com.vaadin.annotations.VaadinServletConfiguration;
import com.vaadin.icons.VaadinIcons;
import com.vaadin.server.UserError;
import com.vaadin.server.VaadinRequest;
import com.vaadin.server.VaadinServlet;
import com.vaadin.shared.ui.ContentMode;

import com.vaadin.ui.AbsoluteLayout;
import com.vaadin.ui.Button;
import com.vaadin.ui.CustomLayout;
import com.vaadin.ui.FormLayout;
import com.vaadin.ui.Grid;
import com.vaadin.ui.HorizontalLayout;
import com.vaadin.ui.HorizontalSplitPanel;
import com.vaadin.ui.Label;
import com.vaadin.ui.Notification;
import com.vaadin.ui.Panel;

import com.vaadin.ui.TabSheet;
import com.vaadin.ui.TextField;
import com.vaadin.ui.Tree;
import com.vaadin.ui.UI;
import com.vaadin.ui.Upload;
import com.vaadin.ui.Upload.Receiver;
import com.vaadin.ui.VerticalLayout;
import com.vaadin.ui.VerticalSplitPanel;
import com.vaadin.ui.Window;

@Theme("mytheme")
public class MyUI extends UI {
   @Override
   protected void init(VaadinRequest vaadinRequest) {

      // A 400x250 pixels size layout
      Panel panel = new Panel("Split Panel example");
      Panel ex = new Panel("My Splitpanel- horizontal ");

      // Have a horizontal split panel as its content
      HorizontalSplitPanel hsplit = new HorizontalSplitPanel();
      hsplit.addComponent(ex);
      panel.setContent(hsplit);
      setContent(hsplit);

      /* Panel ex1 = new Panel("My Splitpanel- vertical ");
      // Have a horizontal split panel as its content
      VerticalSplitPanel vsplit = new VerticalSplitPanel();
      hsplit.addComponent(ex1);
      panel.setContent(vsplit);
      setContent(vsplit);*/
   }
   @WebServlet(urlPatterns = "/*", name = "MyUIServlet", asyncSupported = true)
   @VaadinServletConfiguration(ui = MyUI.class, productionMode = false)
   public static class MyUIServlet extends VaadinServlet {}
}
In the same way you can split your window in vertical way. When you run the above piece of code, it will yield the following output in the browser.
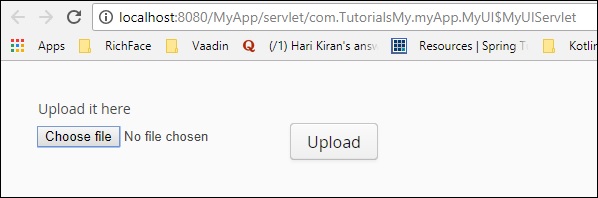
Upload
The upload content will help the user to upload the files to server. It has two different modes, immediate mode and non-immediate mode, controlled with Vaadin core framework. In the immediate mode, the upload displays a file name entry box and button for selecting the file. In non-immediate mode, user needs to trigger the upload using upload button.
The following example shows these two modes of upload −
ICON
Vaadin has in built icons that can be used as a general purpose. These icons have many advantages over the images. They reduce the code size and makes compilation faster. The following example shows how to use this in Vaadin.
Update your MyUI.java class as shown below.
package com.TutorialsMy.myApp;

import java.io.File;
import java.io.FileOutputStream;
import java.io.OutputStream;
import java.util.Arrays;
import java.util.List;

import javax.servlet.annotation.WebServlet;
import com.vaadin.annotations.Theme;
import com.vaadin.annotations.VaadinServletConfiguration;
import com.vaadin.icons.VaadinIcons;
import com.vaadin.server.UserError;
import com.vaadin.server.VaadinRequest;
import com.vaadin.server.VaadinServlet;
import com.vaadin.shared.ui.ContentMode;

import com.vaadin.ui.AbsoluteLayout;
import com.vaadin.ui.Button;
import com.vaadin.ui.CustomLayout;
import com.vaadin.ui.FormLayout;
import com.vaadin.ui.Grid;
import com.vaadin.ui.HorizontalLayout;
import com.vaadin.ui.Label;
import com.vaadin.ui.Notification;
import com.vaadin.ui.Panel;
import com.vaadin.ui.TabSheet;
import com.vaadin.ui.TextField;
import com.vaadin.ui.UI;
import com.vaadin.ui.Upload;
import com.vaadin.ui.Upload.Receiver;
import com.vaadin.ui.VerticalLayout;
import com.vaadin.ui.Window;

@Theme("mytheme")
public class MyUI extends UI {

   @Override
   protected void init(VaadinRequest vaadinRequest) {

      // A 400x250 pixels size layout
      VerticalLayout content = new VerticalLayout();
      Panel p = new Panel("Example of Vaadin Upload-");
      TextField name = new TextField("Name");
      name.setIcon(VaadinIcons.USER);
      content.addComponent(name);

      // Button allows specifying icon resource in constructor
      Button ok = new Button("OK", VaadinIcons.CHECK);
      content.addComponent(ok);
      setContent(content);
   }
   @WebServlet(urlPatterns = "/*", name = "MyUIServlet", asyncSupported = true)
   @VaadinServletConfiguration(ui = MyUI.class, productionMode = false)
   public static class MyUIServlet extends VaadinServlet {}
}
This piece of code will run in the browser and it will yield below output in the browser −
