- Apache Tika - Home
- Apache Tika - Overview
- Apache Tika - Architecture
- Apache Tika - Environment
- Apache Tika - Referenced API
- Apache Tika - File Formats
- Apache Tika - Document Type Detection
- Apache Tika - Content Extraction
- Apache Tika - Metadata Extraction
- Apache Tika - Language Detection
- Apache Tika - GUI
Apache Tika Examples
- Apache Tika - Extracting PDF
- Apache Tika - Extracting ODF
- Apache Tika - Extracting MS-Office Files
- Apache Tika - Extracting Text Document
- Apache Tika - Extracting HTML Document
- Apache Tika - Extracting XML Document
- Apache Tika - Extracting .class File
- Apache Tika - Extracting JAR File
- Apache Tika - Extracting Image File
- Apache Tika - Extracting mp4 Files
- Apache Tika - Extracting mp3 Files
Apache Tika Resources
Apache Tika - Environment Setup
This chapter takes you through the process of setting up Apache Tika on Windows and Linux. User administration is needed while installing the Apache Tika.
Setup Java Development Kit (JDK)
You can download the latest version of SDK from Oracle's Java site − Java SE Downloads. You will find instructions for installing JDK in downloaded files, follow the given instructions to install and configure the setup. Finally set PATH and JAVA_HOME environment variables to refer to the directory that contains java and javac, typically java_install_dir/bin and java_install_dir respectively.
If you are running Windows and have installed the JDK in C:\jdk-24, you would have to put the following line in your C:\autoexec.bat file.
set PATH=C:\jdk-24;%PATH%
set JAVA_HOME=C:\jdk-24
Alternatively, on Windows NT/2000/XP, you will have to right-click on My Computer, select Properties → Advanced → Environment Variables. Then, you will have to update the PATH value and click the OK button.
On Unix (Solaris, Linux, etc.), if the SDK is installed in /usr/local/jdk-24 and you use the C shell, you will have to put the following into your .cshrc file.
setenv PATH /usr/local/jdk-24/bin:$PATH
setenv JAVA_HOME /usr/local/jdk-24
Alternatively, if you use an Integrated Development Environment (IDE) like Borland JBuilder, Eclipse, IntelliJ IDEA, or Sun ONE Studio, you will have to compile and run a simple program to confirm that the IDE knows where you have installed Java. Otherwise, you will have to carry out a proper setup as given in the document of the IDE.
Popular Java Editors
To write your Java programs, you need a text editor. There are many sophisticated IDEs available in the market. But for now, you can consider one of the following −
Notepad − On Windows machine, you can use any simple text editor like Notepad (Recommended for this tutorial), TextPad.
Netbeans − It is a Java IDE that is open-source and free, which can be downloaded from www.netbeans.org/index.html.
Eclipse − It is also a Java IDE developed by the eclipse open-source community and can be downloaded from www.eclipse.org.
Install Eclipse
In this chapter, we will explain how to set Spring environment in Eclipse IDE. Before proceeding with the installation, make sure that you already have Eclipse installed in your system. If not, download and install Eclipse.
For more information on Eclipse, please refer our Eclipse Tutorial
Set Maven
In this tutorial, we are using maven to run and build the spring based examples. Follow the Maven - Environment Setup to install maven.
Setting up Apache Tika Environment
Programmers can integrate Apache Tika in their environment by using
- Command line,
- Tika API,
- Command line interface (CLI) of Tika,
- Graphical User interface (GUI) of Tika, or
- the source code.
For any of these approaches, first of all, you have to download the source code of Tika.
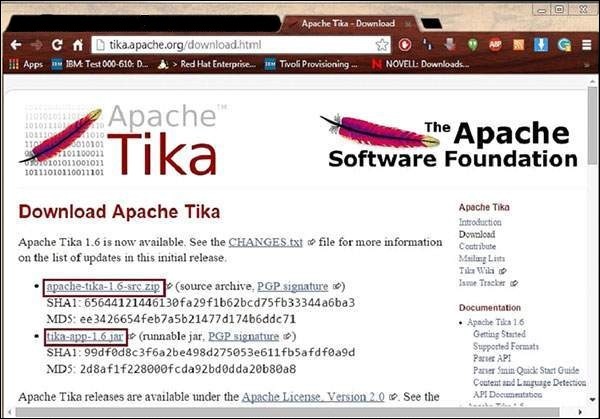
You will find the source code of Tika at https://tika.apache.org/download.html, where you will find two links −
tika-3.2.3-src.zip − It contains the source code of Tika, and
tika-app-3.2.3.jar − It is a jar file that contains the Tika application.
Download these two files. A snapshot of the official website of Tika is shown below.
After downloading the files, set the classpath for the jar file tika-app-3.2.3.jar. Add the complete path of the jar file as shown in the table below.
| OS | Output |
|---|---|
| Windows | Append the String C:\jars\tika-app-3.2.3.jar to the user environment variable CLASSPATH |
| Linux |
Export CLASSPATH = $CLASSPATH − /usr/share/jars/tika-app-3.2.3.jar.tar − |
Apache provides Tika application, a Graphical User Interface (GUI) application using Eclipse.
Tika-Maven Build
Open eclipse and create a new project.
-
If you do not having Maven in your Eclipse, set it up by following the given steps.
Open the linkhttps://tika.apache.org/3.2.3/gettingstarted.html. There you will find the maven support.
Configure the POM.XML File
Get the Tika maven dependency from https://mvnrepository.com/artifact/org.apache.tika
Shown below is the complete Maven dependency of Apache Tika.
<dependency>
   <groupId>org.apache.Tika</groupId>
   <artifactId>tika-core</artifactId>
   <version>3.2.3</version>
</dependency>
<dependency>
   <groupId>org.apache.Tika</groupId>
   <artifactId> tika-parsers-standard-package</artifactId>
   <version>3.2.3</version>
</dependency>
<dependency>
   <groupId>org.apache.tika</groupId>
   <artifactId>tika-langdetect-optimaize</artifactId>
   <version>3.2.3</version>
   <type>pom</type>
</dependency>
