- SAP Smart Forms - Home
- SAP Smart Forms - Overview
- SAP Smart Forms - Architecture
- SAP Smart Forms - Structure
- SAP Smart Forms - Form Logic
- SAP Smart Forms - Navigation
- SAP Smart Forms - Form Builder
- SAP Smart Forms - Style Builder
- SAP Smart Forms - Output Types
- Advance Development Concepts
- SAP Smart Forms - Form Graphics
- Applications & Migration
SAP Smart Forms - Structure
A smart form consists of multiple pages. There are different graphics such as the header and company logo, while output areas and text to be displayed is in the output. You can use the dynamic table structure to show the data or texts in the column, cell format, etc.
A common smart form example is a customer invoice for flight booking. The price details with the flight booking is shown in the table in the main window and other windows contain different elements like the company name logo, address of the customer and other company or customer specific details.
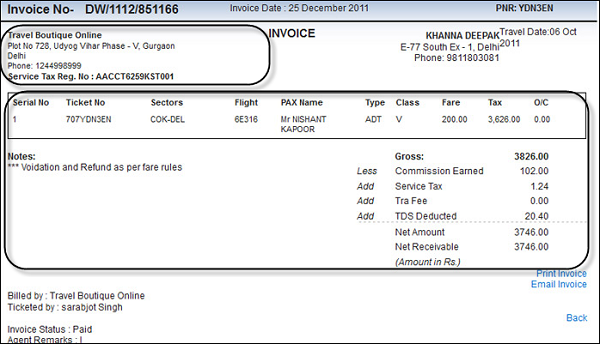
The first page of the flight booking invoice contains booking company details, customer letter if any and a table containing number of booking items. The table type is dynamic and its length depends on the number of booking items in the table. The table header includes column headings −
- Serial number
- Ticket number
- Sectors
- Flight name or number
- PAX (passenger/s) name, etc.
While the table footer contains the amount in Rupees, Net amount, etc.
When the table continues to the second page due to more number of items, the table header and footer repeats on the next page as well. The page layout of this smart form defines the page structure as A4, while A5 is the position of windows with data to be displayed on each page.
SAP Smart Forms Screen Navigation
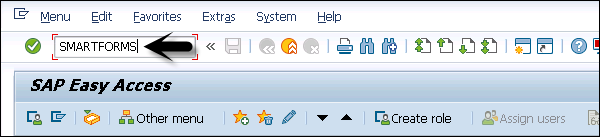
To design a new smart form or to change or display an existing smart form, you should use the Transaction: SMARTFORMS.
Enter the Transaction as shown in the screenshot below −
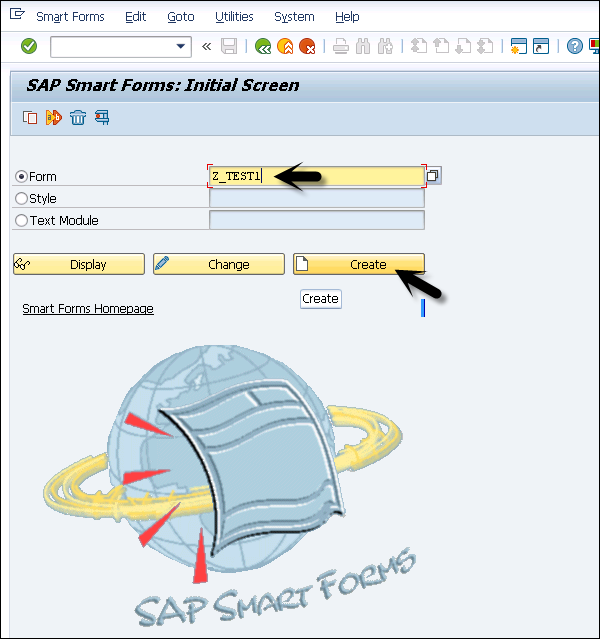
On the home screen, you can see three different tabs −
- Change
- Display
- Create
Enter the Form name and click on the Create button as shown in the following screenshot −
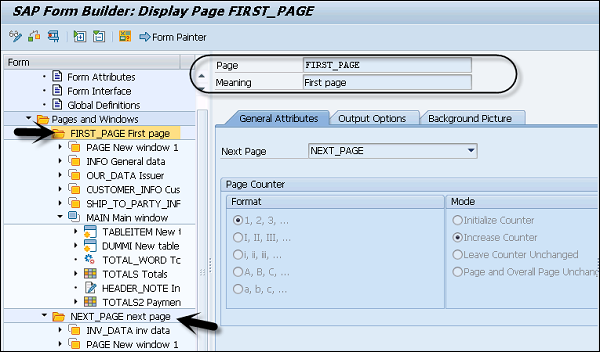
When you click on the Create button, this will open the SAP Form Builder screen which is divided into three parts
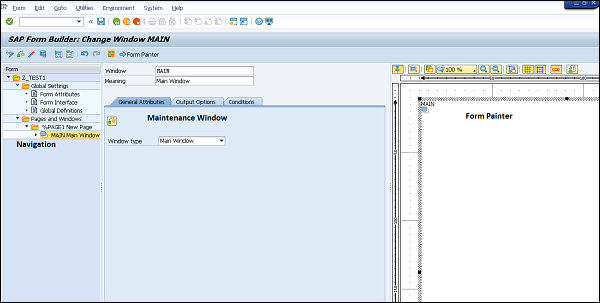
On the left side, you have a Navigation Window. This window contains all the elements such as text and graphics, which are part of a SAP Smart Form. You can see the hierarchy of nodes and sub-nodes under the Navigation pane.
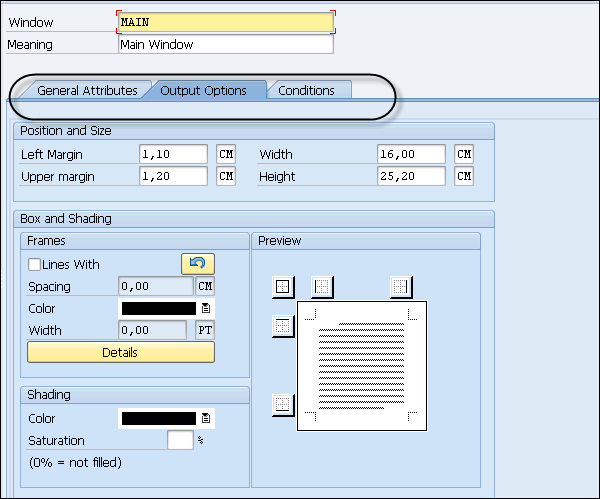
In the middle, you have a Maintenance Window. This window is used to set the attribute value of each element in a smart form. You can define Output Options such as −
- Position and Size (Left Margin, Upper Margin, Width, and Height)
- Box and Shading
- Frames
- Shading, etc.
The Preview and Conditions tab includes Field Name and Comparison Value.
On the right side, you have the Form Painter. A Form Painter defines the layout of the page in a SAP smart form. When you create a smart form in a SAP system, a functional module is generated. Under the Navigation pane, you have to two folders by default in each form, these are −
- Global Settings
- Pages and Window
Let us now discuss both these folders in detail.
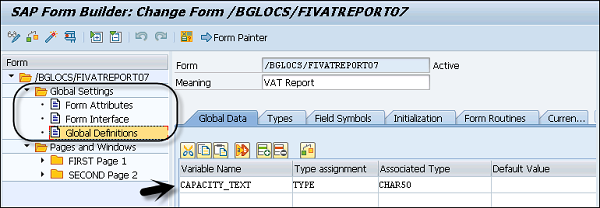
Global Setting
It contains the global settings of the smart form, such as −
- Form Attributes
- Form Interface and
- Global Definitions
In the Form Interface, you can see all the data passed to the smart form from the print program. While, the Global Definition contains the data that can be used throughout the smart form.
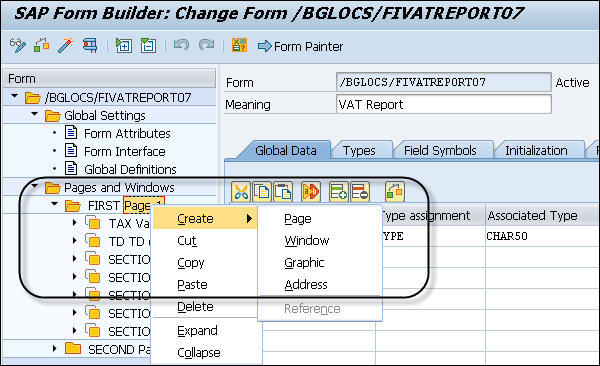
Pages and Window
Using Pages and Window, you can create new objects, such as −
- Page
- Window
- Graphic
- Address
The printing of a smart form takes place as per the next page field. While, the processing of a smart form depends on the sequence defined under the Navigation pane.
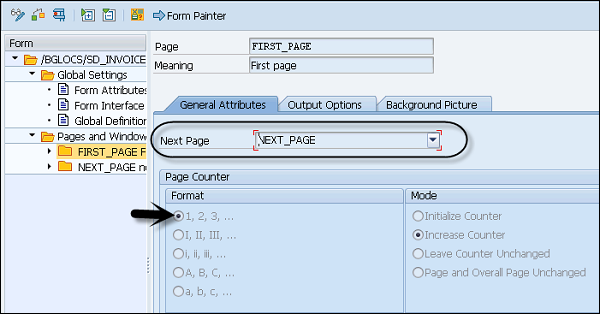
SAP Smart Forms Pages of Form
In any SAP Smart Form, you can define different page layouts for each page. A Page Layout defines the page format, some of its options are −
- Landscape
- Portrait
- A4 Size
- A5 Size, etc.
You can have a different structure for each page in a smart form. As an example, the first page can contain address, about company, logo, terms of business or any other information that should come on the first page.
In a smart form, you need to define the next page for each page and a clear page sequence. You can also call the same page multiple times to make the output recursive. The page break is defined in the form logic using manual coding or you can also define it via the main window and the sub window.
Each page contains two types of output areas, which are Main window and Sub window. These windows can be placed anywhere on the page and you can even overlap them. A single window can be used on multiple pages.
SAP Smart Forms Main Window and Sub Window
In this section, we will understand in detail about the Main and Sub Windows.
Main Window
In a SAP smart form, the main window is used to hold text and data. As this is the main window, it is filled with text and data system. It displays the text in the main window of the next page, while the page break is automatically triggered.
Note − Check the following key points to remember about main window and sub-window.
The main window of each page should have same width, but it can differ in height.
When you dont have a main window that defines a page. That page will call itself and it will result in an endless loop.
Sub-Window
In a SAP smart form, the sub-windows are used to display the text and the data on the predefined areas of the output. The text and data that doesnt fit in the sub-window is truncated and not displayed in the form output.
When a sub-window is placed on each page with the same name, the content of that sub window is displayed on each page.

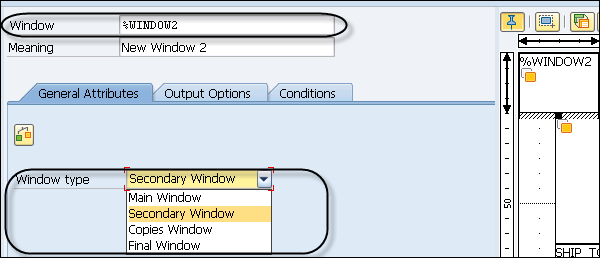
To create a window in Main window or in a page, right click on the Page or the Main window and select the window type.
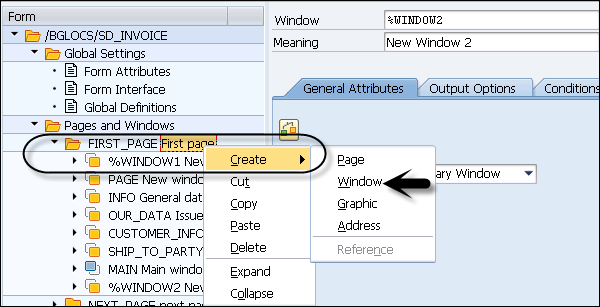
Enter the Window Name, Meaning and Window Type. The name entered for this window is shown in the navigation pane. You can drag the window and put it anywhere on the main window.
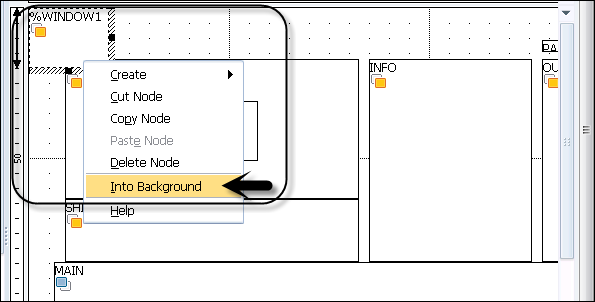
When the windows are overlapping, you can also send one window to the background, copy or delete a node by right clicking on it.
SAP Smart Forms Text and Data
You can enter the text and the data in a smart form and place them as per the requirement. The data entered in this smart form is in a string format and can be pulled from the database. You can also enter the text and the data in a table format to display it as a table.
You can use Form Painter to position Windows, Graphics, etc. on a page in a smart form.
The PC Editor is used to write the text.
The Table Painter in a smart form window is used to format your tables.
Entering Text in a Smart Form using the PC Editor
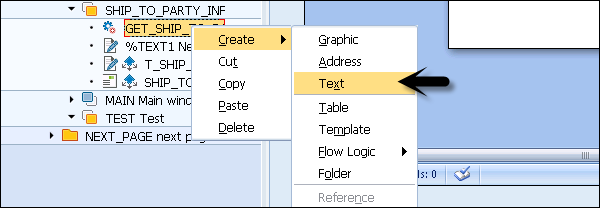
To enter text using PC Editor, you should create the text node in the navigation tree. It is also possible to include data from the system into the text using system fields and parameters in the form. While processing the smart form, the system replaces the data with values from system fields.
To create a text node in the Navigation pane, right click → Create → Text as shown in the following screenshot.
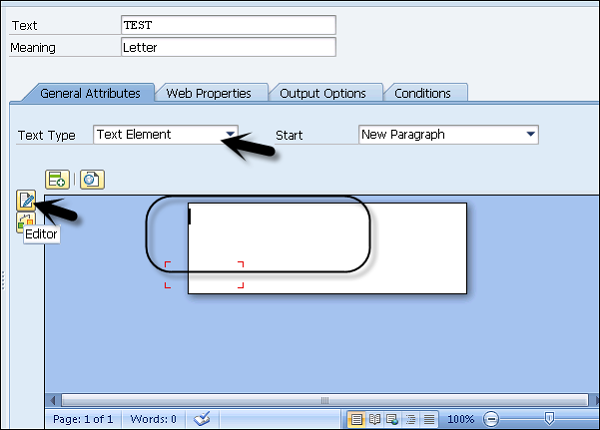
Enter the node name and the description as shown in the following screenshot −
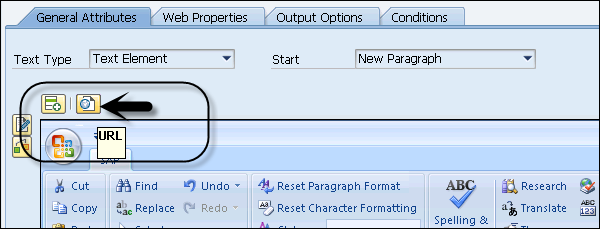
Go to General Attribute and select Text type as the Text Element. You can enter the text in PC Editor directly or you can also open the Text Editor in full screen mode.
When you click on the Green Arrow Mark (F3 button), the text from the Text Editor is transferred to the Inline PC Editor.
To highlight the text as a URL, mark this text and click Insert URL at the top.