- SAP Smart Forms - Home
- SAP Smart Forms - Overview
- SAP Smart Forms - Architecture
- SAP Smart Forms - Structure
- SAP Smart Forms - Form Logic
- SAP Smart Forms - Navigation
- SAP Smart Forms - Form Builder
- SAP Smart Forms - Style Builder
- SAP Smart Forms - Output Types
- Advance Development Concepts
- SAP Smart Forms - Form Graphics
- Applications & Migration
SAP Smart Forms - Form Builder
In this chapter, we will discuss in detail about Navigation in Form Builder, Functions of Form Builder, Usage of Table Painter and the Output Options of SAP Smart Forms.
SAP Smart Forms Navigation in Form Builder
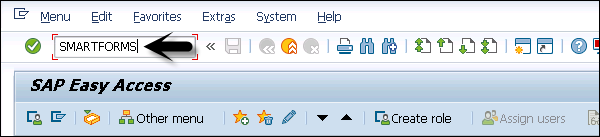
To design a new smart form or to change or display an existing smart form, you must use Transaction: SMARTFORMS.
Enter the Transaction as shown in the following screenshot −
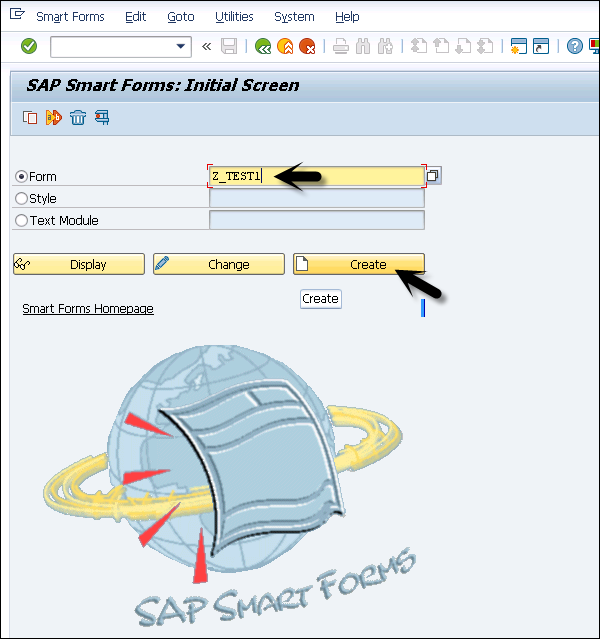
On the home screen, you can see three different tabs −
- Change
- Display
- Create
Enter the Form name and click on the Create button −
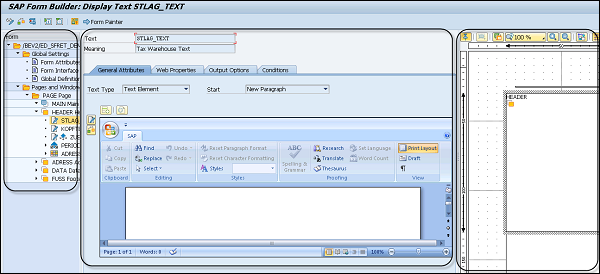
When you click on the Create button, this will open a SAP Form Builder screen. The Graphical interface screen of Form Builder is used for form designing.
It consists of three work areas −
- Navigation Tree (Left Side)
- Maintenance Screen (Middle Pane)
- Form Painter (Right Side)
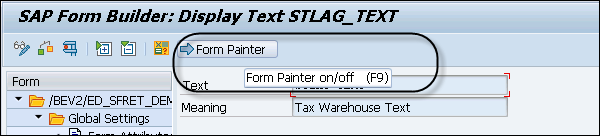
It is also possible to hide/unhide form painter from the top menu. At the top menu, you have the option to On/Off Form Painter as shown in the following screenshot.
In the Maintenance tab, you have other tools integrated with the Form Builder.
PC Editor − To manage text nodes.
Table Painter − To manage table and template nodes.
SAP Smart Forms Functions in Form Builder
There are different set of functions that are provided in the Form Builder.
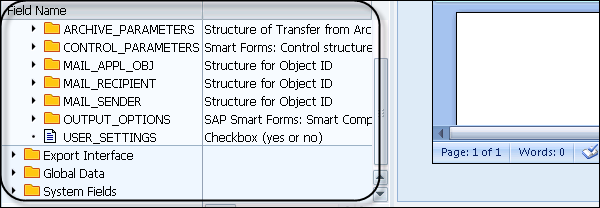
Field List
This function lists all the fields of the smart form.

When you click on the Field List (ctrl+shift+F4), it opens the Field List folder on the main screen. The following values are displayed under the Field List −
- Import Interface
- Export Interface
- Global Data
- System Fields
Undo/Redo
You can also undo changes to a form step by step. In a smart form, the Form Builder stores any changes you made to the form since last saving it, independent of whether the changes occurred in the following places
- The Navigation Tree
- The Table Painter
- The Form Painter
- The PC Editor
- The input fields of the maintenance screen.
You can undo these changes step by step. Once they are undone, you can also redo the changes.
Go to Utilities → Settings → Undo/Redo Form Changes. Under the General tab, you have the option.
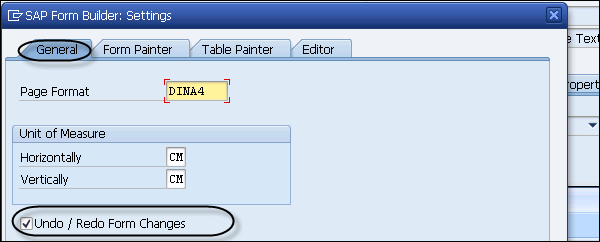
By default, these options are marked when you navigate to the General tab.
Downloading/Uploading Form
It is also possible to store a form or subtree locally. It saves as an XML file and you can upload this XML file into the same form or even in a different form.
When you upload the subtree, you need to make sure that the styles and fields of this downloaded subtree should exist in the target system.
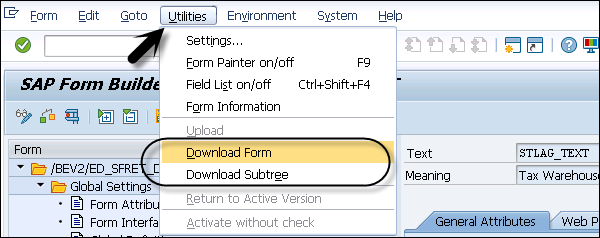
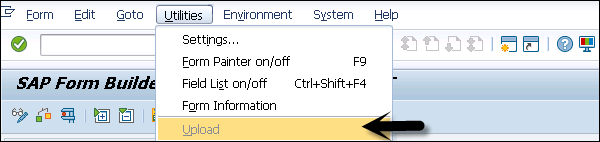
To download a Smart Form, go to Utilities → Download Form.
To download a subtree, go to navigation pane and double click on inferior node of a pages and Windows node as root node of the form. Go to Utilities → Download Subtree.
To upload the form, go to Utilities → Upload.
While uploading, it knows if there is a form/subtree to be uploaded. In case of a form, it overwrites the current form in the Form Builder. When the file contains a subtree, smart form copies this subtree to the clipboard and to paste this subtree, you can navigate to the tree structure and use the context menu to insert the subtree.
Note − Before inserting, you should ensure that all the target and styles exist for the subtree. If not, you should create them.
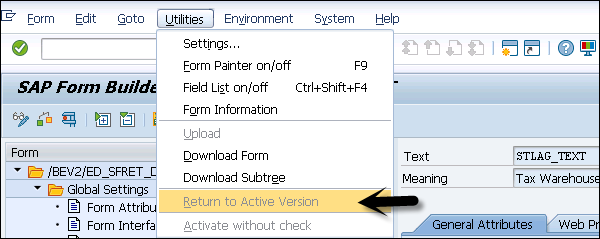
Active Version
You can also directly return to the last active version of the form. However, all the changes are lost for that form. To restore the active version, go to Utilities → Back to Active Version.
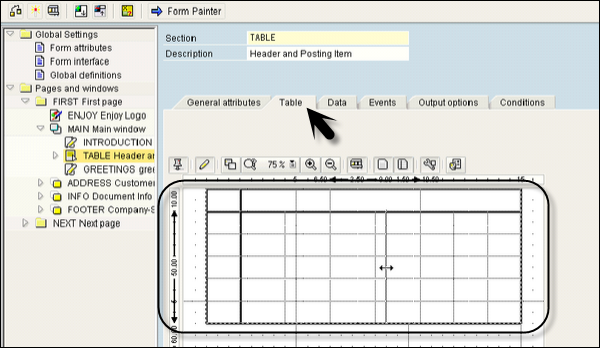
SAP Smart Forms Using Table Painter
The Table Painter in a smart form is used to design the template and tables in a window. The layout for template and tables are done using Line types. You can On/Off Table Painter by going to the Table tab under the Maintenance window in the SMARTFORMS GUI screen.
The Table Painter provides different functions in smart forms −
- You can draw lines and columns.
- You can cut, copy, delete or insert lines.
- You can delete cells.
- You can also change the cell size.
- You can also split cells.
- Different table patterns can be used.
Note − You should check the size in scale as design area doesnt scale as per the window size.
The following Node types can be used to present the data in a table format −
Template Node − You can use Templates which are static in nature as columns and lines are predetermined.
Tables − Tables in smart forms are dynamic in nature as size of the table in form depends on the amount of data selected at run time.

You can see the Table Painter in the lower part of the screen. Whereas, at the top you have the Table Painter functions that can be used to provide the line types.
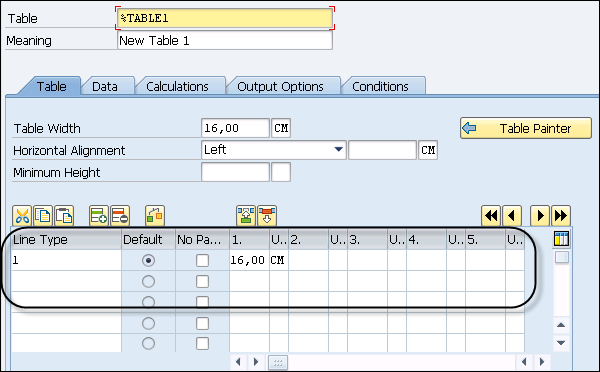
Defining Table Layout
To define a table layout, you need to create a template or table under the Navigation tree structure. This Table Layout determines −
- Height and Width of each cell.
- Number of lines and cells.
- Width of each cell.
While defining a table layout, you can use columns From and To to specify the lines of your template for which the definition applies.
The value of Height is applied to all the cells of a line and you can specify the width for each cell you want to display. The sum of the width values must amount to the specified Width of the template.
It is also possible to reuse the name of the template line by entering the value in the reference column of the line.
The following are the sample lines in table control.
| Name | Value From | Value To | Height | 1. | 2. |
|---|---|---|---|---|---|
| Line 1 | 1 | 1 | 1 | 1 | 1 |
| Line 2 | 2 | 2 | 2 | 2 | 2 |
| Line 3 | 3 | 3 | 1 | 1 | 2 |
Defining Line Types in a Table Painter
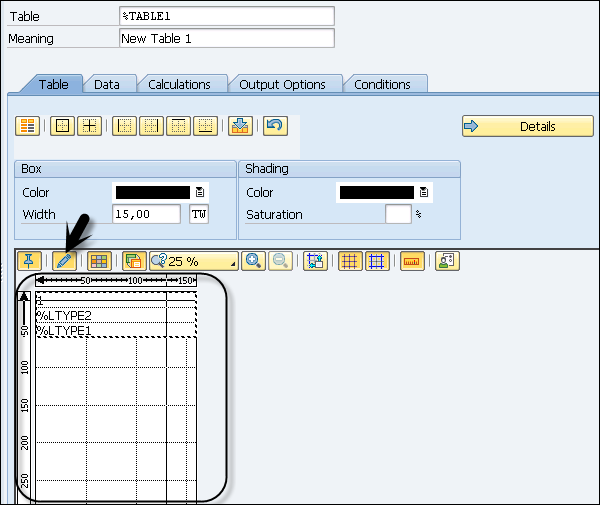
Line type in your template or table specify the number and size of cells of a line. You can enter the line types graphically by entering values in Details settings as shown in the following screenshot.

Using table painter to define line types, go to template or table. In the Table Painter, there exists a line whose width corresponds to the window width. The width in the design area of the Table Painter is the same as the window width.
To draw the lines, select draw lines and column pen and draw the Line types as shown below.
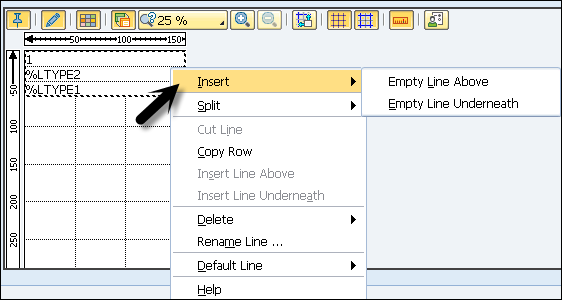
You can also insert blank lines using the context menu. Bring the mouse pointer on the line where you want to insert a blank line and right click to open the context menu.
You can select Insert → New Blank Line below or Insert → New Blank Line above. This will insert a new line with the same height as the clicked line in the table.
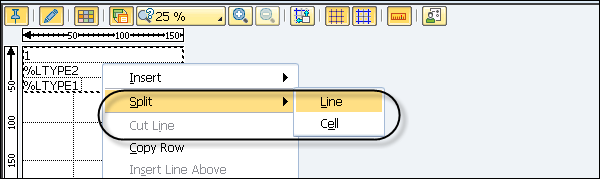
You can also split an existing line type. Put the pencil at a position that you want to horizontally split and pull the line towards right. The table painter will split the line automatically. You can also split the line using the Context menu.
You can also use Copy or cut line to move or copy existing lines as show in context menu.
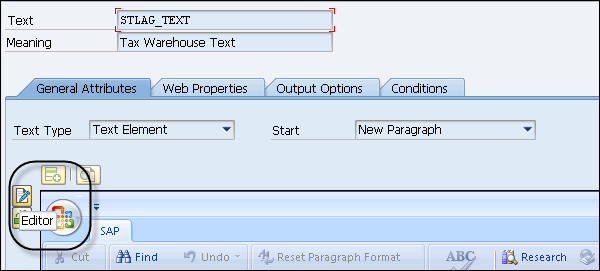
SAP Smart Forms Output Options
You can use different output options under Form Builder. These attributes are available under the Output options tab of form attributes in a smart form.
Component type: SSFCOMPOP.

You can control the form output using the Form Attribute to define the default setting for the output format and medium. These settings can be overruled by using standard parameters when smart forms are called and are known as Dynamic Setting Options.
Note − Default option for the output format in the form is a Standard Output (OTF) and this output format as well as the medium is known as Static settings.
The following image shows the overriding setting for output options −

When you use the overriding option in the Output format, a smart form ignores all the static settings in the form.
